
Overview
After submitting your request form a shipping API key, you must set up the shipping system. The setup screen can be found either by clicking the Ship My Orders button on the Main Menu (will launch the Shipping Setup screen only if the API key has not yet been entered) or by going from the Main Menu to Settings – Shipping Functions – Shipping Setup.
Company Information
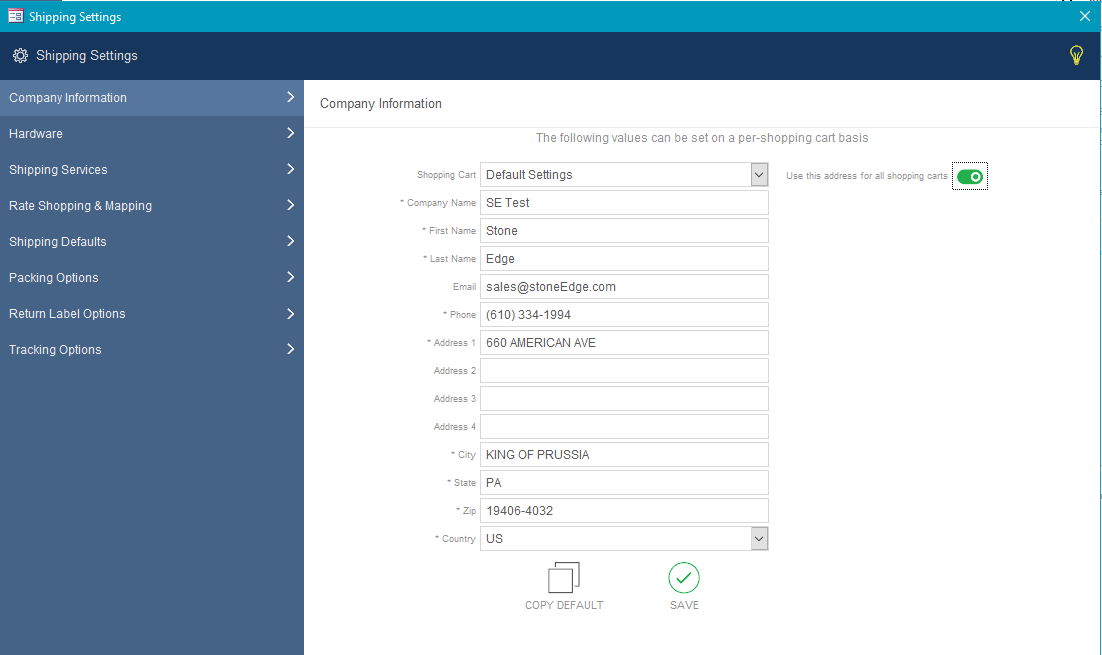
The initial screen will allow you to enter your API key if it has not yet been entered. You will then be presented with several setup options. The first is your Company Information. Company information can be entered on a cart-by-cart basis, or, if there is only one shopping cart configured, or if all carts share the same shipping information, you can simply enter default company information, then switch on the “Use this address for all shopping carts” option so that information can be shared by all carts.
- Shopping Cart
- Default Settings -> dropdown list of all shopping carts
- Use this address for all shopping carts -> toggle on if using the same address for all shopping carts (will grey out fields in other shopping carts)
![]()
- Return Address – address placed on the shipping label
- Company Name – required
- First Name – required
- Last Name – required
- Phone – required
- Address 1 – required
- Address 2
- Address 3
- Address 4
- City – required
- State – required
- Zip – required
- Country – required
- Copy Default – Click while on a different shopping cart to set the address to the same as the default.

Hardware
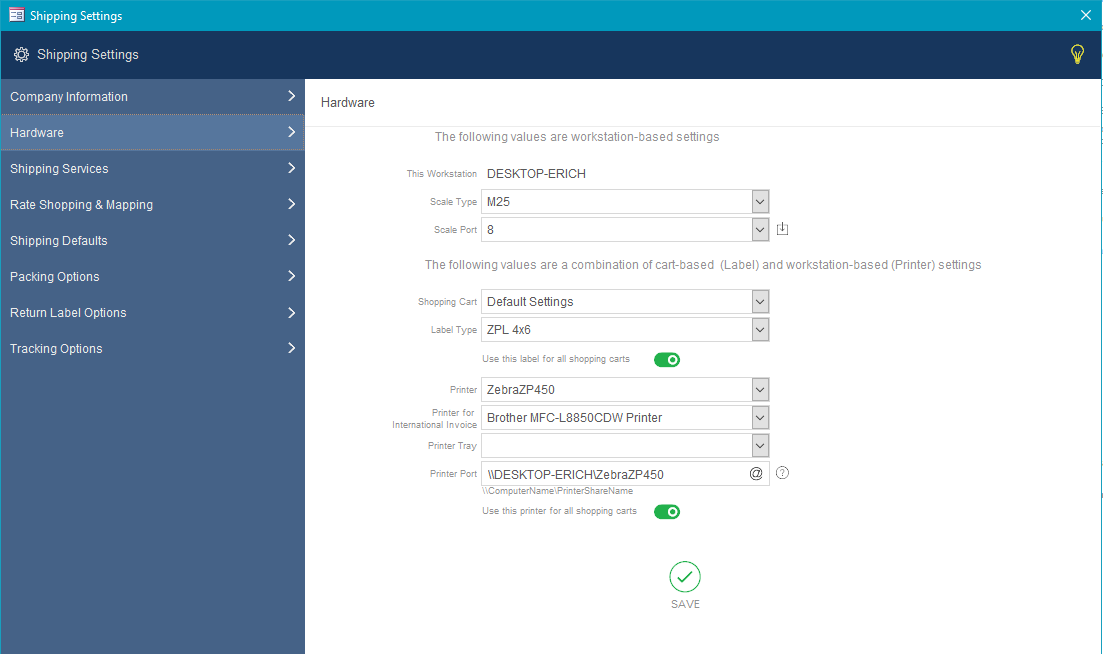
Hardware options are available to configure a scale (configured for the current workstation only) and printers (configurable for each shopping cart).
Link to How to Step-by-Step for Setup Shipping Hardware
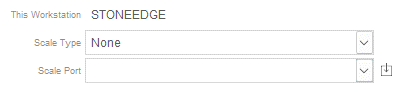
- Scale Type – dropdown list of standard compatible scales
- Scale Port
Scale setup must be performed on the PC to which the scale is directly connected. Scale Type and Scale Port must be set. Additional configuration instructions can be found here. Use the test button next to the Scale Port field to test the scale setup.
Printers
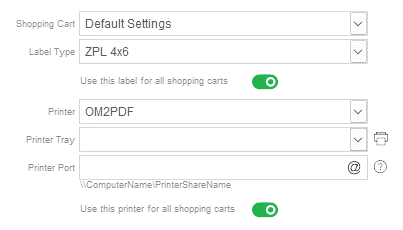
- Shopping Cart – dropdown for cart-specific settings
- Label Type – dropdown list of printable labels (some are not compatible per shipping service)
- ZPL 4×6
- PDF 8×11
- Integrated Packing Slip
- Use this label for all shopping carts – toggle on if true while on “Default Settings”
- Printer – dropdown of list of printers in system
- Printer Tray – dropdown to different paper trays if applicable
Printer Port -> path to printer location (printer should be shared and have no spaces in the shared name.
Shipping Services
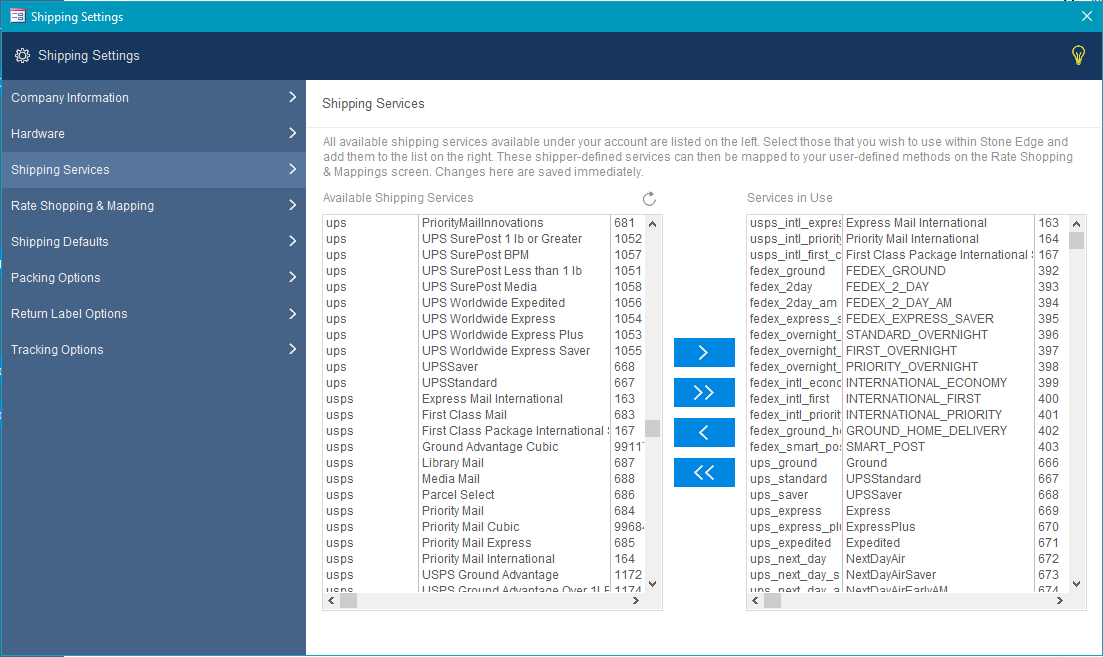
In the image above, the list on the left contains all available shipping methods for your shipping account. These methods are loaded during the upgrade to the 7.700 (and newer) release of Stone Edge. If you already use the 7.7xx version of Stone Edge, your services are already loaded. You can reload/refresh this list by clicking the Refresh button just above the list of Available Shipping Methods. For a detailed how to set up services and rate mapping, see Setting up Shipping Services and Rate Mapping – Stone Edge Order Manager.
- Available Shipping Services – Lists all services available with eHub
NOTE: List may include services not authorized to use -
- > – move the current selection to right (add service)
- >> – move all options to the right (add all available services)
- < – move the current selection to left (remove service)
- << – move all options to the left (clear selected services)
- Services in Use – List services chosen
Rate Shopping & Mapping
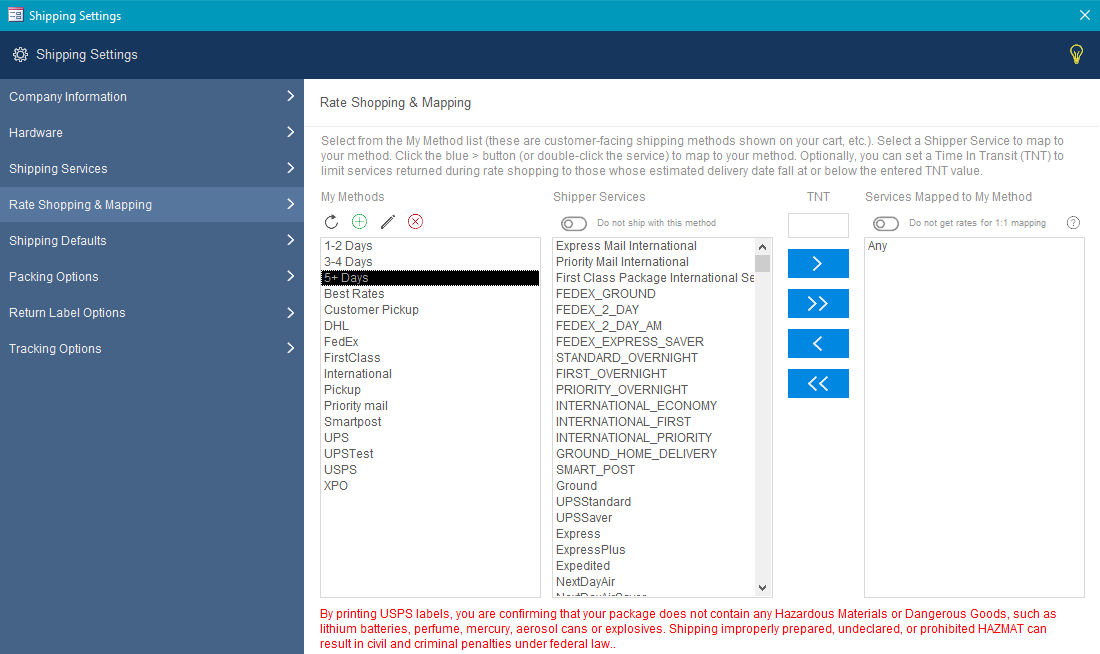
Rate Shopping & Mapping configuration allows you to map your previous setup published shipping methods to those chosen on the previous screen. For a detailed how to set up services and rate mapping, see Setting up Shipping Services and Rate Mapping – Stone Edge Order Manager.
- My Methods -> list of current methods in numeric-alpha order
- Buttons below header

- Refresh – click to refresh the list.
- Add – Click to add a new method.
- Edit – highlights the method, then click to edit the name of the method.
- Delete – highlight method, then click to delete method.
- Buttons below header
Your published shipping methods listed under My Methods can be refreshed, edited, deleted, and created using the buttons above the list. This list can also be found and modified using the List Maintenance feature.
- Shipper Services
- Do not ship with this method – used for pickup options.
![]()
- TNT (time in transit) – enter maximum days for shipment to take.
![]()
- Middle Buttons
- > – move the current selection to right (add service to the method).
- >> – move all options to the right (add all available services to the method).
- < – move the current selection to left (remove service for method).
- << – move all options to the left (clear all services for method).
NOTE: Will be replaced by “Any” – includes all shipping methods.
- Services Mapped to My Method

- Do not get rates for 1:1 mapping – if only one service is mapped to a method, it is possible to skip rate shopping to save time
Any changes made to the rate shopping configuration are saved immediately.
Shipping Defaults
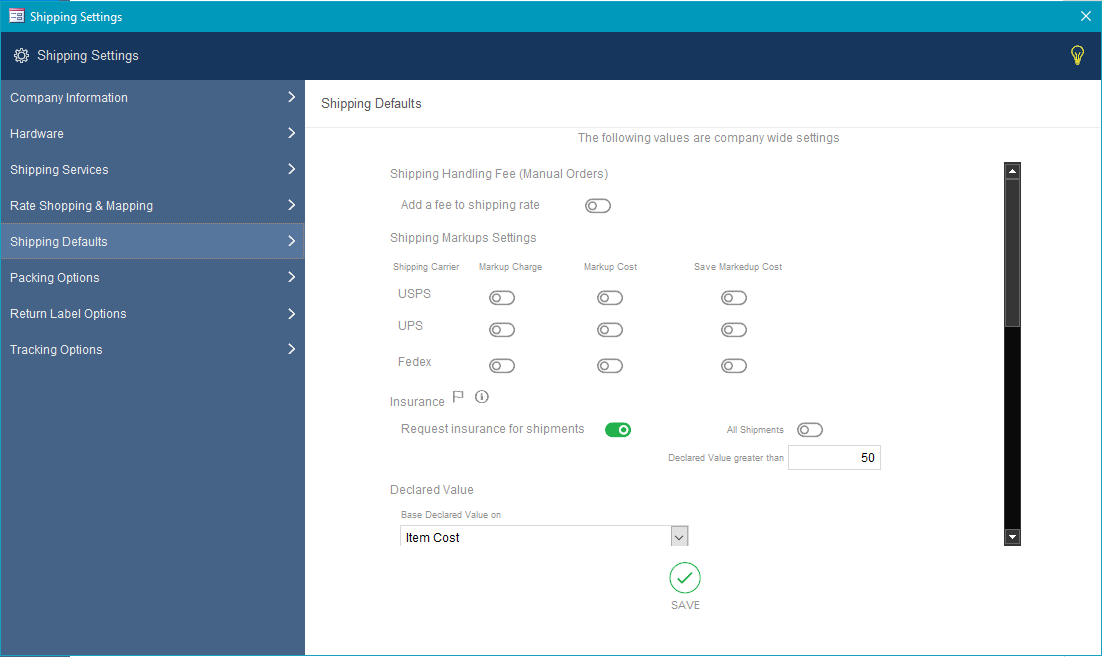
Shipping Defaults offer several options to configure the shipping functionality. These settings are company-wide and will affect all users on all workstations.
- Shipping Handling Fee (Manual Orders)
- Add a fee to the shipping rate -> toggle on to add shipping/handling amount
 – click to choose flat-rate or percentage
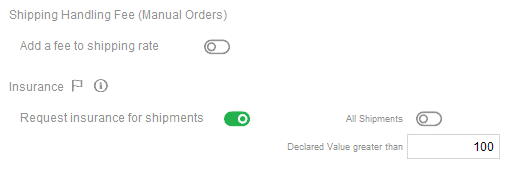
- Insurance
- Request Insurance for shipments – toggle to add insurance to shipments.
- All Shipments – toggle to add insurance to ALL shipments.
NOTE: only visible is the previous toggle is on.- Declared Value greater than – enter a minimum dollar amount.
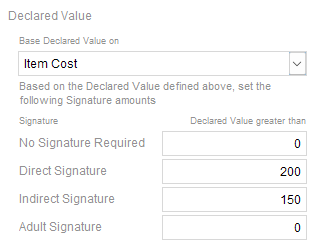
- Declared Value
- Declared value based on – dropdown to select option.
NOTE: separate from adding insurance.- No Default Value.
- Item Cost – how much you bought the item for.
- Order Product Subtotal – the entire monetary amount of the order
- Retail Value -> how much you sold the item for.
- Signature
- No Signature Required.
- Direct Signature – must be from the buyer.
- Indirect Signature – anyone living in the resident.
- Adult Signature – 18+ must sign.
- Declared value based on – dropdown to select option.
Form Options
- Shipping Opening View -> dropdown to choose the setting
Note: shipping page must be reopened for settings to change.
The shipping form can be used in one of two ways: List, Search.
Options
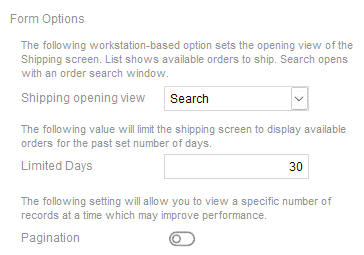
- Limited Days – orders older than the day count entered will not be shown.
- Pagination – limits the amount of orders viewing at a time.
- Shipping Cutoff Time
- Default
- USPS
- UPS
- FedEx
More information on this functionality can be found in the Shipping documentation.
Packing Options
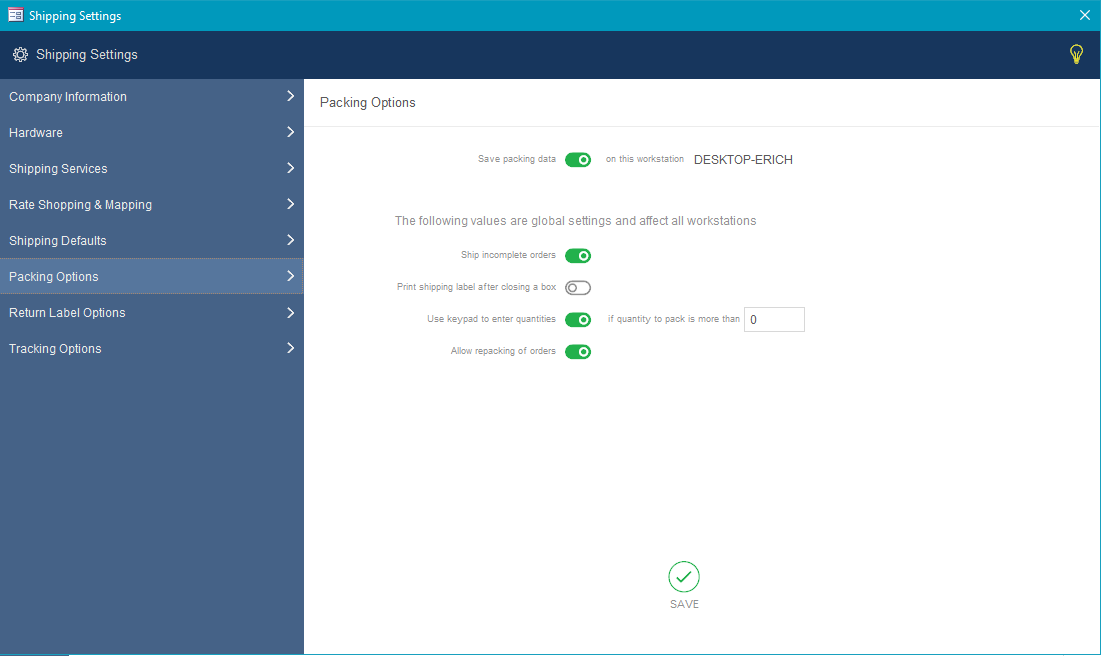
Packing Options control whether you would like to save packing data for each shipment. These options are company-based and would affect all users on all workstations.
- Save packing data – toggle to use built-in packing system.
![]()
- Global – settings are the same across all workstations.
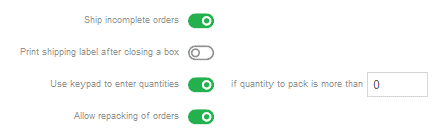
- Ship Incomplete Orders – toggle to allow shipping incomplete orders.
- Print shipping label after closing box – toggle to auto print label once box closes.
NOTE: weight and dimensions must be entered prior. - Use the keypad to enter quantities – toggle to allow the use of the keypad.
- If the quantity to pack is more than -, enter a number for the quantity to be greater than to use the keypad (the keypad option must be toggled).
- Allow repacking of orders – toggle to allow repacking of old orders.
Tracking Options
![]()
Tracking Options offer fields that store shipper links in order to track packages. These links are determined by the shipper (FedEx, UPS, USPS). There are also fields to specify an email template to send to the customer when their packages ship, based on each shipper.
- Shipper – dropdown to choose shipper method.
NOTE: New shipper can be added by manually typing in the name.- Federal Express (FedEx)
- United Parcel Service (UPS)
- US Post Office (USPS)
- Shipper Code – auto-filled if choosing a predefined shipper.
- Email Template -> pick a premade email template.
NOTE: email templates can be edited/created using “Email Template Editor” Click HERE to learn more. - Track Button Prefix – the start of the link.
- Track Button Suffix – end of the link.