Prerequisites
- Save packing data must be true.
- Settings -> Shipping Functions -> Shipping Setup -> Packing Options -> Toggle “Save Packing Data” (per workstation)
- The Packers need to be set up
- Settings -> Data Functions -> List Maintenance -> Packers
- Printer connected.
- Settings -> Shipping Functions -> Shipping Setup -> Hardware -> Set Printer and Printer for Commercial Invoice
- More info Setup for Shipping Hardware – Stone Edge Order Manager
- Scale setup or weights for products set in Stone Edge
- Boxes defined in inventory.
- Link to boxes article
Standard Multi-Box Workflow
- Open shipping area with Ship My Orders
- Select Order
- List view, select an order from the list.
- Search View, scan, or enter the SE order number. (Can be set in shipping settings)
- Pack items for box 1 (Figure 1)
- Once items are selected, confirm the following:
- Weight
- Dimensions (L, W, H)
- Package Type, if applicable
- Shipping Service (Figure 1)
- Click the grey “Close Box” button (Figure1)
- Click the green “Next Box, Same Order” button (Figure 1)
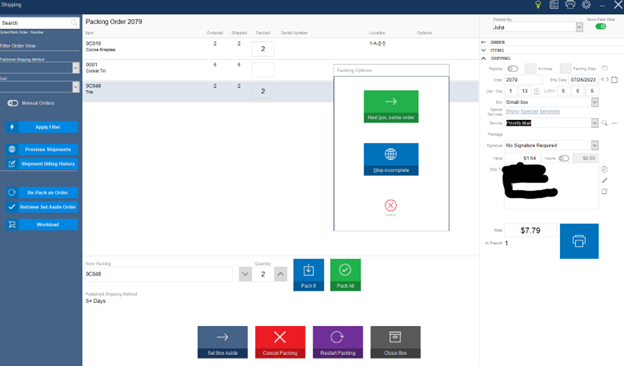
Figure 1 - Box 1’s label will print
- Unpacked items will stay on the screen to be packed (Figure 2)
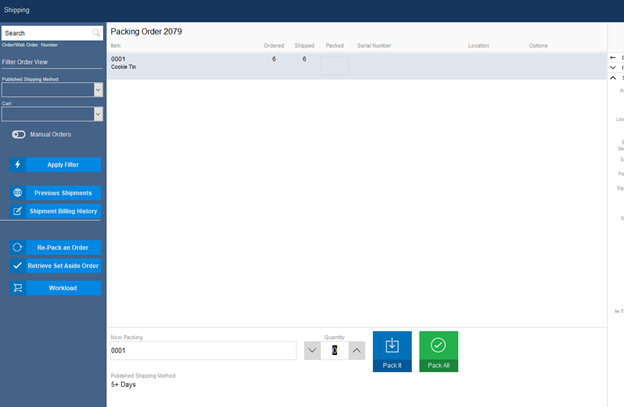
Figure 2 - Pack the contents of Box 2
- If there are more boxes after ->, follow steps 4-7
- If the last box -> follow step 4 and click the blue “Printer button.”
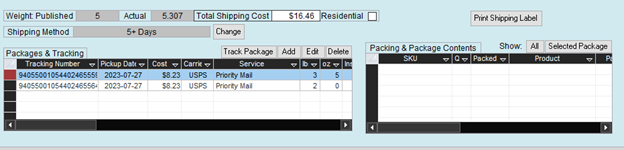
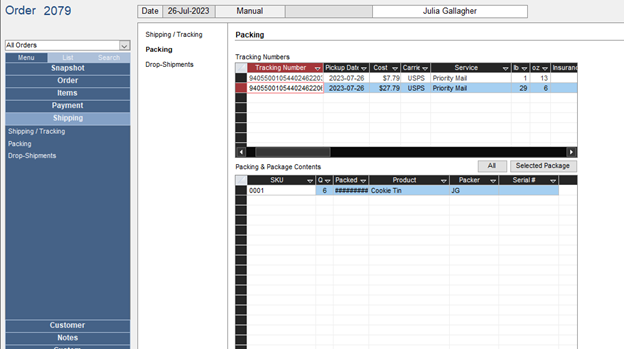
View Box Contents (Standard View Orders Screen)
- Main Menu -> Process My Orders -> View & Process My Orders
- Find Order.
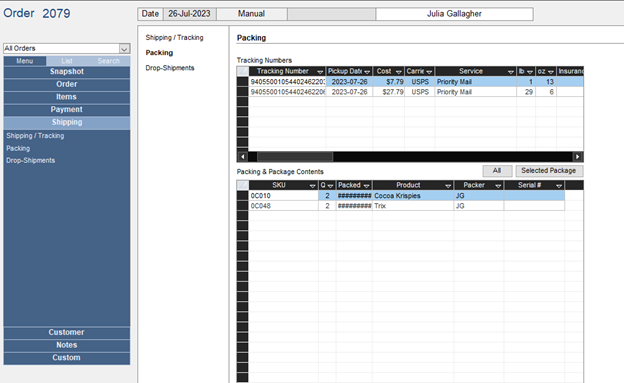
- On the left-hand side menu, click Shipping -> Packing (Figure 3)
- Click a row in the “Tracking Numbers” table to show packing data in the “Packing & Package Contents” table
- Default: first tracking number with packing data (figure 3)
- Click the row entry to see other packing data (Figure 4)
Multi-Box Workflow using Advanced View Orders
- Open Advanced View Orders (AVO)
- Select Order to print labels.
- Select print Shipping label in the top-right of the shipping section
- Make sure “Shipping” is displayed (top right)
- Set the number of Boxes needed for this Order above the rate box (Figure 5)
- Confirm: (Figure 5)
- Weight
- Dimensions (L, W, H)
- Package Type, if applicable
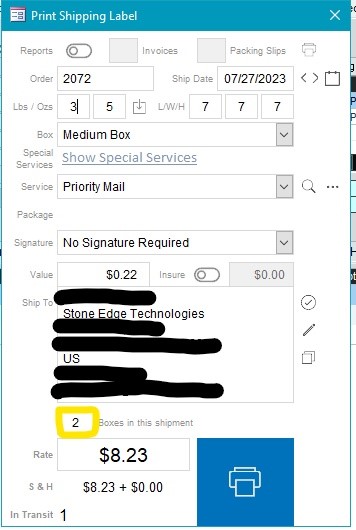
Figure 5
- Click the blue “Printer” button for Box 1
NOTE: The Rate line should be Crossed through after the label prints. This indicates that you need to update the weight and dimensions for the next box. - Boxes needed should be decremented by 1. (Figure 6)
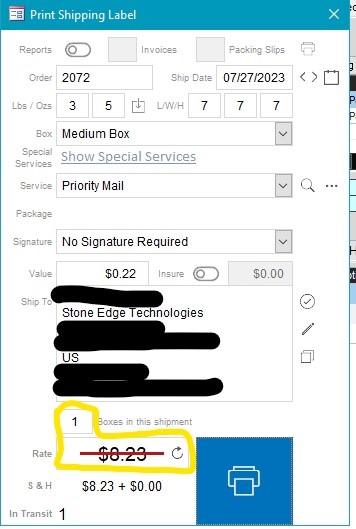
Figure 6 - Repeat step 6, then click the magnifying glass next to “Service” or refresh arrow next to “Rate” to update rates for the current box(Figure 7)
- Click the blue “Printer” button for Box 2 and repeat steps 9 – 10 for the remaining boxes.
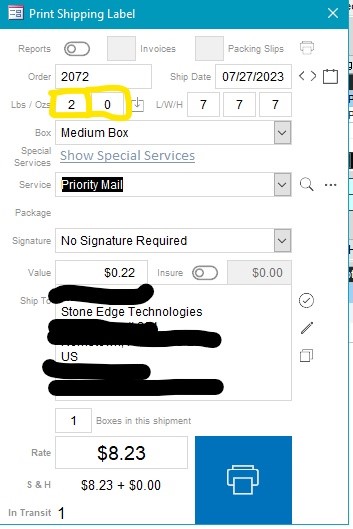
Figure 7 - Once the last box’s label is printed, the shipping label screen will close
- Tracking information and update in the AVO shipping area. (Figure 8)
Note: Doing Multi-Box in the AVO does not log what items are packed in each box.