
- Manually enter supplier records at the Suppliers screen or use the Import Suppliers link on the Inventory screen to import supplier information from a text file.
- Go to Main Menu>Manage My Inventory>View and Manage My Inventory.
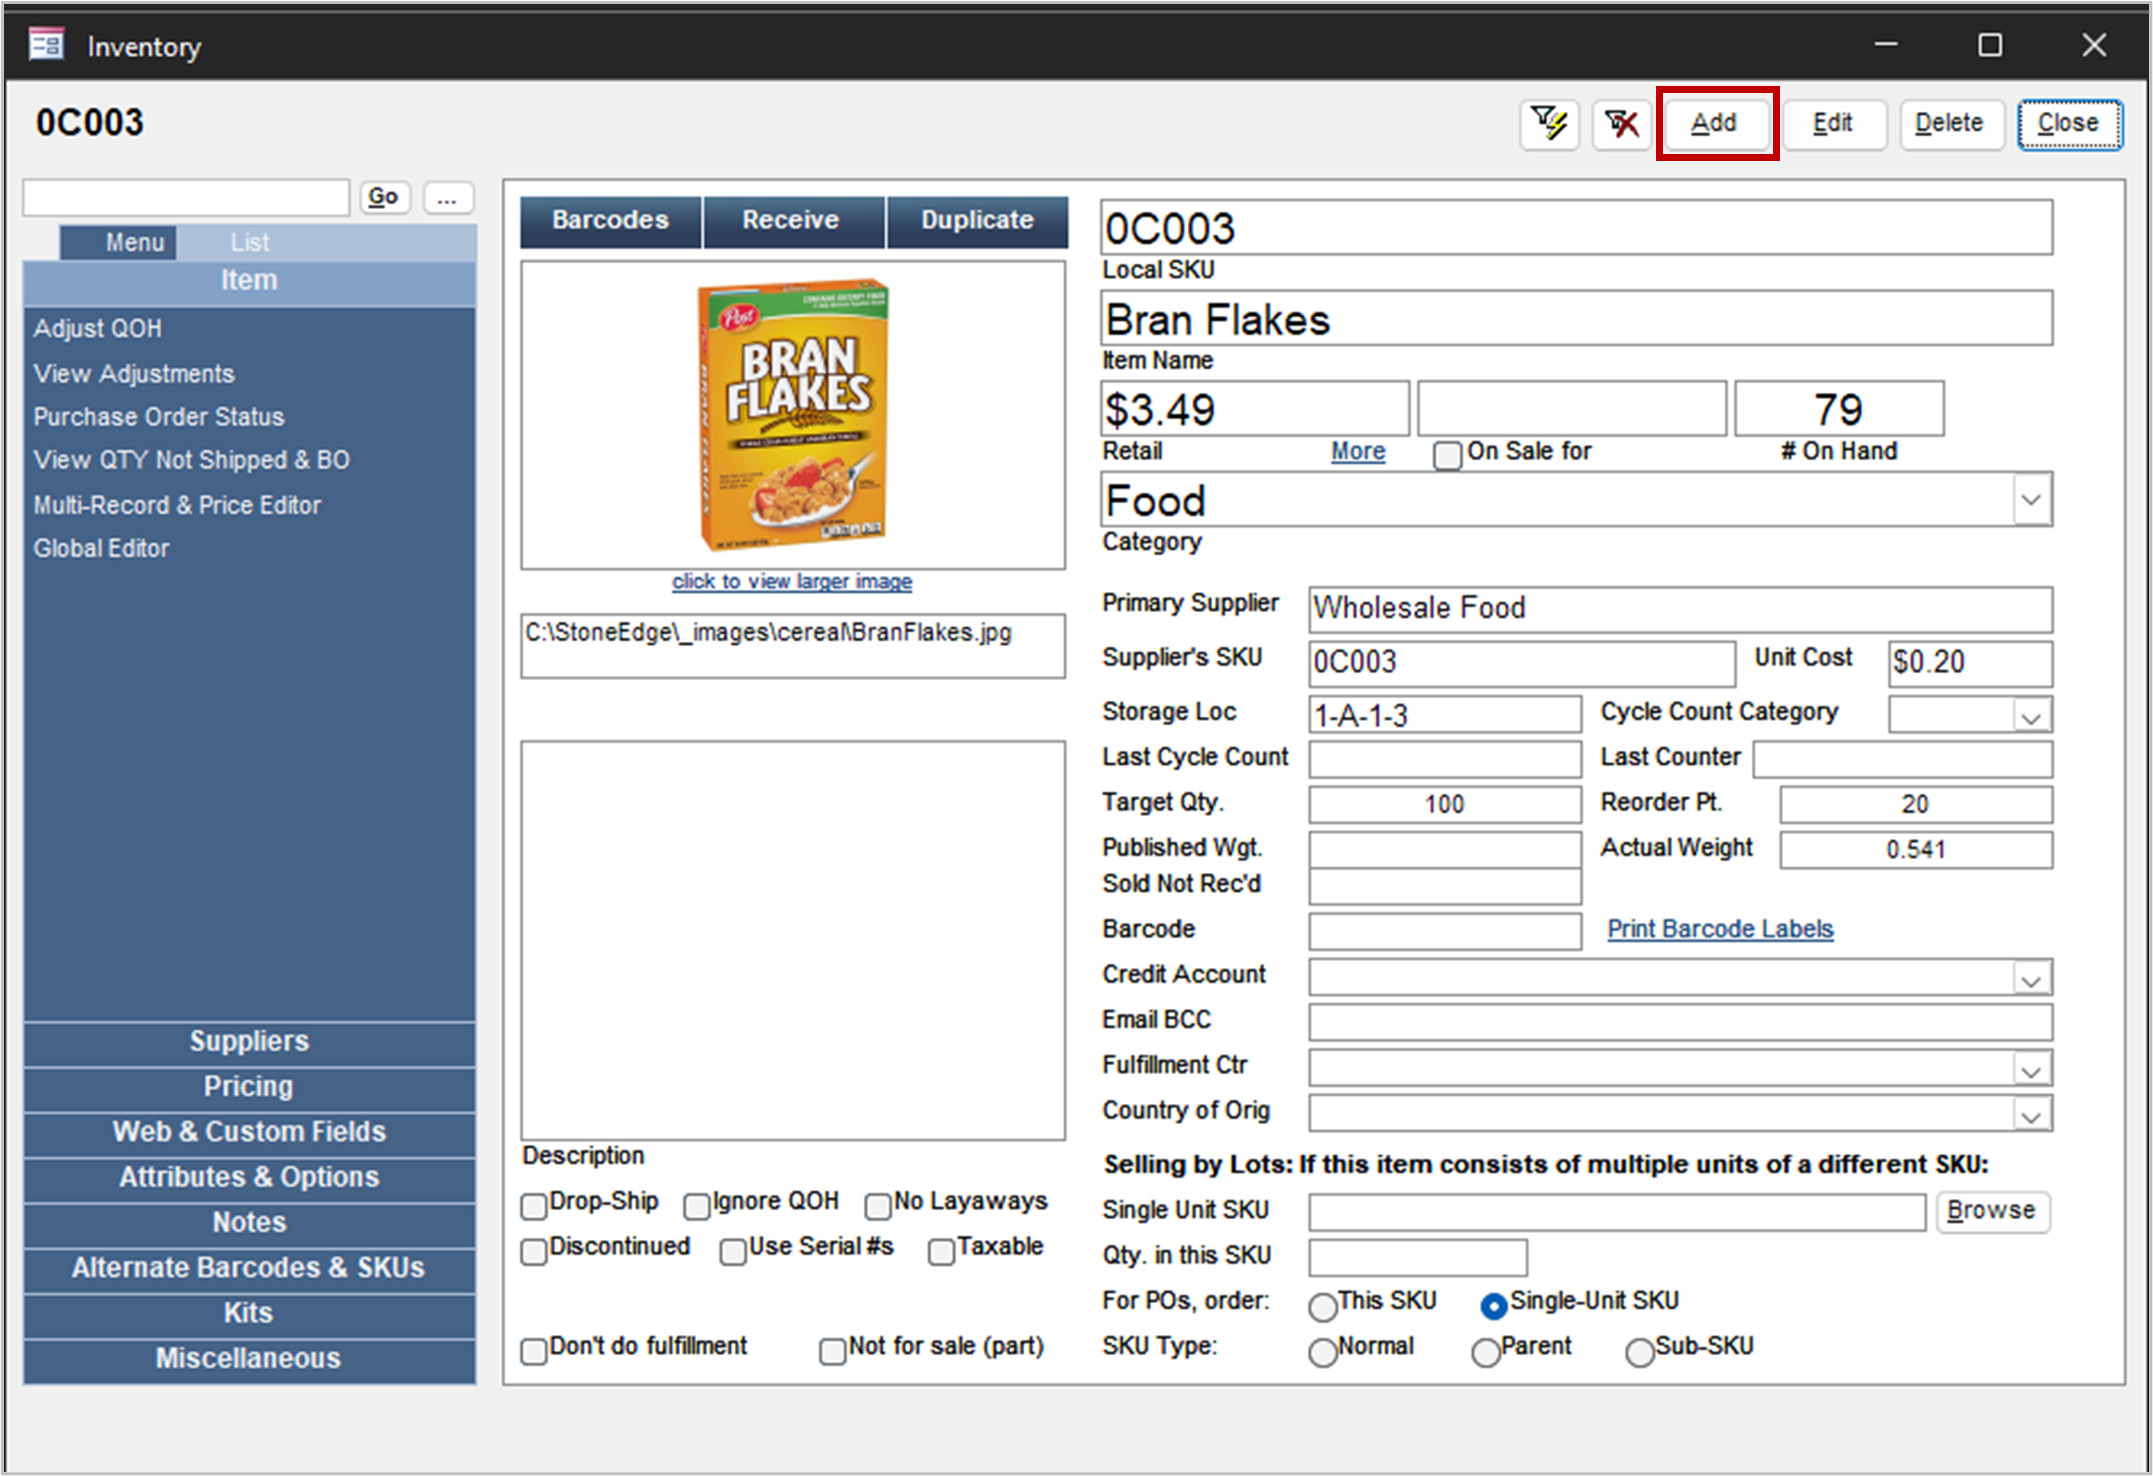
- Select Add to create a “blank” item record that you can fill in to create a new product in your inventory database.
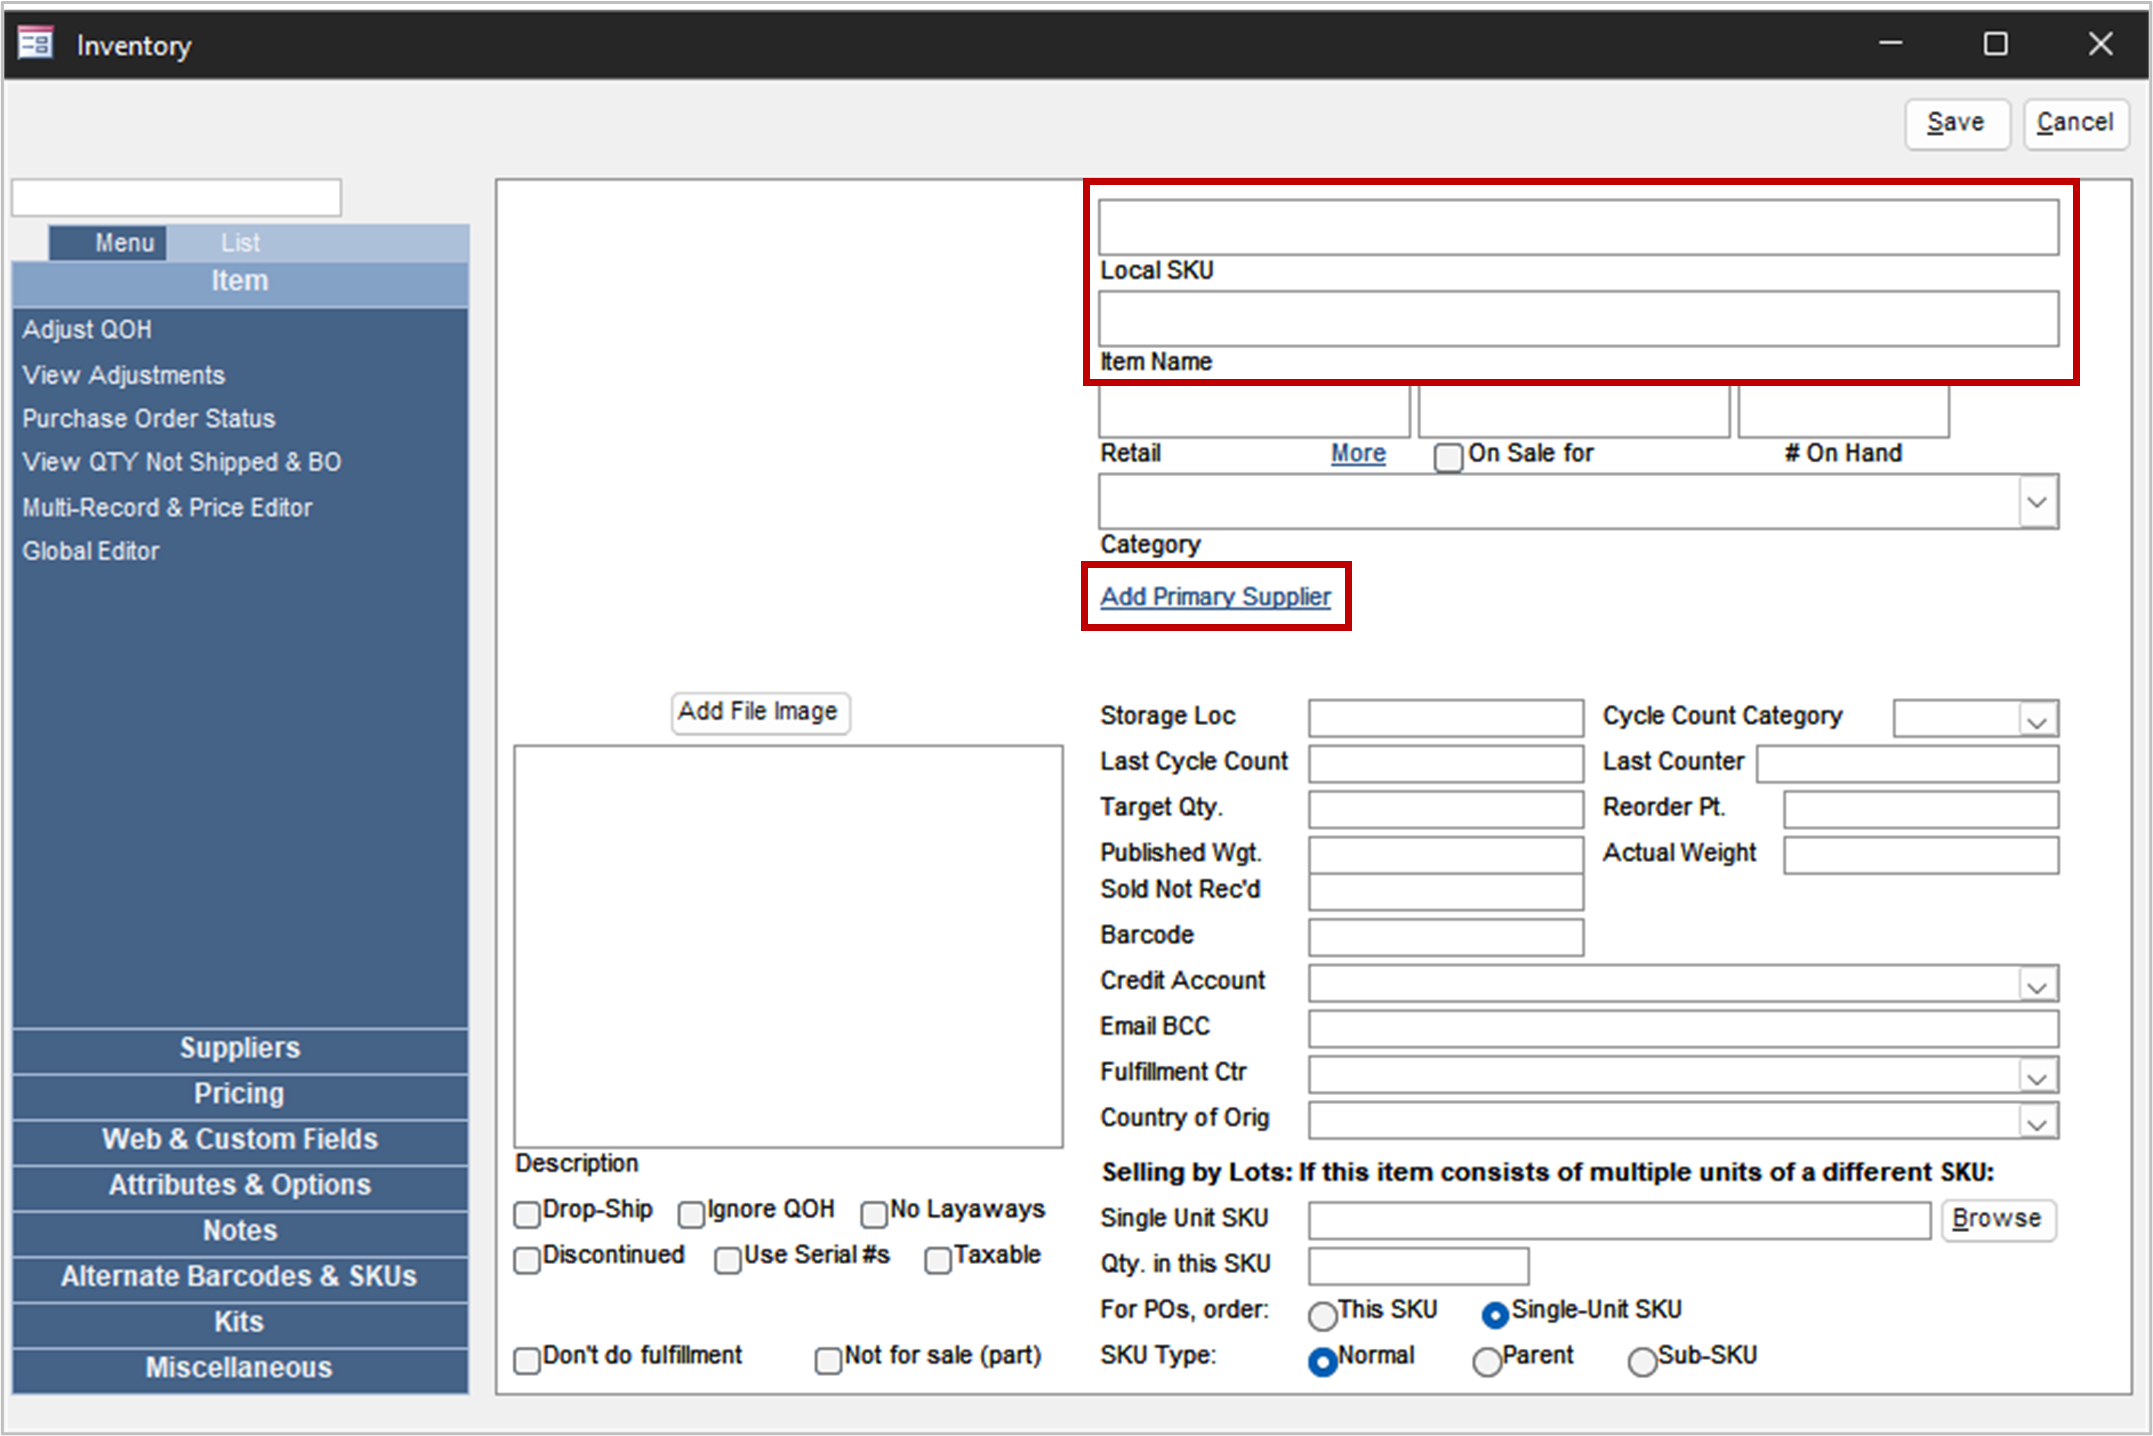
- Enter a unique value in the Local SKU field. A Local SKU is the part number you use to refer to an item in your store or stores. SKUs can include letters, numerals, spaces, underscores (_) and dashes (-). We do not recommend using other punctuation marks. In particular, they must not include quotes (”), apostrophes (’), commas (,) and semicolons (;).SKUs are limited to 250 characters in length however; many places in the program can only display about 40 characters, so think small!
- Enter a value in the Item Name field.
(Red Fields are Required)
- Complete the other fields as appropriate. Refer to the Inventory Knowledge Base topic for more information.
- Select Add Primary Supplier.
(Red Fields are Required)
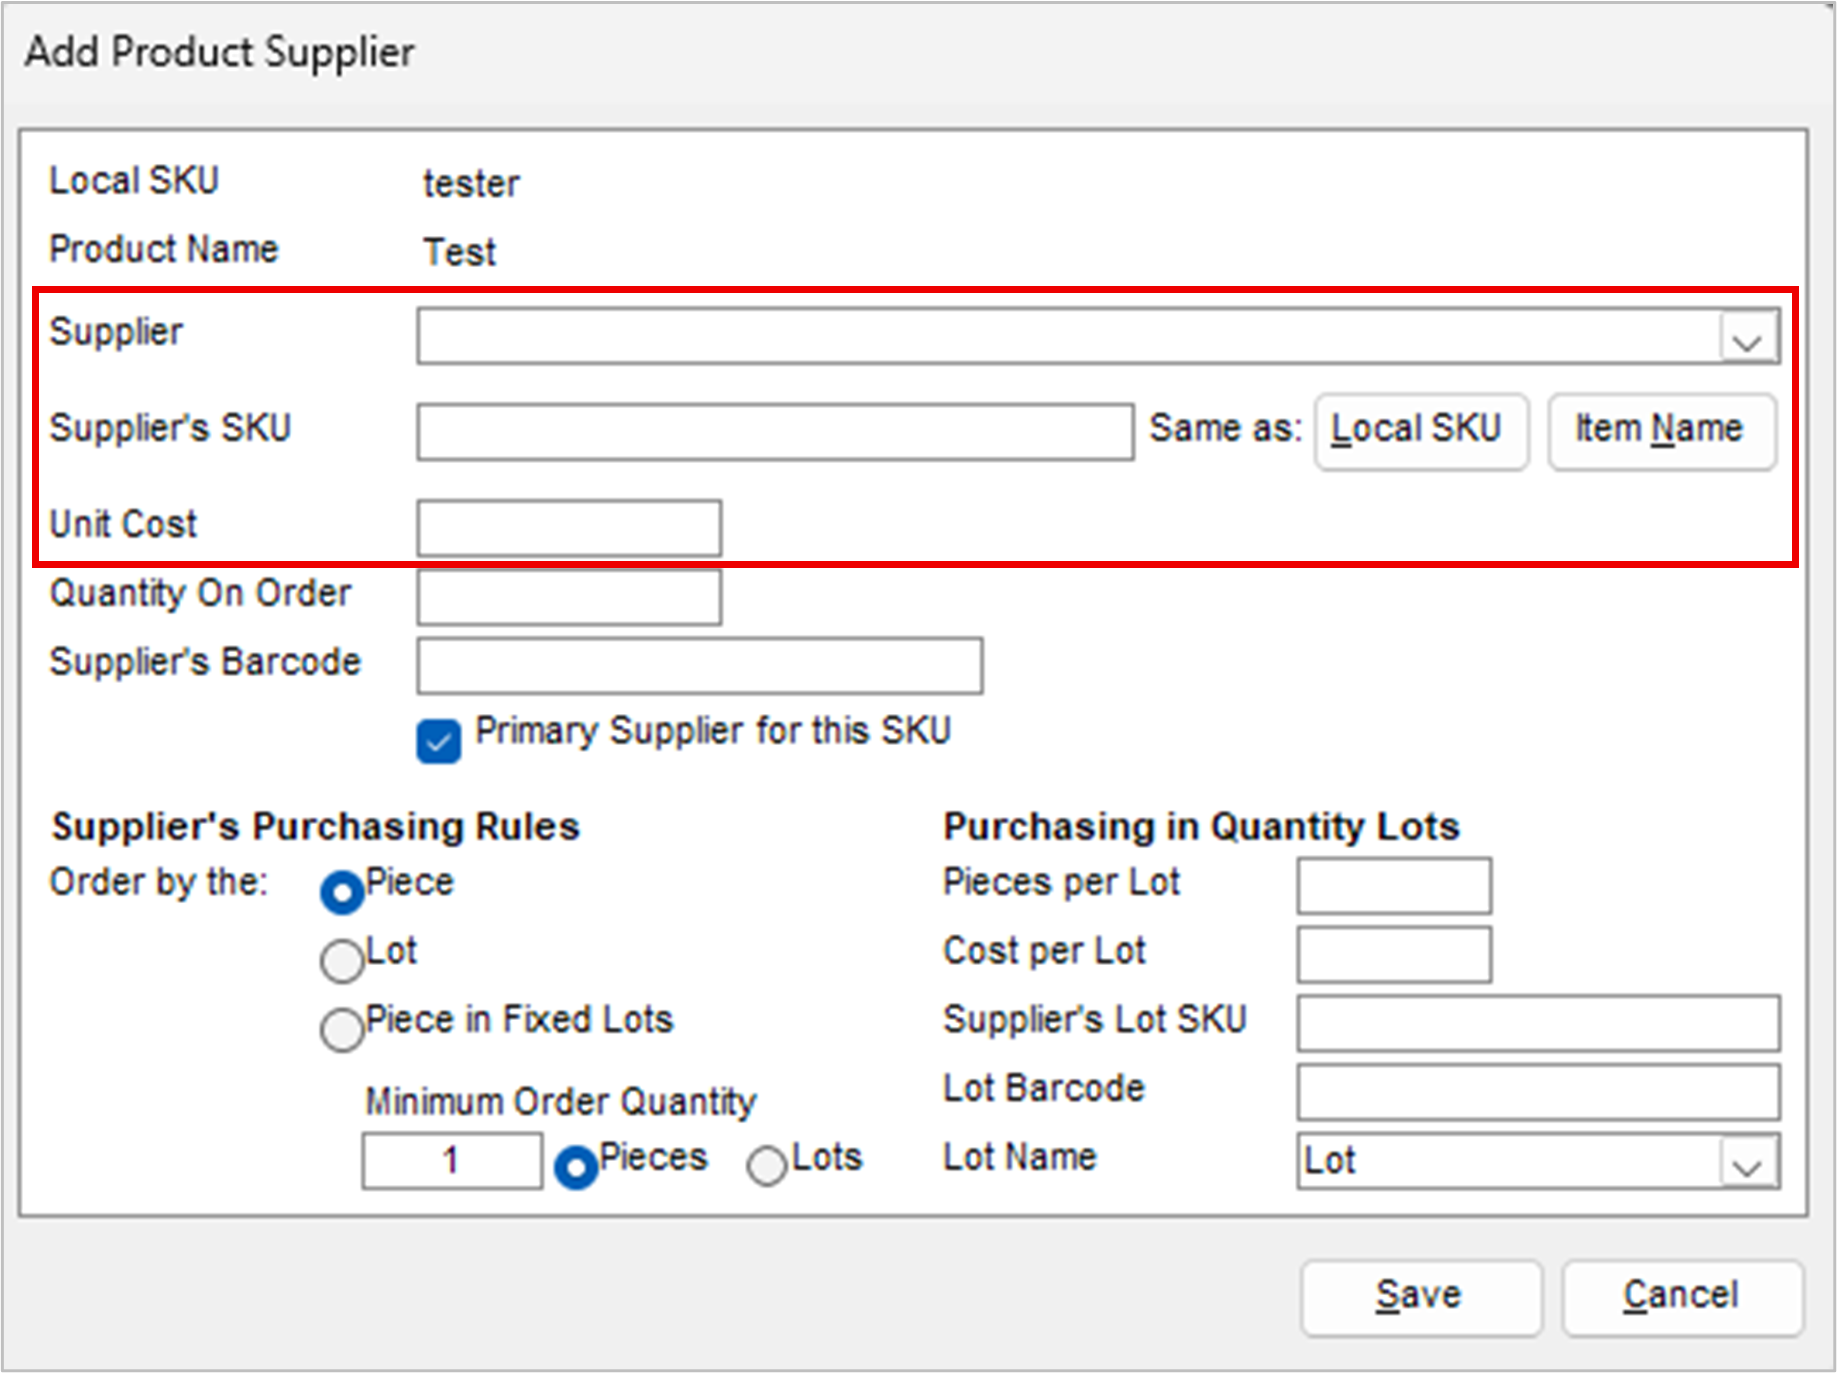
- Pick a primary supplier of the product from the list.
- Enter your supplier’s SKU for the item or select Local SKU or Item Name to use one of those as the supplier SKU.
Note: Because an item can have more than one supplier, an item can have more than one Supplier’s SKU. If you wish, you can use a Supplier’s SKU as the Local SKU.
- Enter a value in the Unit Cost field.
- Enter additional information in the remaining fields, as appropriate.
- Select the Miscellaneous tab and enter product dimension information in Length, Width, and Height. Having this information available can help minimize costs for Ground shipments through UPS and FedEx.
- Select Save.