
Overview
Once you talk to our sales team about using Connect2Cart to connect your Miva Store to Stone Edge, you’re probably wondering about the steps to do so.
The following are the instructions to set up a Miva 9.x or Miva 10.x Storefront with the Miva API using the Connect2Cart service for Stone Edge. This integration uses the Miva API to access the order data and inventory.
Create and Enable Credentials
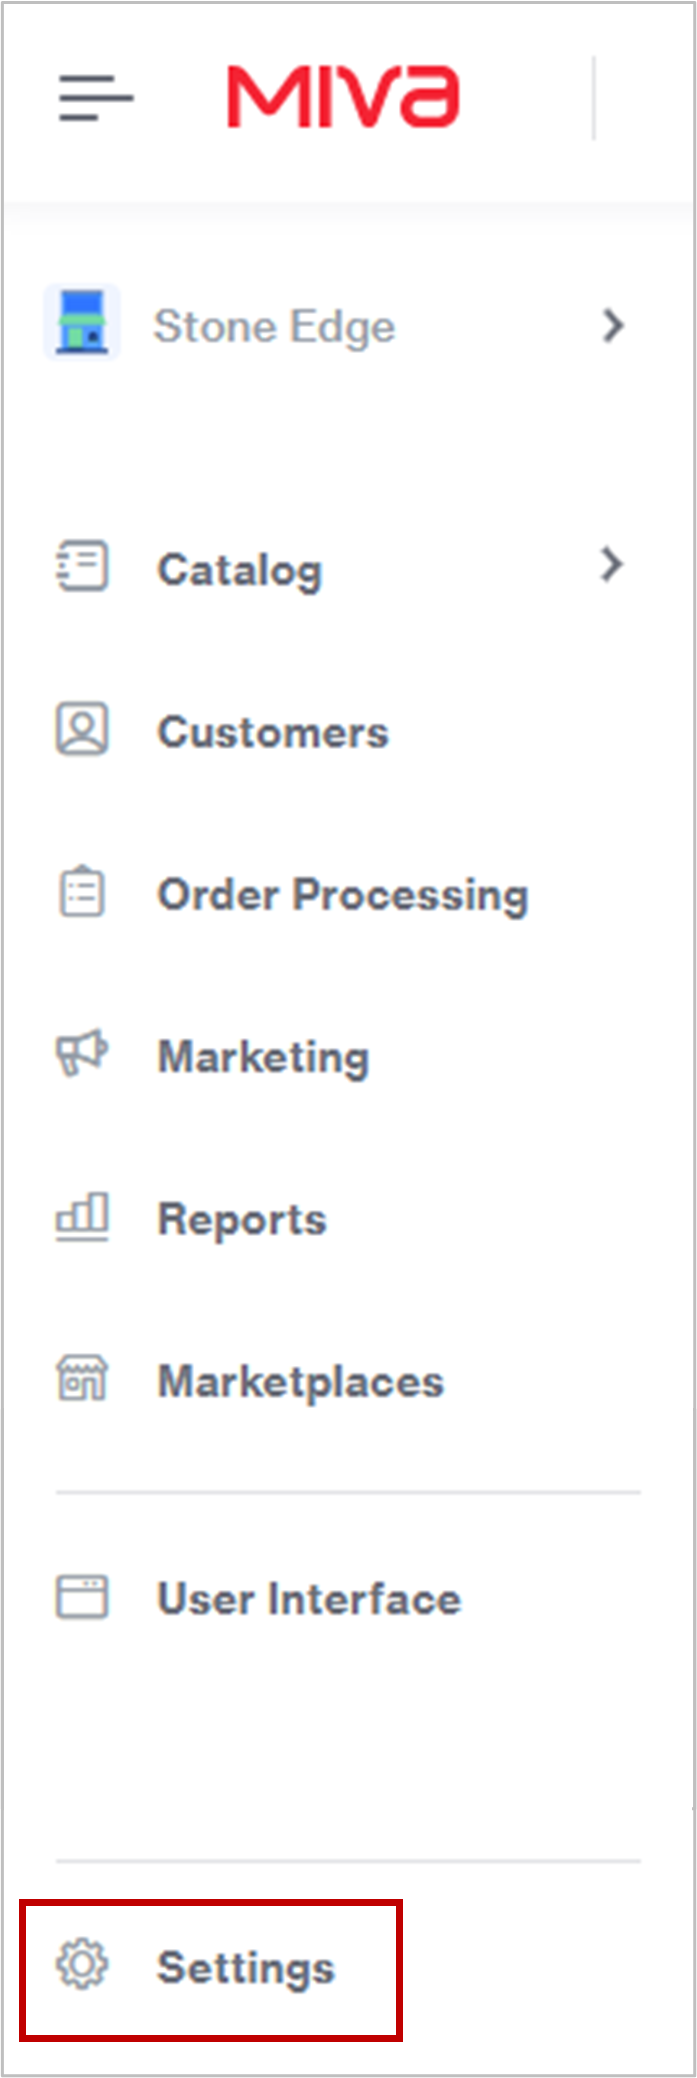
- Login to the Miva Admin Website and select “Settings” in the bottom-left corner
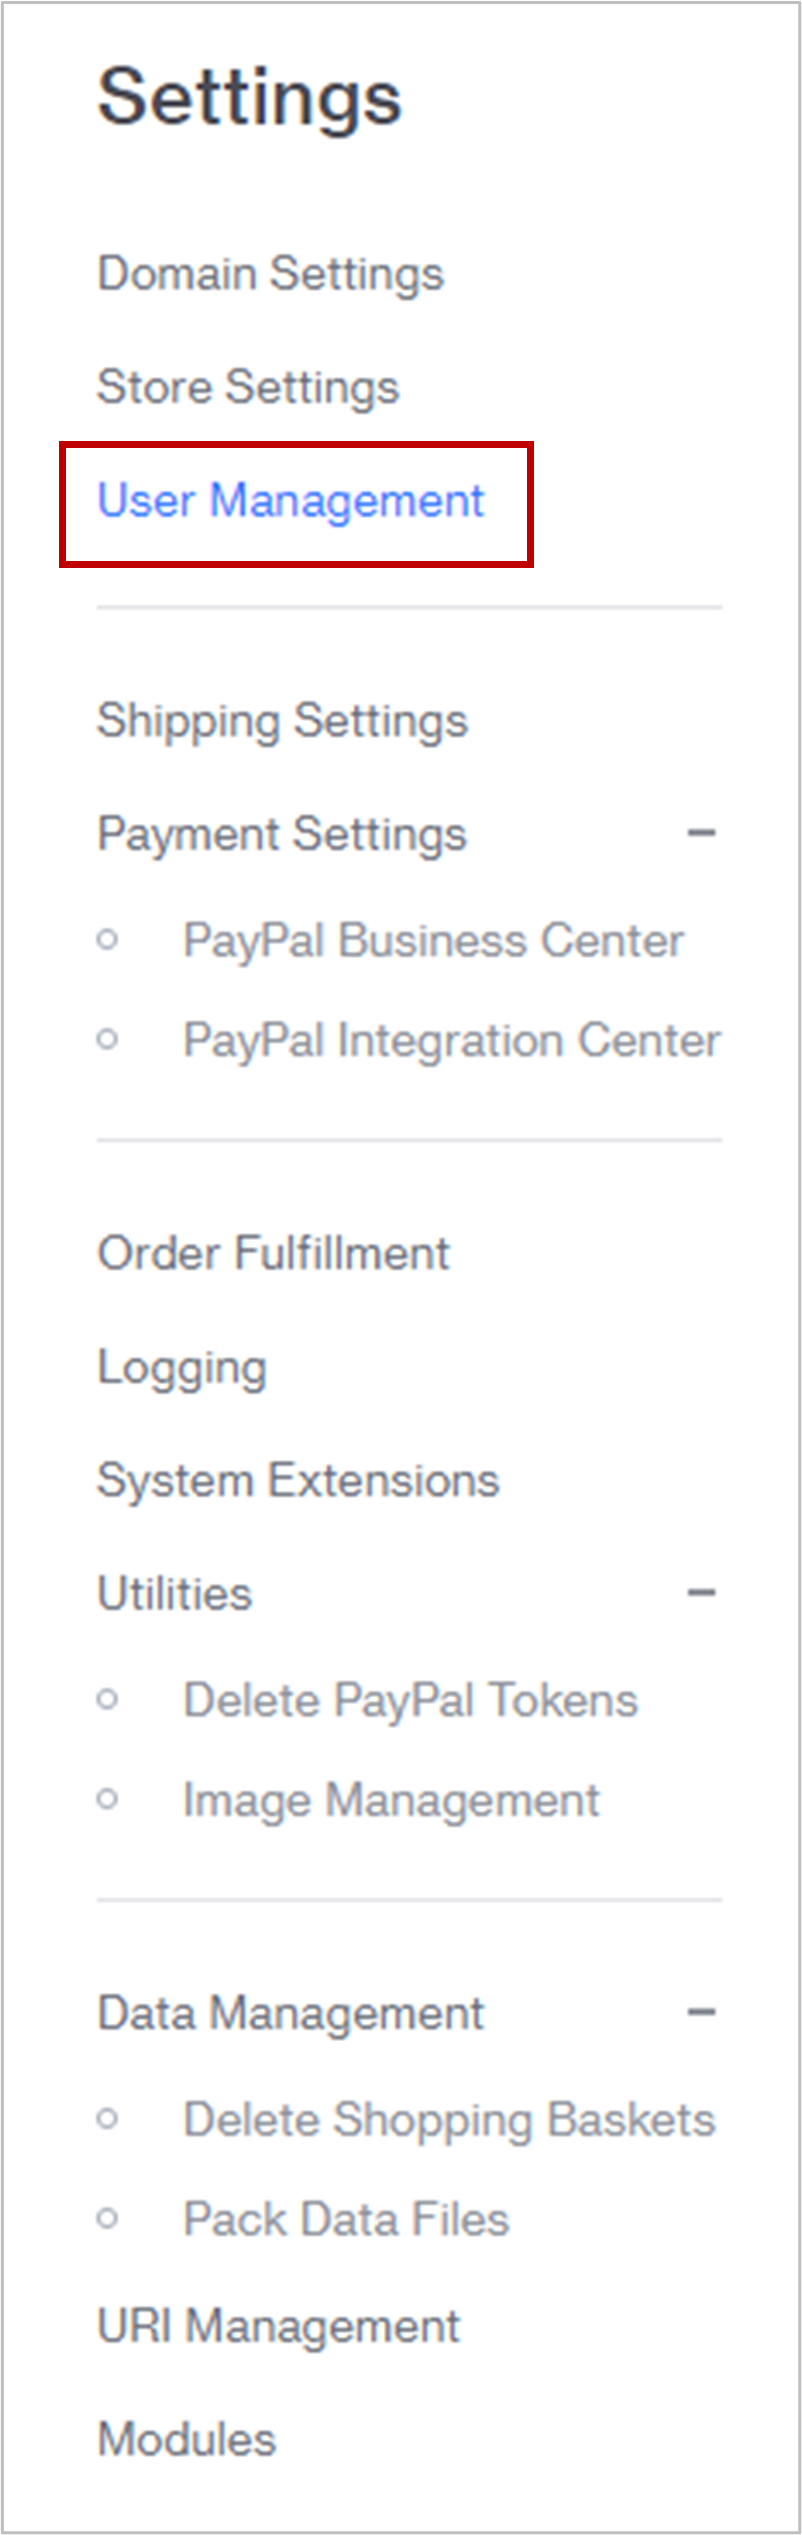
- Click “User Managment”
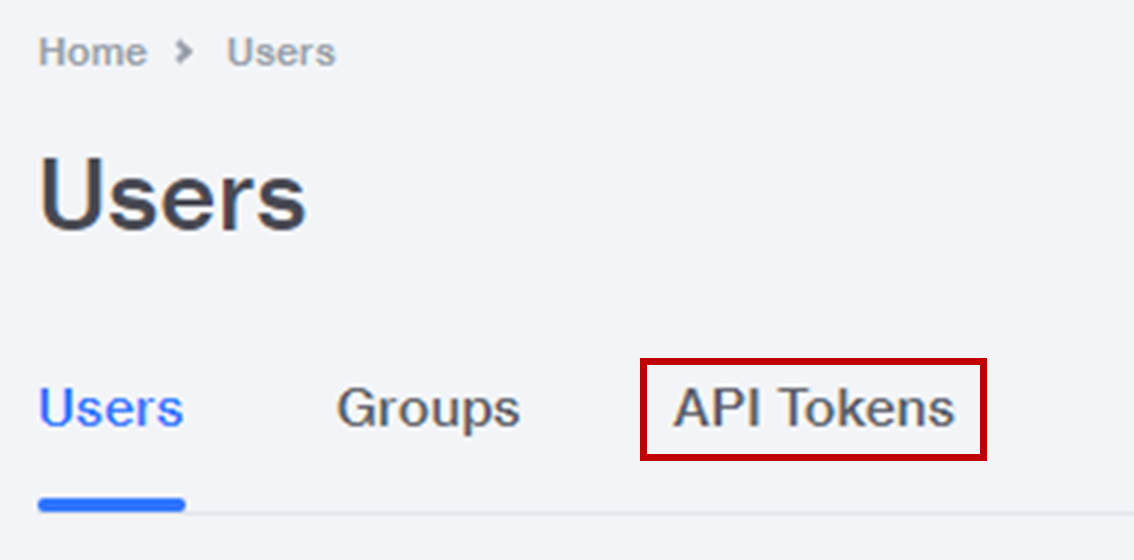
- Click the “API Tokens” tab
- Click “Add API Token” on the right-hand side in the blue box

- A pop-up window called “Add API Token” will appear with a variety of fields to fill out
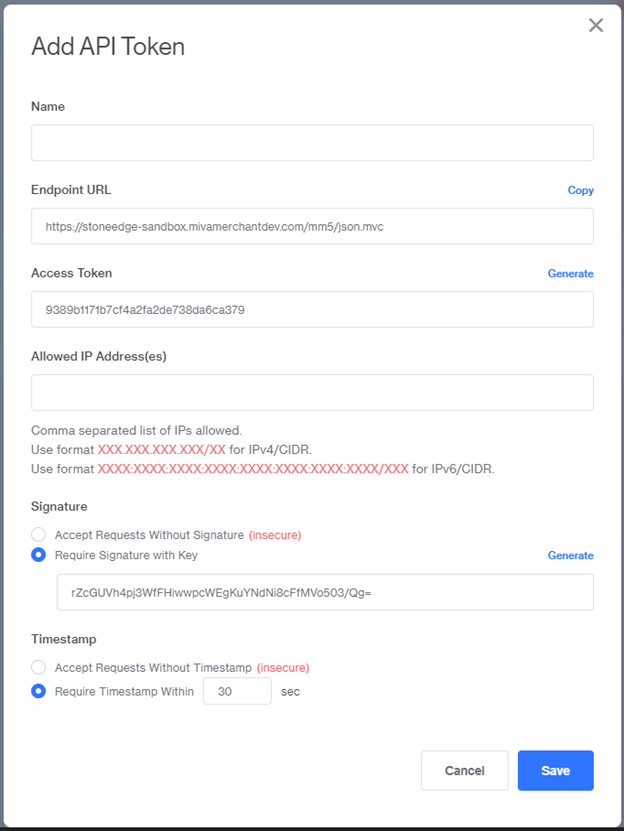
- Fill out the fields with the following.
- Name -> create a name that helps you identify your token
- Endpoint URL -> leave this as the default
- Access Token -> click the blue “Generate” on the right-hand side to create a token.
- Allowed IP Address(es) -> set this to 0.0.0.0/0
- NOTE: if you have IP restrictions implemented, contact sales@stoneedge.com for more information
- Signature -> click the blue “Generate” on the right-hand side to create a signature.
- Timestamp -> set to “Require Timestamp With” and set the time to “30” sec
- Click “Save”
- Click the checkbox on the left-hand side of your new Token.
- Click the [●●●] button at the top, which opens a drop-down menu.
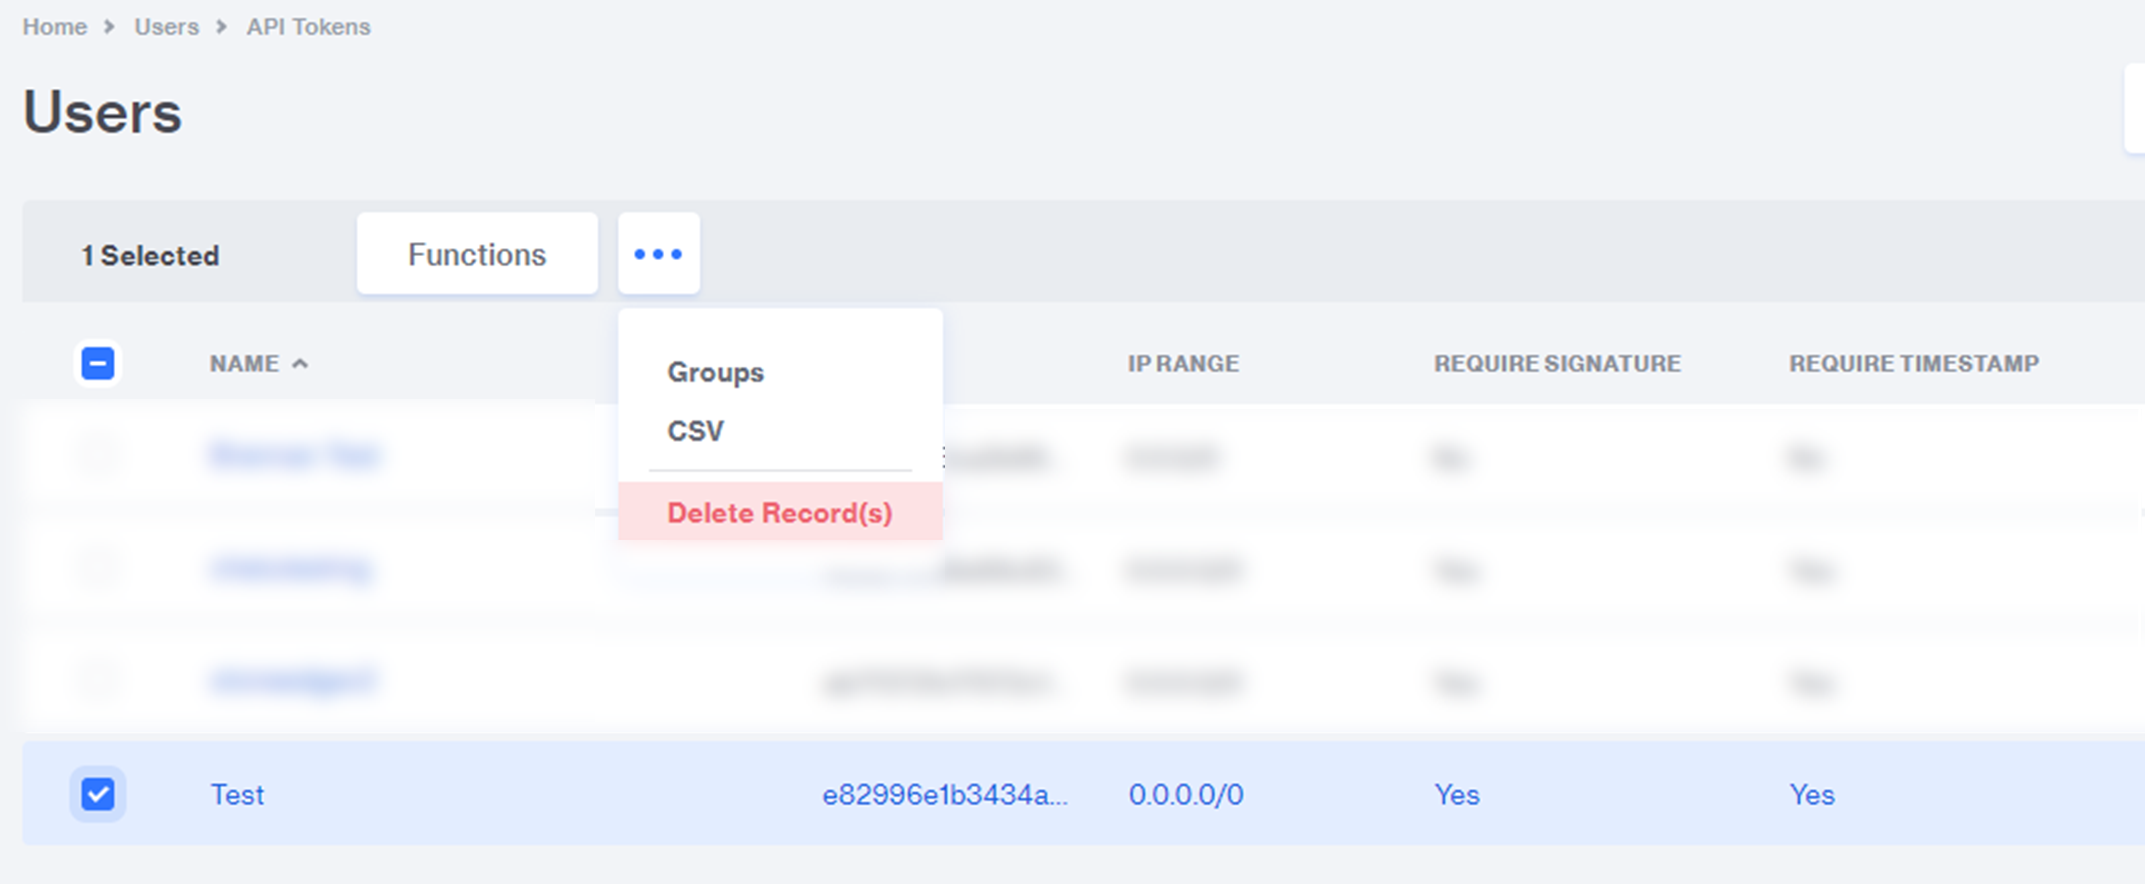
- Click “Groups”
- A pop-up window called “Groups” will appear with a variety of sliders to change permissions
- Turn the sliders on for the following:
- Customer Service & Sales
- Order Processing & Fulfillment
- Product Management
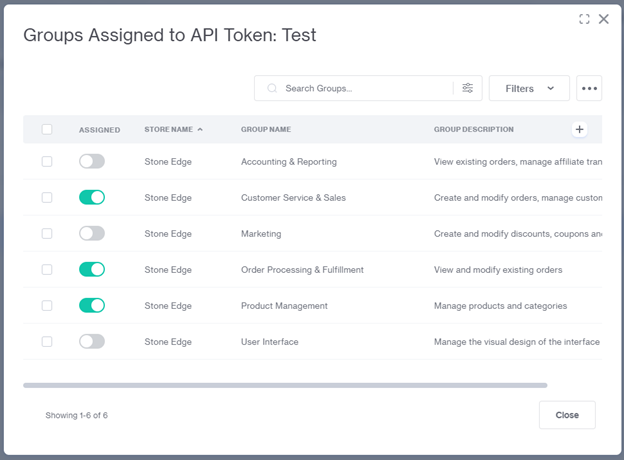
- Click “Close” to exit the window and save.
- You have now created an Access Token and Signature Key.
Add Encryption
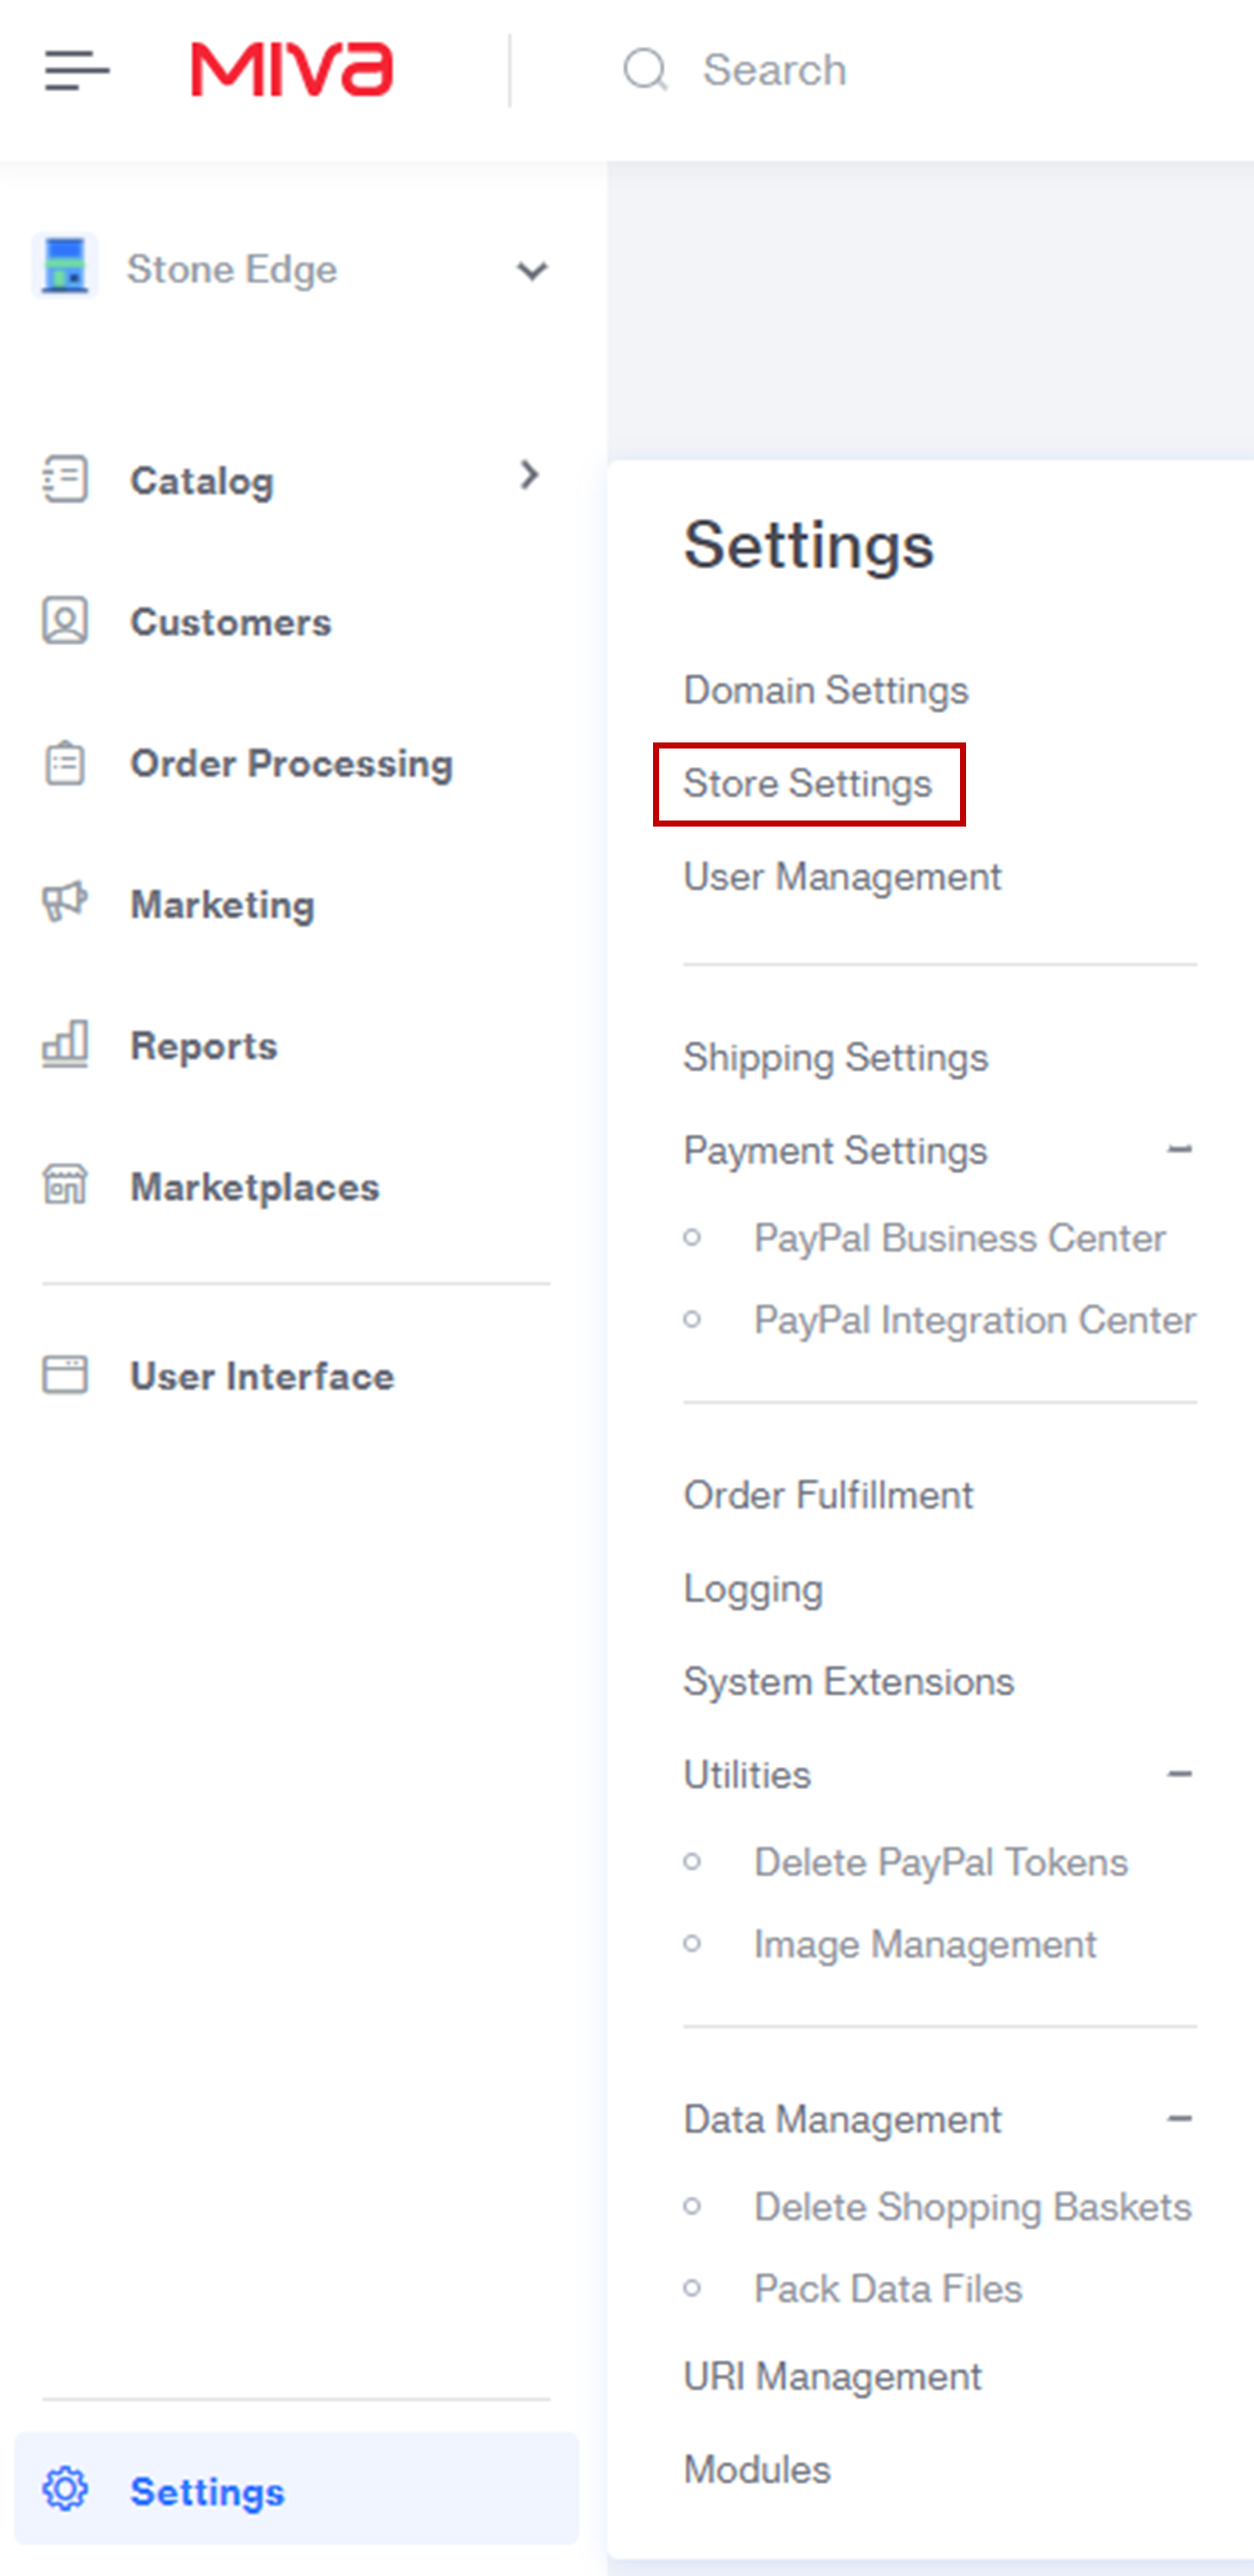
- On the Miva Main Menu, click “Settings” on the screen’s bottom-left next to the gear icon.
- Click “Store Settings” from the list that appears.
- Click “More” -> “Encryption Keys”

- Click the blue “Add Encryption Key” button on the top-right corner, and the Miva Merchant Encryption Key Wizard should open.

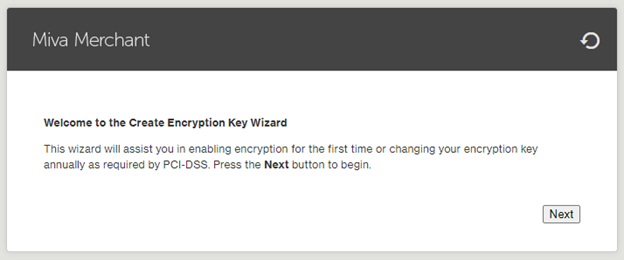
- Click “Next” to continue.
- Create an Encryption Key Prompt -> Something that will help you remember this specific encryption key
- Click “Next” once done
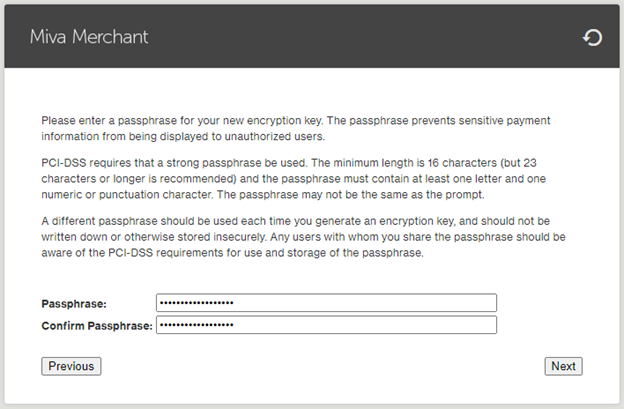
- Create a Passphrase following these rules
- Must be at least 16 characters long
- Contain at least one symbol
- Contain at least one letter/number
- Cannot be the same as the prompt
- Click “Next” once you have created a passphrase and confirmed the passphrase
- You will get a confirmation of the prompt and passphrase, but the passphrase will be censored
NOTE: Keep your passphrase saved somewhere! If you lose the passphrase, there is no way to recover it. There are two choices if this happens:
• All payment information that is saved and encrypted will need to be removed
• All credit cards will be encrypted, and you will not be able to view anything
- Click “Next” to continue.
- Click “Close” to finish and exit the wizard.
- Your new encryption can now be seen under the Encryption Key tab
Sending Required Information
Congratulations! You have created all the required information to connect your store to Stone Edge. Send the following information to: sales@stoneedge.com.
- Store Code -> found under “Store Settings” -> “Store Details”
- Access Token -> Created from credentials
- Signature Key -> Created from credentials
- Website URL -> the public URL to visit your site
- Encryption Passphrase (for complete payment data sent) -> created from encryption
Once you have sent the information above and received information back, please follow the link to Setting Up a Connect2Cart Channel – Stone Edge Order Manager.
Miva References
Miva Docs: Getting Started | Miva JSON API
Miva Docs: Reference Guide | Additional Resources | Enabling Encryption in Your Store