
Overview
A step-by-step guide on how to use the Cycle count feature to track your inventory better. We will start with first-time use with ABC analysis, then move to create batches, viewing, printing, and imputing batch information to update inventory.
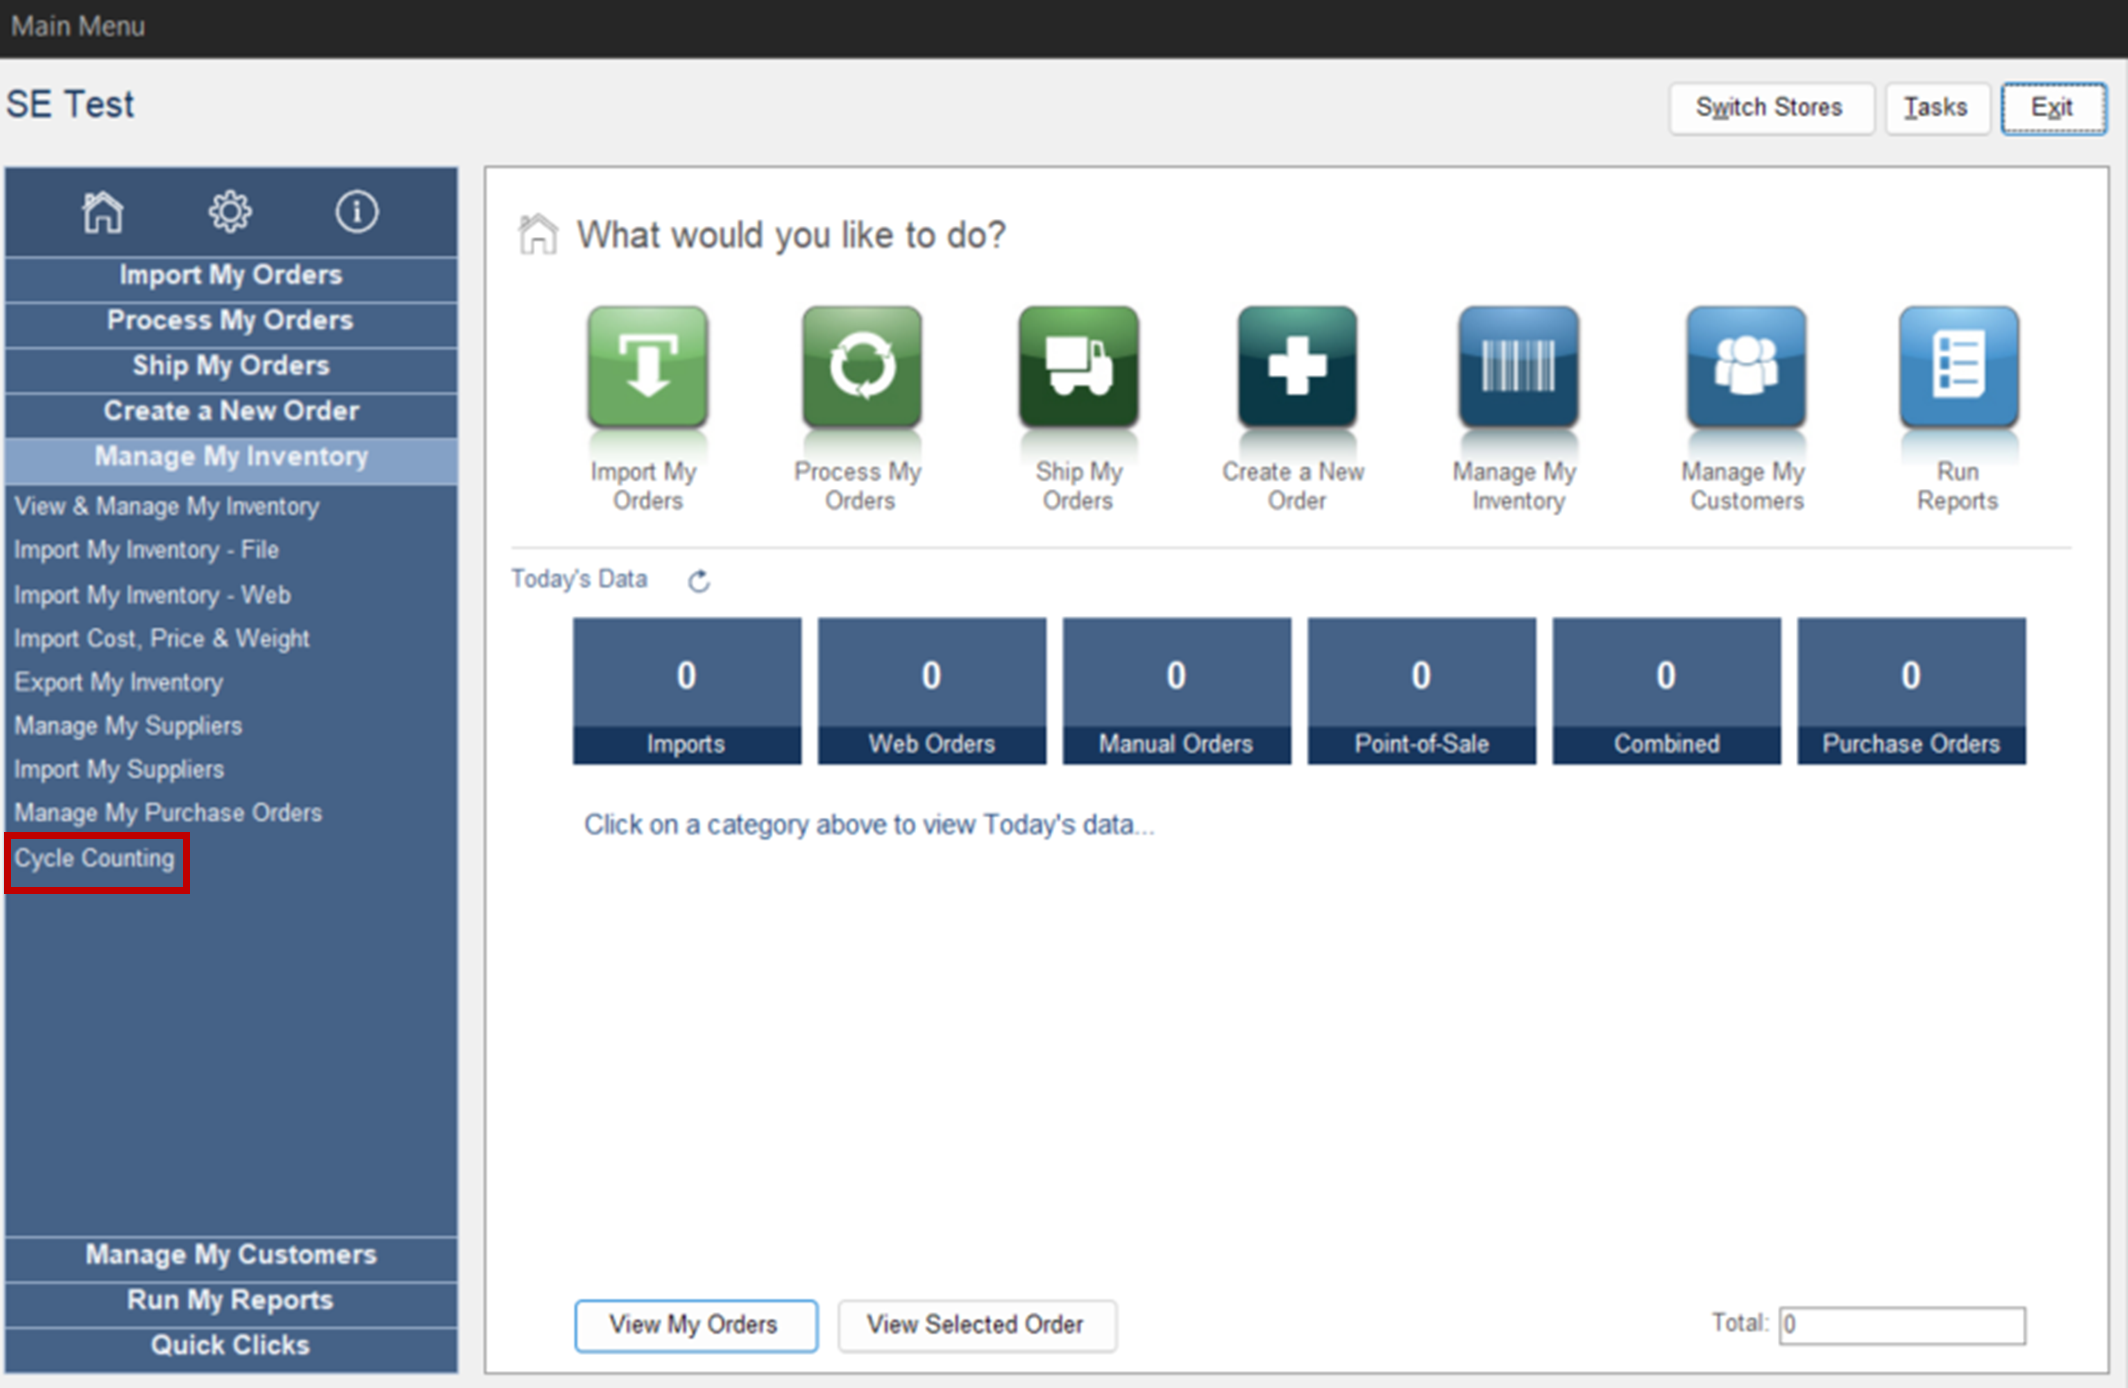
Navigation
Main Menu > Manage My Inventory > Cycle Counting
Prerequisites
- All items have locations set inventory (Will not be looked at otherwise)
- Single Stone Edge workstation open to ensure the database is free.
Cycle counting
Before you can cycle count your inventory, you will need to analyze which items to count and how often.
ABC Analysis
What is it, and why do I need to do it?
ABC analysis is a method used to classify items in a cycle counting system based on their value or importance to a business. In a cycle count, ABC analysis can be used to determine which items should be counted more frequently and which items can be counted less frequently.
To conduct an ABC analysis on a cycle count, the items are first sorted by their unit cost, or unit sales to indicate velocity, with the most expensive or fastest moving items assigned to category A, the next most expensive or fasting moving items assigned to category B, and the least expensive or slowest moving items assigned to category C.
Category A items are typically the most critical items and should be counted more frequently to ensure accurate inventory levels. Category B items are less critical and may be counted less frequently, while category C items are typically the least critical and may be counted the least frequently.
By prioritizing the counting frequency of items based on their value and importance, a business can improve the accuracy of its inventory levels while also optimizing its cycle counting process by focusing on the most critical items.
Starting ABC Analysis
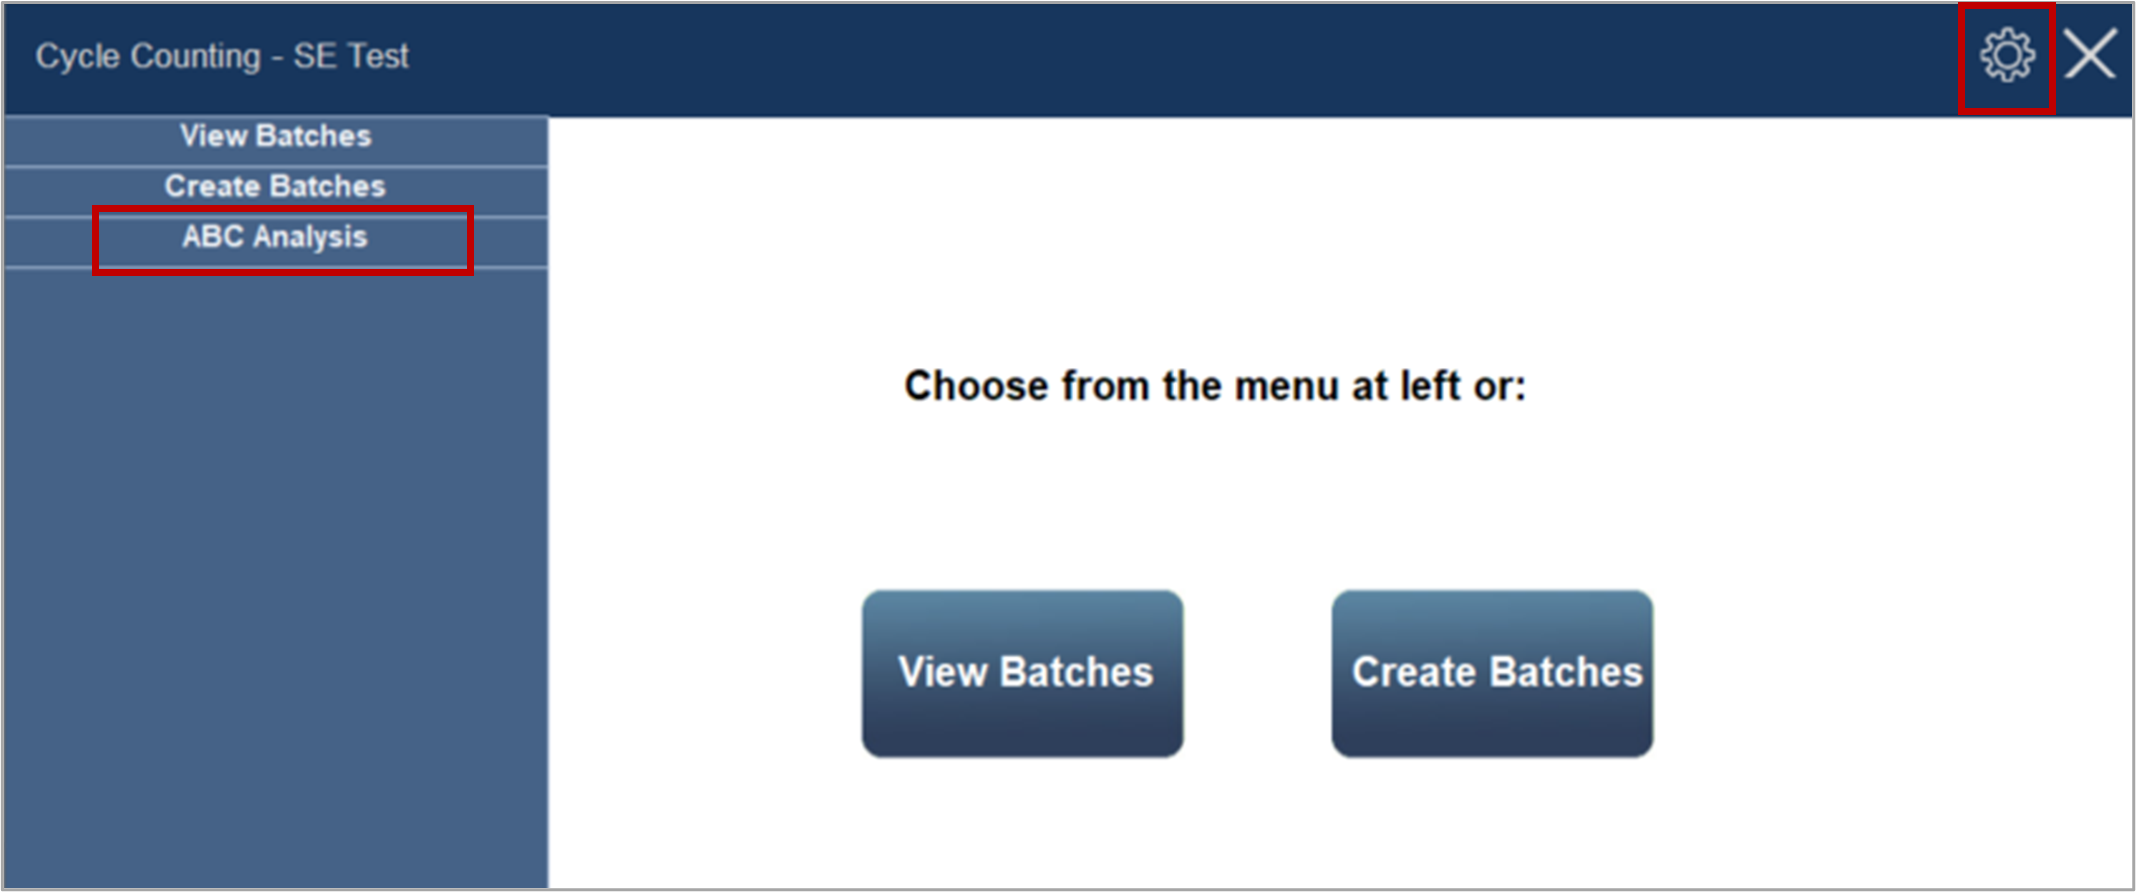
- Open cycle counting.
- Click “ABC Analysis” on the left-hand sidebar OR the “Gear Icon” in the top-right corner.
- Click the dropdown menu under “Base ABC Analysis On.”
You have two options here on how you would like to perform the analysis.- Sales History
Based on items sold within the specified date range. This would exclude items not sold during the set range.- Enter the date range for the time period sales should be looked at
- Clicking the box below each header will show a calendar to the right -> click for easy date selection
- Enter the date range for the time period sales should be looked at
- Quantity on Hand by Cost
This filter starts with all Items with a QOH greater than 0 and starts with the highest-cost items to be counted with higher frequency.
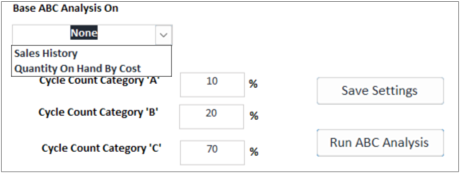
- Sales History
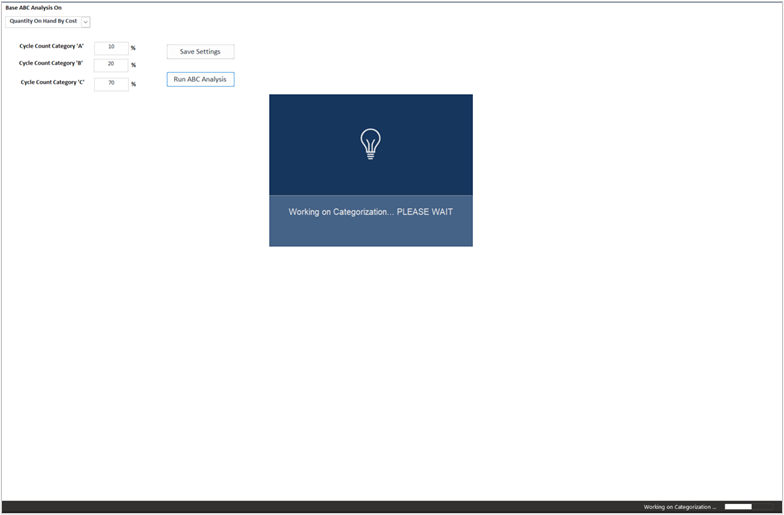
- Give percentages to categories A, B, and C
- All percentages must equal 100%
- A category can be defined 0%
- Click “Save Settings” if you plan to use the same settings later
- Click “Run ABC Analysis”
- If item locations are not defined, ABC Analysis will not complete successfully.
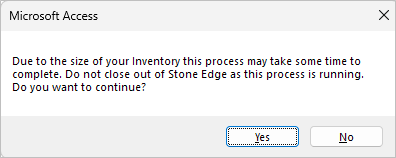
- If is sizable inventory a pop-up will appear informing process will take a while -> Click “Yes” to continue.
- Will ignore any discontinued and drop-shipped items
- Progress can be seen in the bottom-right-hand corner
- After the ABC analysis, products will have a “Cycle Count Category” assigned which can be reassigned by running a new ABC Analysis or by editing the product in Manage My Inventory.
Creating Batches
Once the ABC analysis is completed, you will need to create batches to break your inventory down into manageable lists for the warehouse to count the items.
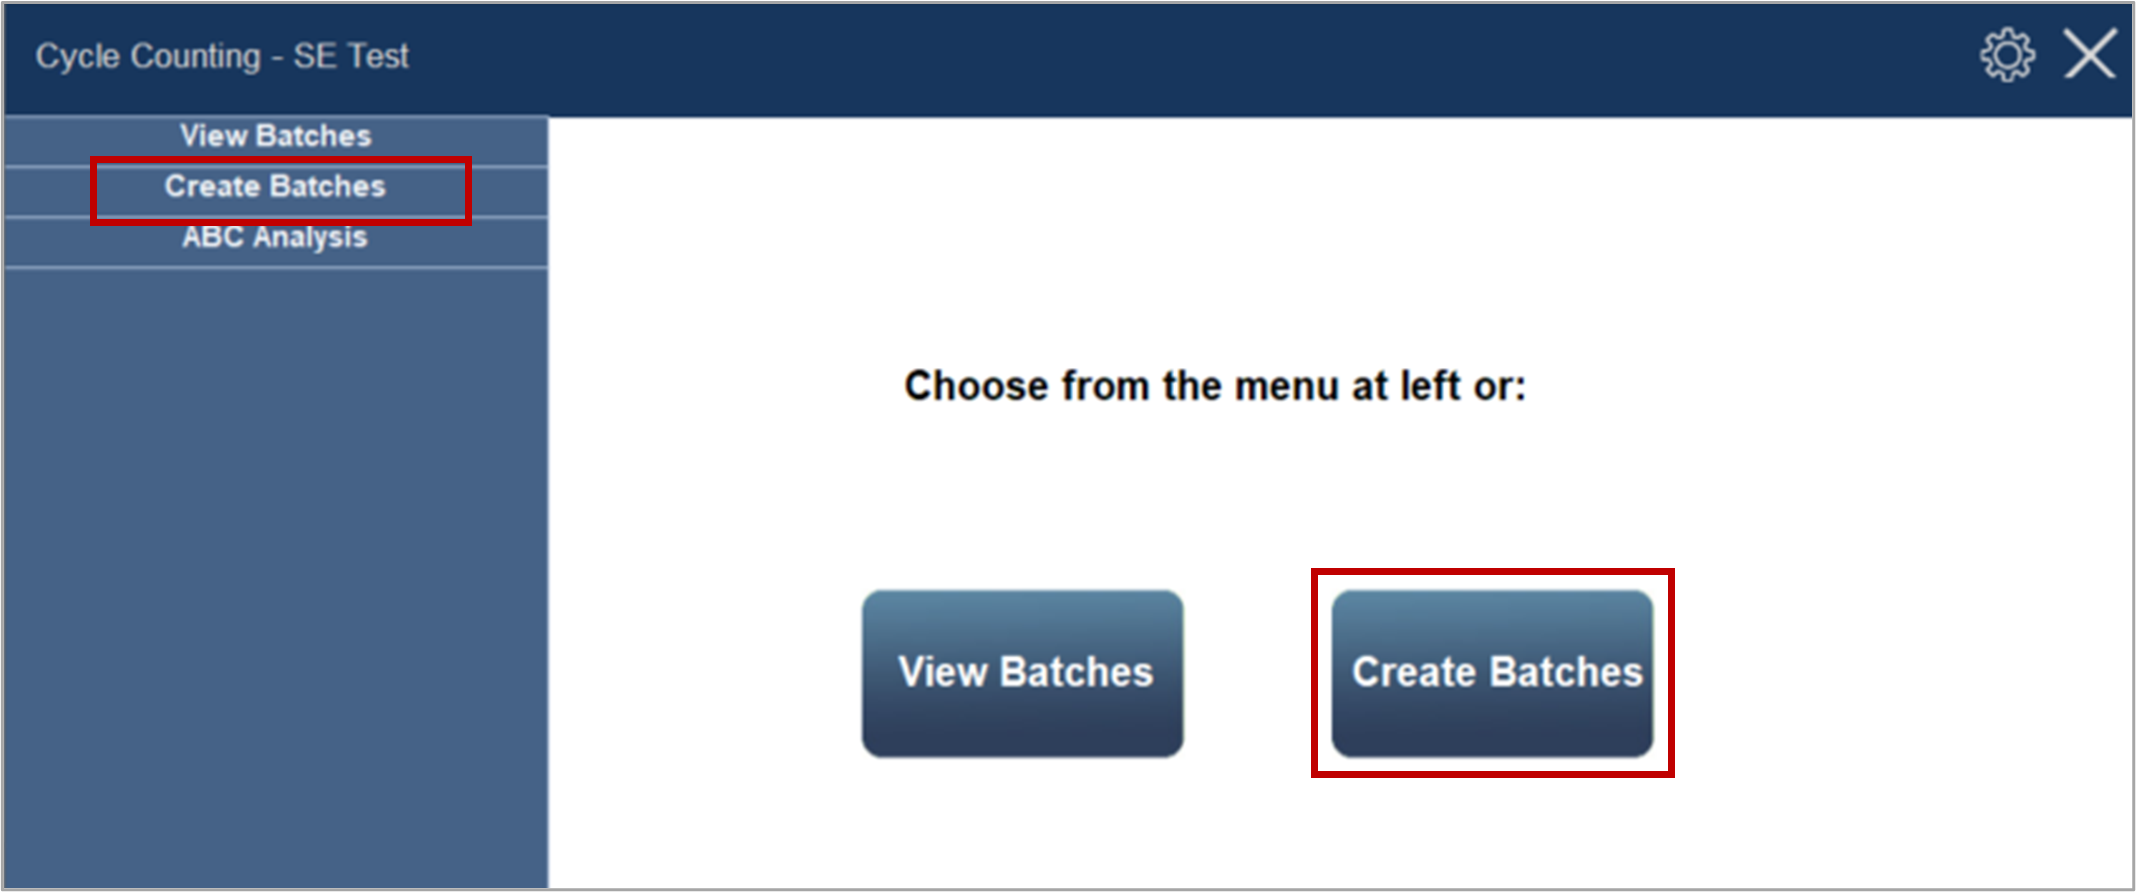
- Open Cycle Counting
- Click “Create Batches” on the left-hand sidebar OR the blue “Create Batches” button
- Choose how to “Filter By”:
- Cycle Count Category -> Uses ABC analysis
- Item Category -> Uses item categories defined by items
- Location -> Uses location in the warehouse
- Recounts -> Usable only if cycle counting was done before
- Choose “Filter” if “Filter By” requires:
- Cycle Count Category -> A, B, or C
- Item Category -> Uses item categories defined by items
- Location -> None
- Recounts -> None
NOTE: Once options are chosen preview will be shown in the table below, and “Total Items” under “Batches” will be shown
- Define Batches
- # Batches -> How many batches to create
- Items Per Batch -> How many items are in each batch
- Total Items -> Shows how many items left are available for batches
- Items in the table can be uncheck marked to exclude from created batches
- Entering new numbers into “Batches” parameters will reload the options and remove any manually unchecked marked items
- Click the “Print Batches” option if batches should be printed
- Batches will have an ID number and barcode assigned to them
- Click “Create Batches” to finalize options
View Batches
Once the Batches have been created, you can view/ review them, then select Which you would like to print and note to who you assigned that batch. Once a batch has been counted, you will manually enter the QOH reported and decide if the amount is accepted, or rejected(needing a recount).
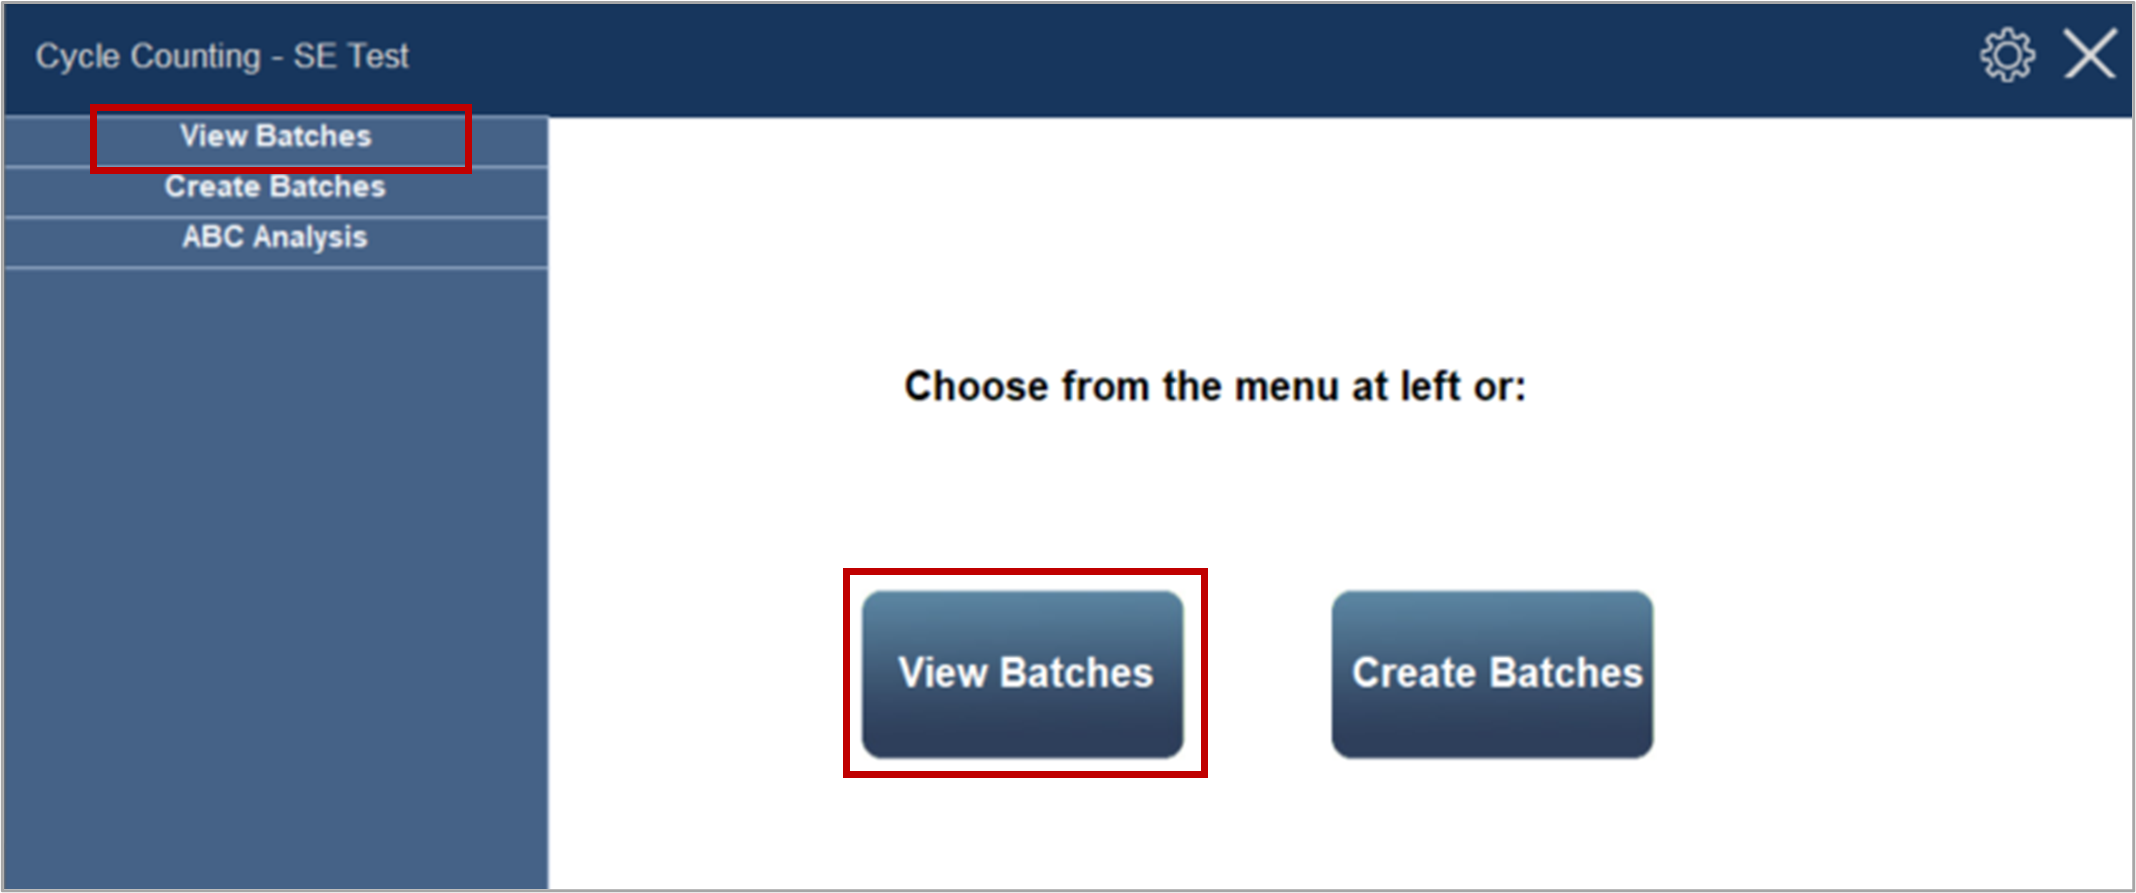
- Open Cycle Counting
- Click “View Batches” on the left-hand sidebar OR the blue “View Batches” button.
- Choose a batch ID from the “Cycle Count Batch ID dropdown.”
- Choose a user from the “User List.”
- In “List Maintenance”, users must be defined as a “Counter.”
- Click “Assign Batch”
- Repeat for all batches
- Use the “Cancel Batch” button if needed.
- Have users count inventory in batches and return it to the warehouse manager.
- Once the inventory has been counted, you will reload the batch based on the number and input the QOH.
- Then you will input the reported QOH, and you can
- Accept the reported number, which, if it is different, will update the QOH in Stone Edge.
- Reject the count, which will have the item marked for the recount.