
Overview
- SEOM provides many standard reports that cover most forms of printed output that is required by a business, such as invoices, packing slips, as well as some business analysis reports. In the event that the user wants to extract different information from the program, or the same information but in a different format, the program provides the Custom Report Maintenance feature to manage reports that are created by the user or a third party for use with SEOM.
- Many of the standard reports also come with several different templates from which the user can choose. It is recommended that the user research the existing templates for selected reports before creating a custom report, which might not be necessary.
- The template that a report uses is controlled by a series of system parameters, such as InvoiceTemplate, PackingSlipTemplate, etc., which are found in the Report parameter group. If a custom report is created, the user will have to type in the name of the desired custom report, as it will not be populated in the drop-down list for the parameter.
- Reports are housed in the local SEOM program file that is installed on each workstation in the complex. When a custom report is created, it only exists in the program file of the workstation where it was developed. To share that new report with the other workstations, the user must export it from the local workstation to the Custom Reports database. The file path can be found on the information screen of the main menu. Once the report has been saved in the Custom Reports database, it can be exported to the other workstation’s program files, so that all users have the same version of the report.
- Even a simple change, like altering the report to print on a specific printer, constitutes the creation of a custom report.
- It is imperative that any changes made to a custom report must be exported to the Custom Reports database, or the changes may be lost during the program upgrade process. Saving the report in the Custom Reports database ensures that the reports will be available to the user in future releases of the program. Depending on the properties of the custom reports and the nature of any changes made to SEOM, the possibility exists that the report may need to be modified to match the changes in the program.
- It is recommended to include your company name (or an acronym/abbreviation) in the titles of any custom reports, e.g. Ajax Sales by Product. This helps distinguish them from the SEOM standard reports, and it will also group them together in the list of reports which makes them easier to locate.
- This article outlines the basic steps to follow to customize reports. For detailed information, refer to the following Microsoft articles:
- Stone Edge Technologies will create custom reports for a fee. Contact the sales department at sales@stoneedge.com for a quote.
Creating or Editing a Custom Report
- Go to the Main Menu.
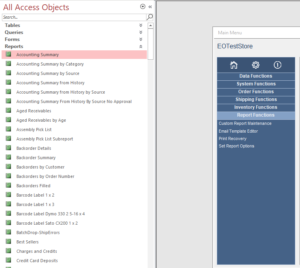
- Press [F11]. The database objects window opens, if the user has access to that screen, which is controlled by the SEOM security system.
- Click on the [Reports] button in the Objects column on the left-hand side of the screen to see the list of reports that are provided with the program.
Creating a Custom Report from one of the SEOM Standard Reports
- Click on the report to be customized.
- Press [Ctrl+C] or right-click and choose [Copy].
- Press [Ctrl+V] or right-click and choose [Paste].
- Enter a file name for the new report when prompted.
- Edit the report in design view, as needed.
- Save the report.
- Go to the “Custom Report Maintenance” screen (Settings -> Report Functions) and export the new report to the Custom Reports.mdb.
- Click the [Add to Custom Reports Menu] button.
- The new report will be listed in the “Reports Menu” (Main Menu -> Run My Reports -> Run My Management Reports).
Building a Custom Report from Scratch
- Click the [New] button and enter a name for the new report.
- Use the report wizard to select the data and layout for the report.
- Save the report.
- Go to the “Custom Report Maintenance” screen (Settings -> Report Functions) and export the new report to the Custom Reports.mdb.
- Click the [Add to Custom Reports Menu] button.
- The new report will be listed in the “Reports Menu” (Main Menu -> Run My Reports -> Run My Management Reports).