
Overview
- Beginning with Enterprise Edition 5.908, SEOM allows an unlimited number of custom fields for customer and product (inventory) records.
- These advanced custom fields are visible on user-defined tab pages accessed via the Inventory or Customer screens. The process is basically the same for both types of advanced custom fields.
- Advanced Custom Fields are presently only for data storage and cannot be used as search criteria.
- It is not possible to have more than one workstation/user editing the advanced custom fields at the same time. If that is attempted, the program will present a message stating that someone else is currently using this feature, and the user should try again later.
Configure SEOM to Use Advanced Custom Fields
Depending on the type of advanced custom fields to be created:
- set system parameter, UseAdvancedCustomCustomerFields to TRUE
- set system parameter, UseAdvancedCustomInventoryFields to TRUE
The default setting of each parameter is False. For assistance with setting system parameters, refer to Knowledge Base topic, Set System Parameters.
Description of the Screen
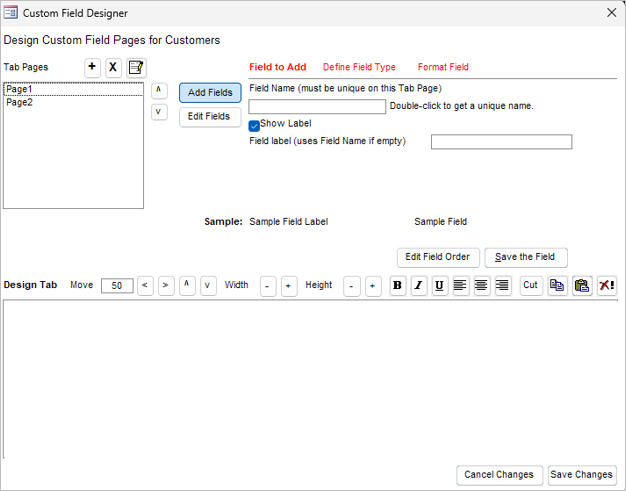
Tab Pages List Box

- + -> displays a list of previously created Advanced Custom Fields Tab pages
- click to add a new tab page
- X -> click to delete the selected tab page
- Notebook -> click to edit the name of a tab page
- ^ -> click this arrow to move the selected tab up in the list of pages
- v -> click this arrow to move the selected tab down in the list of pages
Field to Add Tab
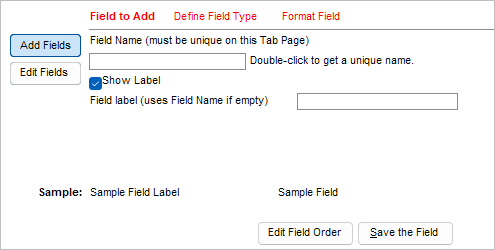
Add Fields Button
- click to add a new field to the selected tab page
- specify the Field Name and optionally a Field Label
Edit Fields Button
- click this button to make changes to the selected field on the selected tab page
Field Name Field
- enter a unique name for the field or double-click in this field to get a unique field name after selecting a Field Type
Show Label Check Box
- select or clear this box to activate or deactivate the Field Label field
- if no Field Label is provided, the program uses the Field Name as its label
Field Label Field
- enter the value to use as the label of the field on the tab page
Edit Field Order Button
Save the Field Button
- click this button to create the new custom field
- it then appears in the Design Tab section of the screen
Design Tab
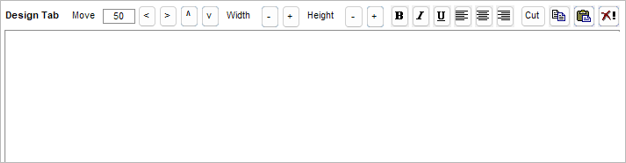
- the Move field contains a value, or step size, that dictates the distance the field is moved when the directional arrows are clicked
- the default value of the Move field is 50, but you can change by over-typing it
- hold the arrow button down for continual movement of the field until it is where you want it to be located
- the Width and Height + or – buttons increase or decrease the height or width of the selected field
- The other buttons in the design section of the screen allow you to:
- Change the text type of the selected text box to Bold, Italics, and Underline the text
- Left, Center, or Right Justify the text within the text box
- Cut, Copy, Paste, and Delete the selected object in the Design tab page section
Create a Custom Tab Page and Custom Field
- Go to the Main Menu>Settings>Data Functions>Setup Custom Fields and from the Setup custom fields for drop-down, select either Customers or Products.
- Click the Setup Advanced Custom Fields link.
- The Custom Field Designer window opens, and the title reflects the kind of custom field being created (customer or product). In this example, a custom customer field is being created:
- Click + to create the custom Tab Page on which the custom field is displayed.
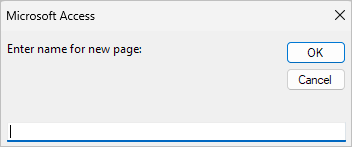
- Enter a meaningful name for the Tab Page and click OK. The name of the new tab appears under the Tab Pages heading.
- Click the Add Fields button to add a custom field to the new Tab Page.
- Enter a name for the custom field in Field Name. In the future, to add another custom field, double-click in this field and the program proposes a unique name for the field.
- Select the Show Label check box to use a value other than the field name as the field label.
- Enter the label in Field Label or the program uses the field name as the label. Refer to the Sample: section of the screen.
- Select the Define Field Type tab and select the Data Type of the field.
- Select a value from the Display Type list. The choices change, depending on the data type.
- If a Data Type of “Text” is selected, the program allows the user to specify the Maximum field Length by over-typing the default value of 255. If a Data Type of Date is selected, specify the Date Format.
- If a Data Type of “Grid” is selected, it is possible to define up to 10 columns. Assign a Heading and Data Type to each column. Optionally, specify a field Width and Date Format as needed.
- If a Data Type of “Integer” is selected, you have the choice of Text Box, Combo Box or List Box for its Display Type.
- If the Display Type of Combo box or List Box is chosen, specify a List Source (Unique List, Shared List, or SQL Statement). Refer to the Configuring Custom Fields Knowledge Base article for more information about creating lists. The View/Edit List button becomes visible as well.
- Select the Format Field Tab to choose the Font Name and Font Size for the custom field and its label.
- Click Save the Field and the new field is displayed in the Design Tab section of the screen.
- Use the buttons in the Design Tab to further customize your fields.
- When satisfied with the changes made to the new field or fields, click Save Changes.
- Click the X in the upper right-hand corner to close the screen.
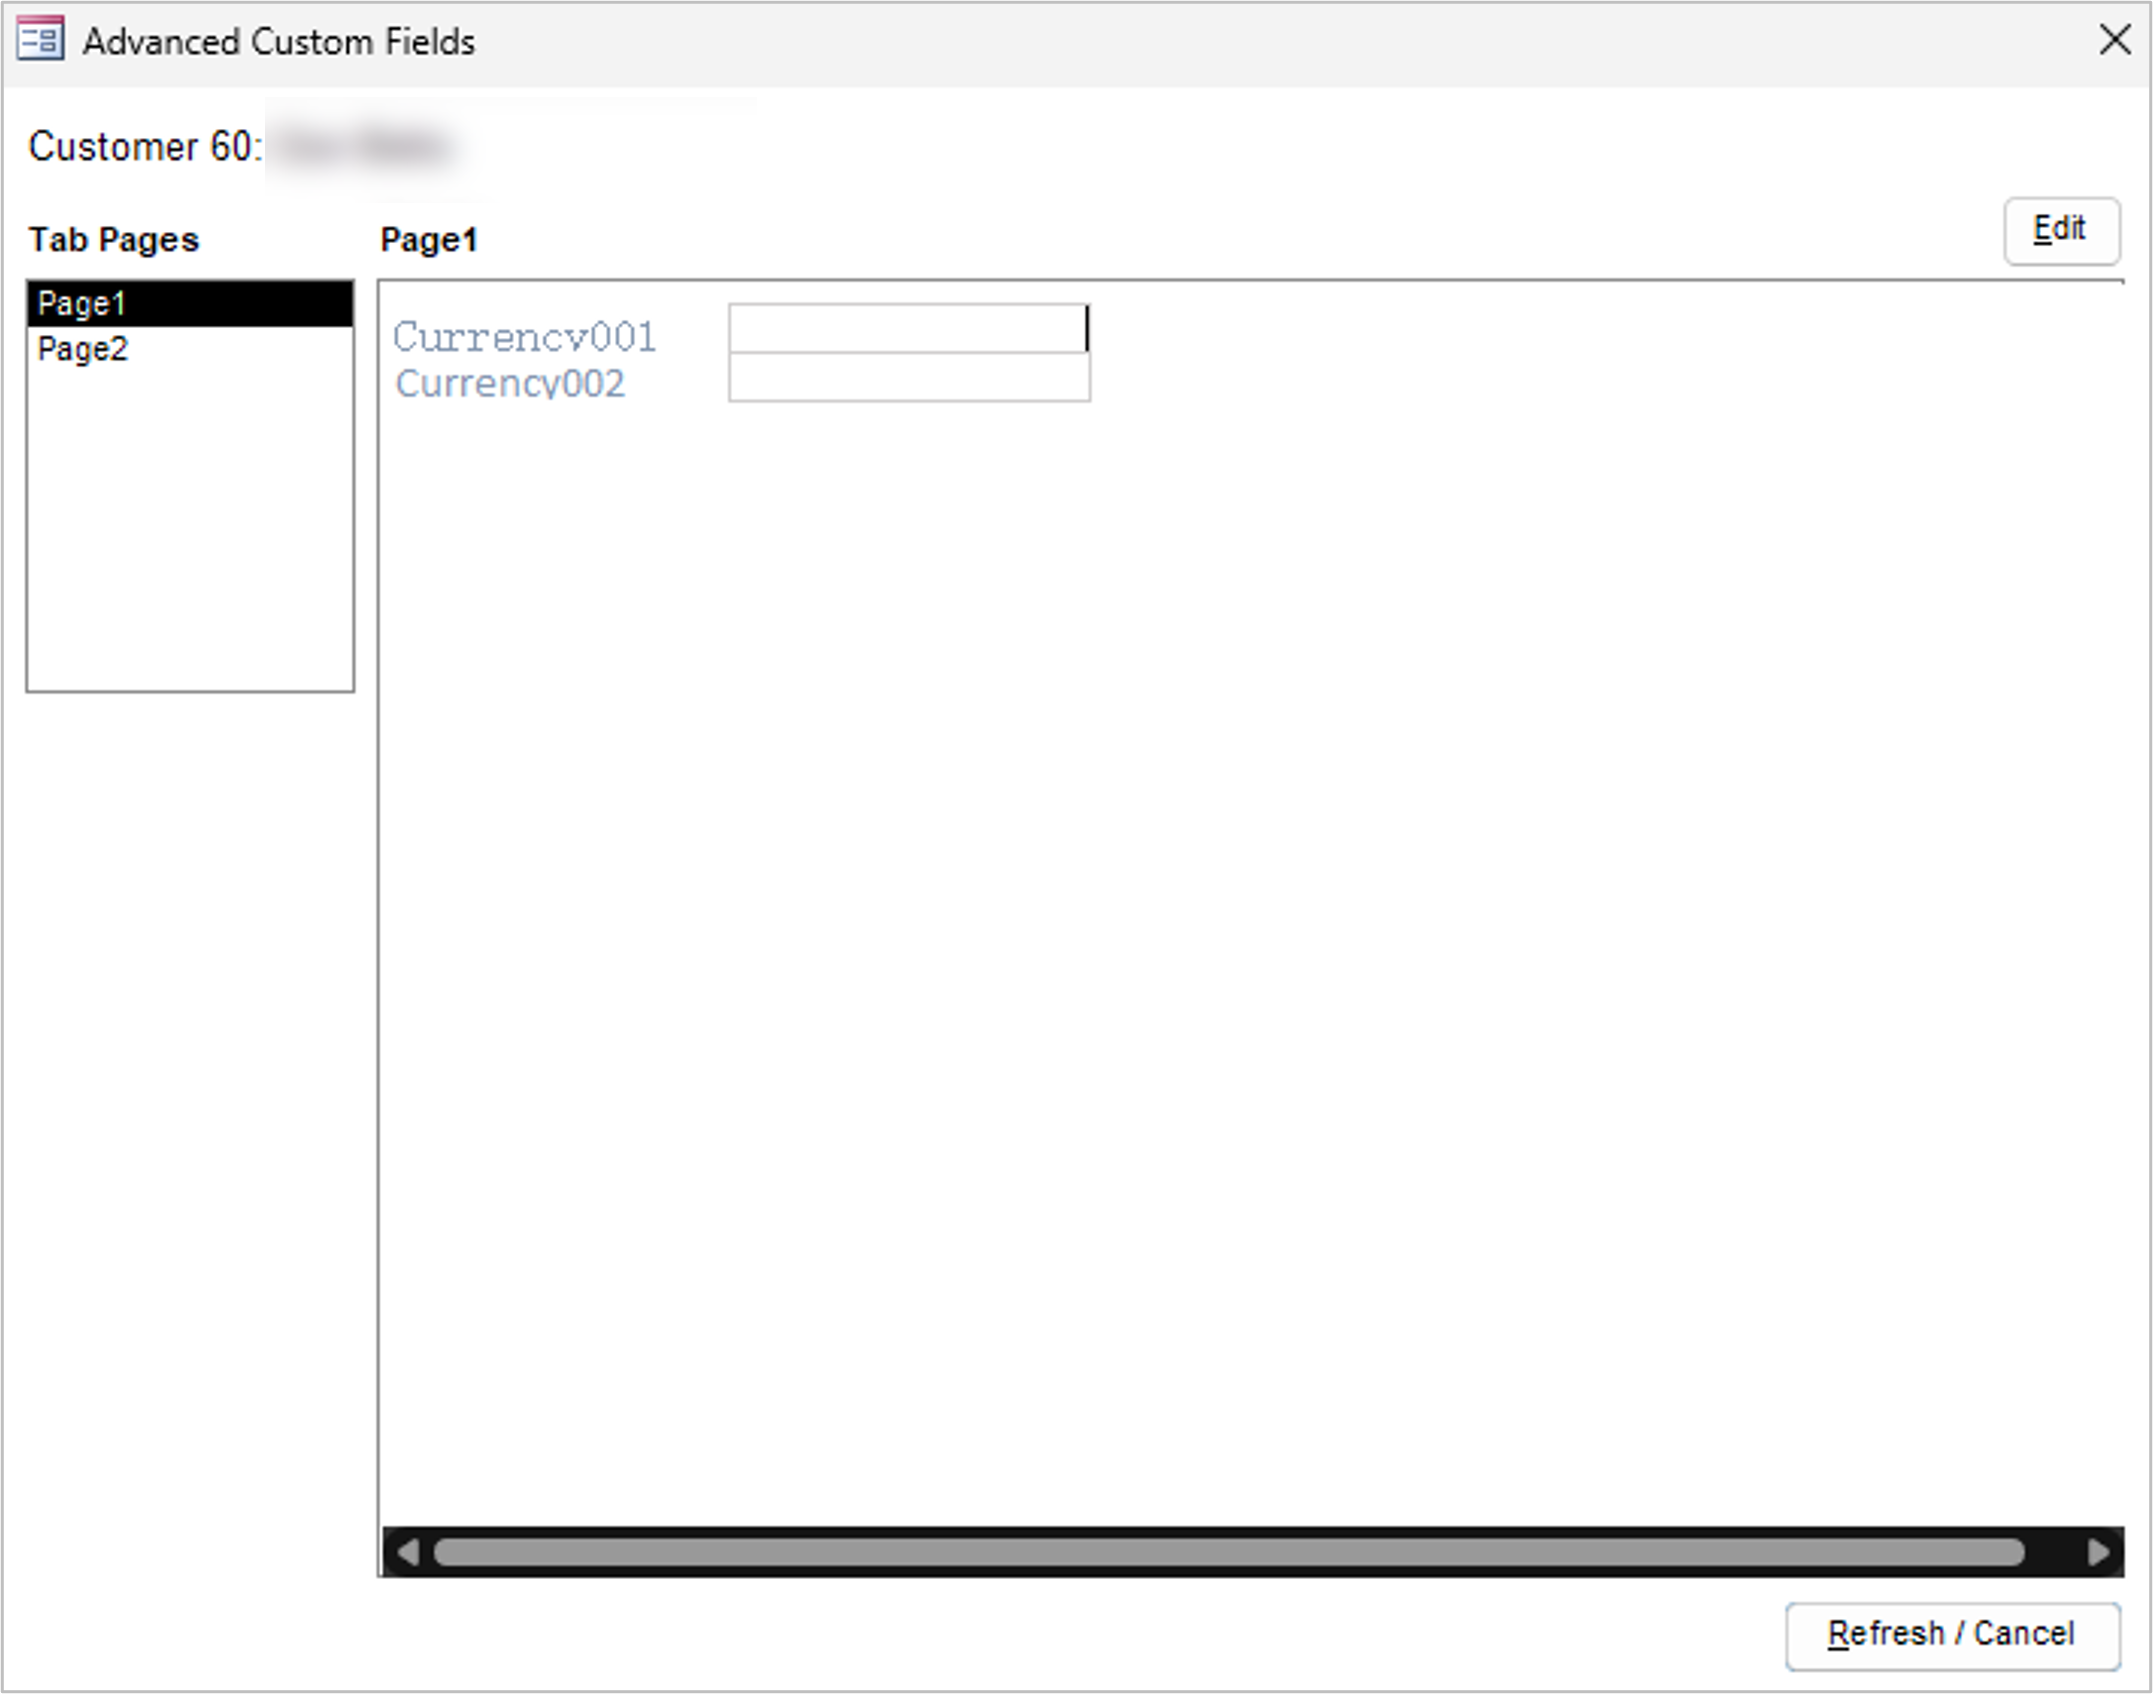
Viewing Advanced Custom Fields
- Go to Main Menu > Manage My Customers> View and Manage My Customers (or Main Menu > Manage My Inventory >View and Manage My Inventory) and click the Custom Fields tab.
- Click View Advanced Custom Fields to view the Custom Tab Pages and their fields:
Editing an Existing Advanced Custom Field
- Go to Main Menu > Settings > Data Functions > Setup Custom Fields > and select either Customers or Products from the Setup custom fields for drop-down list.
- Select the appropriate page from the Tab Pages list.
- Click Edit Fields.
- Then select the field to be edited from the list of fields in the Design Tab section of the screen and make the necessary changes to the field type or format.
- Click Save the Field.
- Click Save Changes.