
Overview
- Imported directly from the website.
- Order Information
- Inventory Records
- Customer Records
- Custom order fields CANNOT be imported from the website.
- Manual Inventory Synchronization is supported in both directions (Get/Send).
- Real-time Inventory Synchronization is supported.
- Order Status Updates are supported.
Setting up Shopping Cart
Configuring CV3
Admin Portal Login: https://store.commercev3.com/ShowView/login/1
- Login to the CV3 admin account.
- Click Store connecting to Stone Edge from the “My Stores” list.
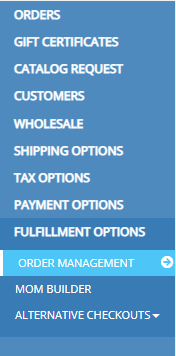
- Click “Orders” at the top of the page.

- Click “Fulfillment Options” on the left-hand side list.
- Click “Order Management.”
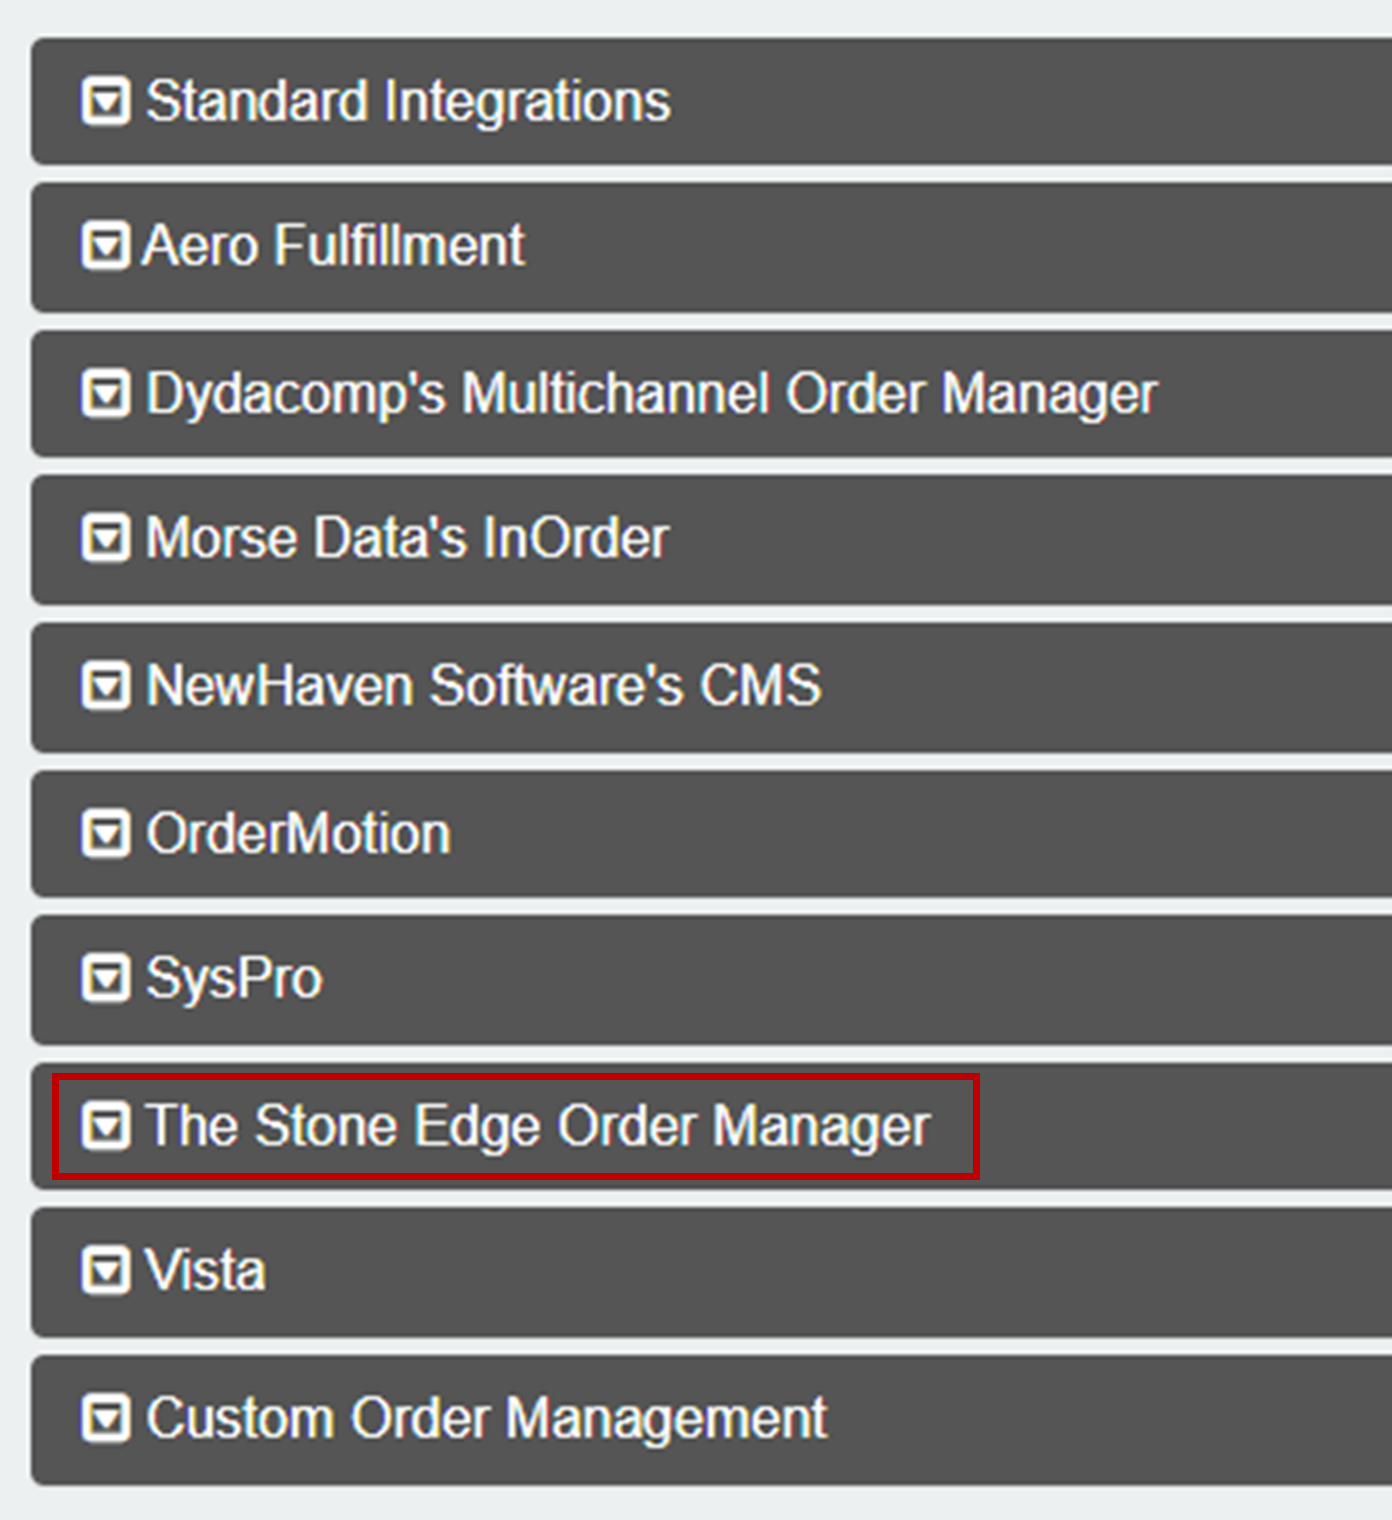
- Click “The Stone Edge Order Manager” to expand the tab.
- Set Options:
- Enable = Yes
- Export Promo Code as Coupon = Yes
- Export Discount Amount with Coupon = Yes
- Export Customer Number in Custom Checkout Field = Yes
- Export Customer Number as WebCustomerID for Orders and WebID for Customer Exports = Yes
- Send Shipping as Billing Address for PayPal Express = Yes
- Sort Products in Order Exports by = SKU
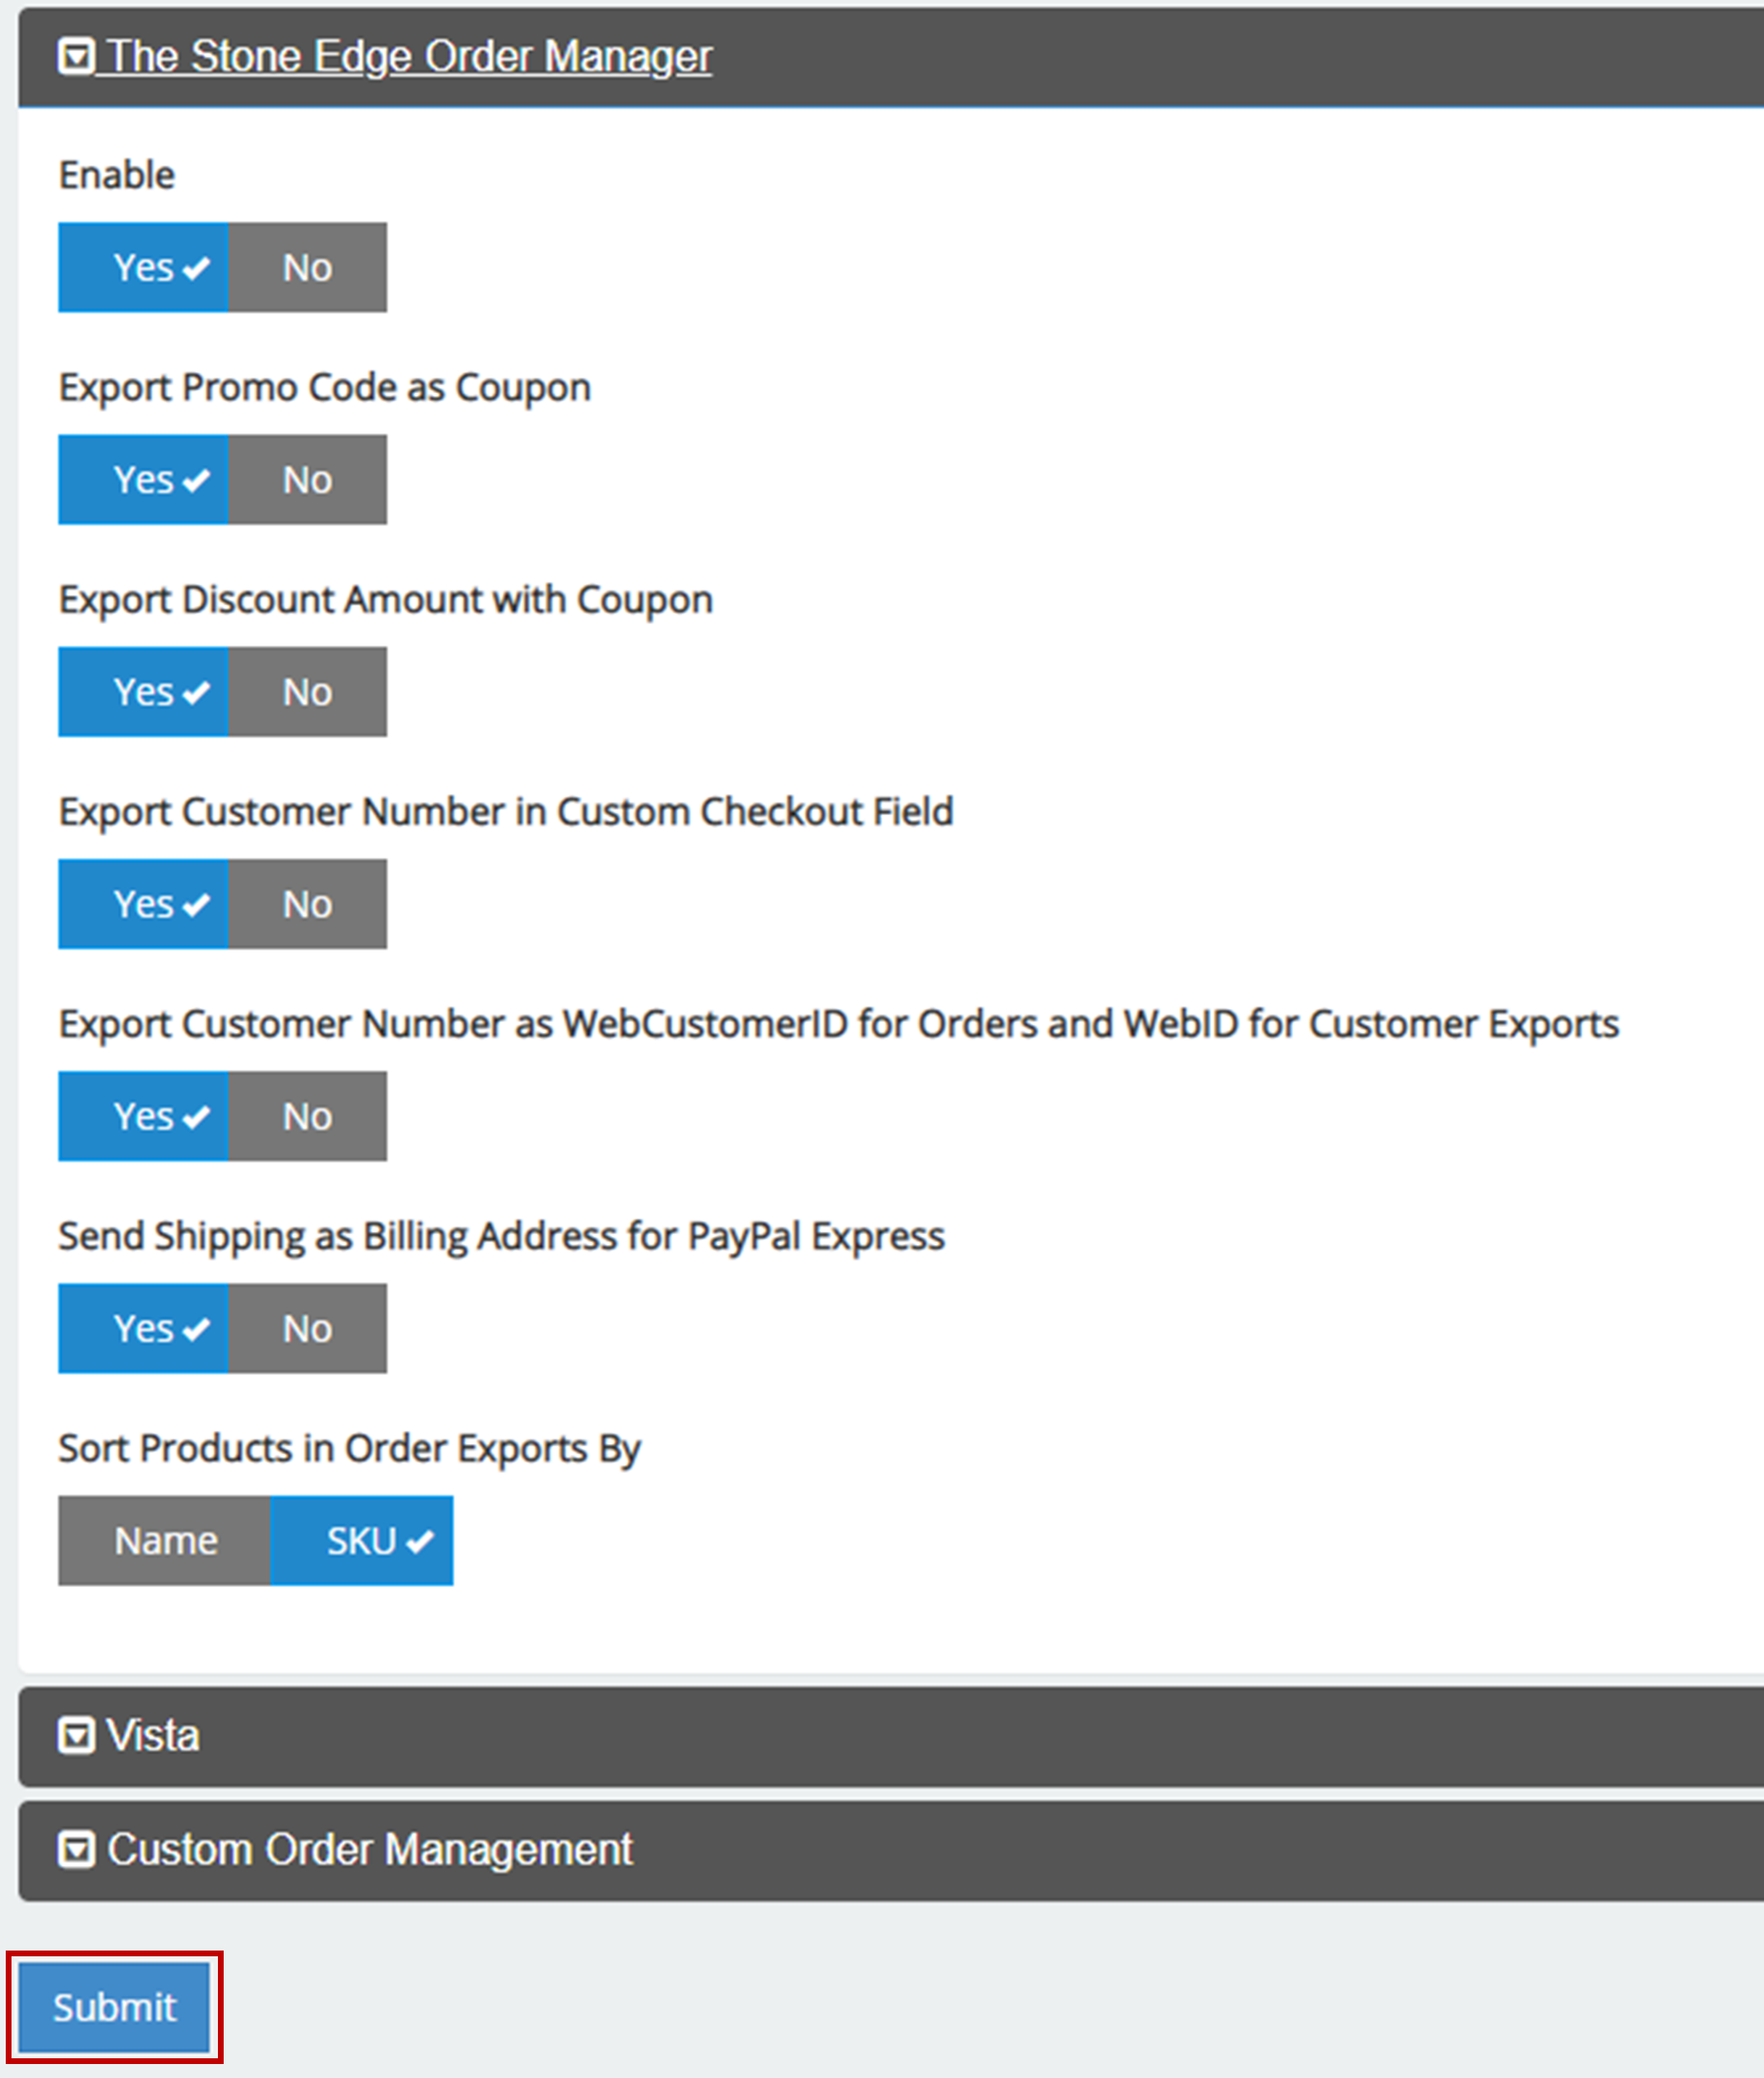
- Click “Submit” at the bottom of the page.
Configuring Stone Edge
- Main Menu -> Gear Icon (Settings)
- System Functions -> Shopping Carts
- Click “Add” in the top-right corner.
- Define shopping cart;
- Store Name -> Something memorable or the store name.
- Cart Type = CommerceV3
- Cart ID/Username -> username used to sign in to the CV3 admin portal.
- Cart Password -> password used to sign into the CV3 admin portal.
- Store Code = CommerceV3
- Script URL = store.STORENAME.com/services/ordermanager/service.php
NOTE: Change STORE NAME to URL for store website.- For test environment -> Store.CommerceV3.com/services/ordermanager/service.php.
- Synchronize inventory -> Check to allow syncing of inventory
NOTE: Check the Inventory Sync section below for further setup. - Suppress Stone Edge emails to Marketplace -> Check if you would not like to send emails to customers when processing orders in Stone Edge.
- Active -> Check to make the cart functional.
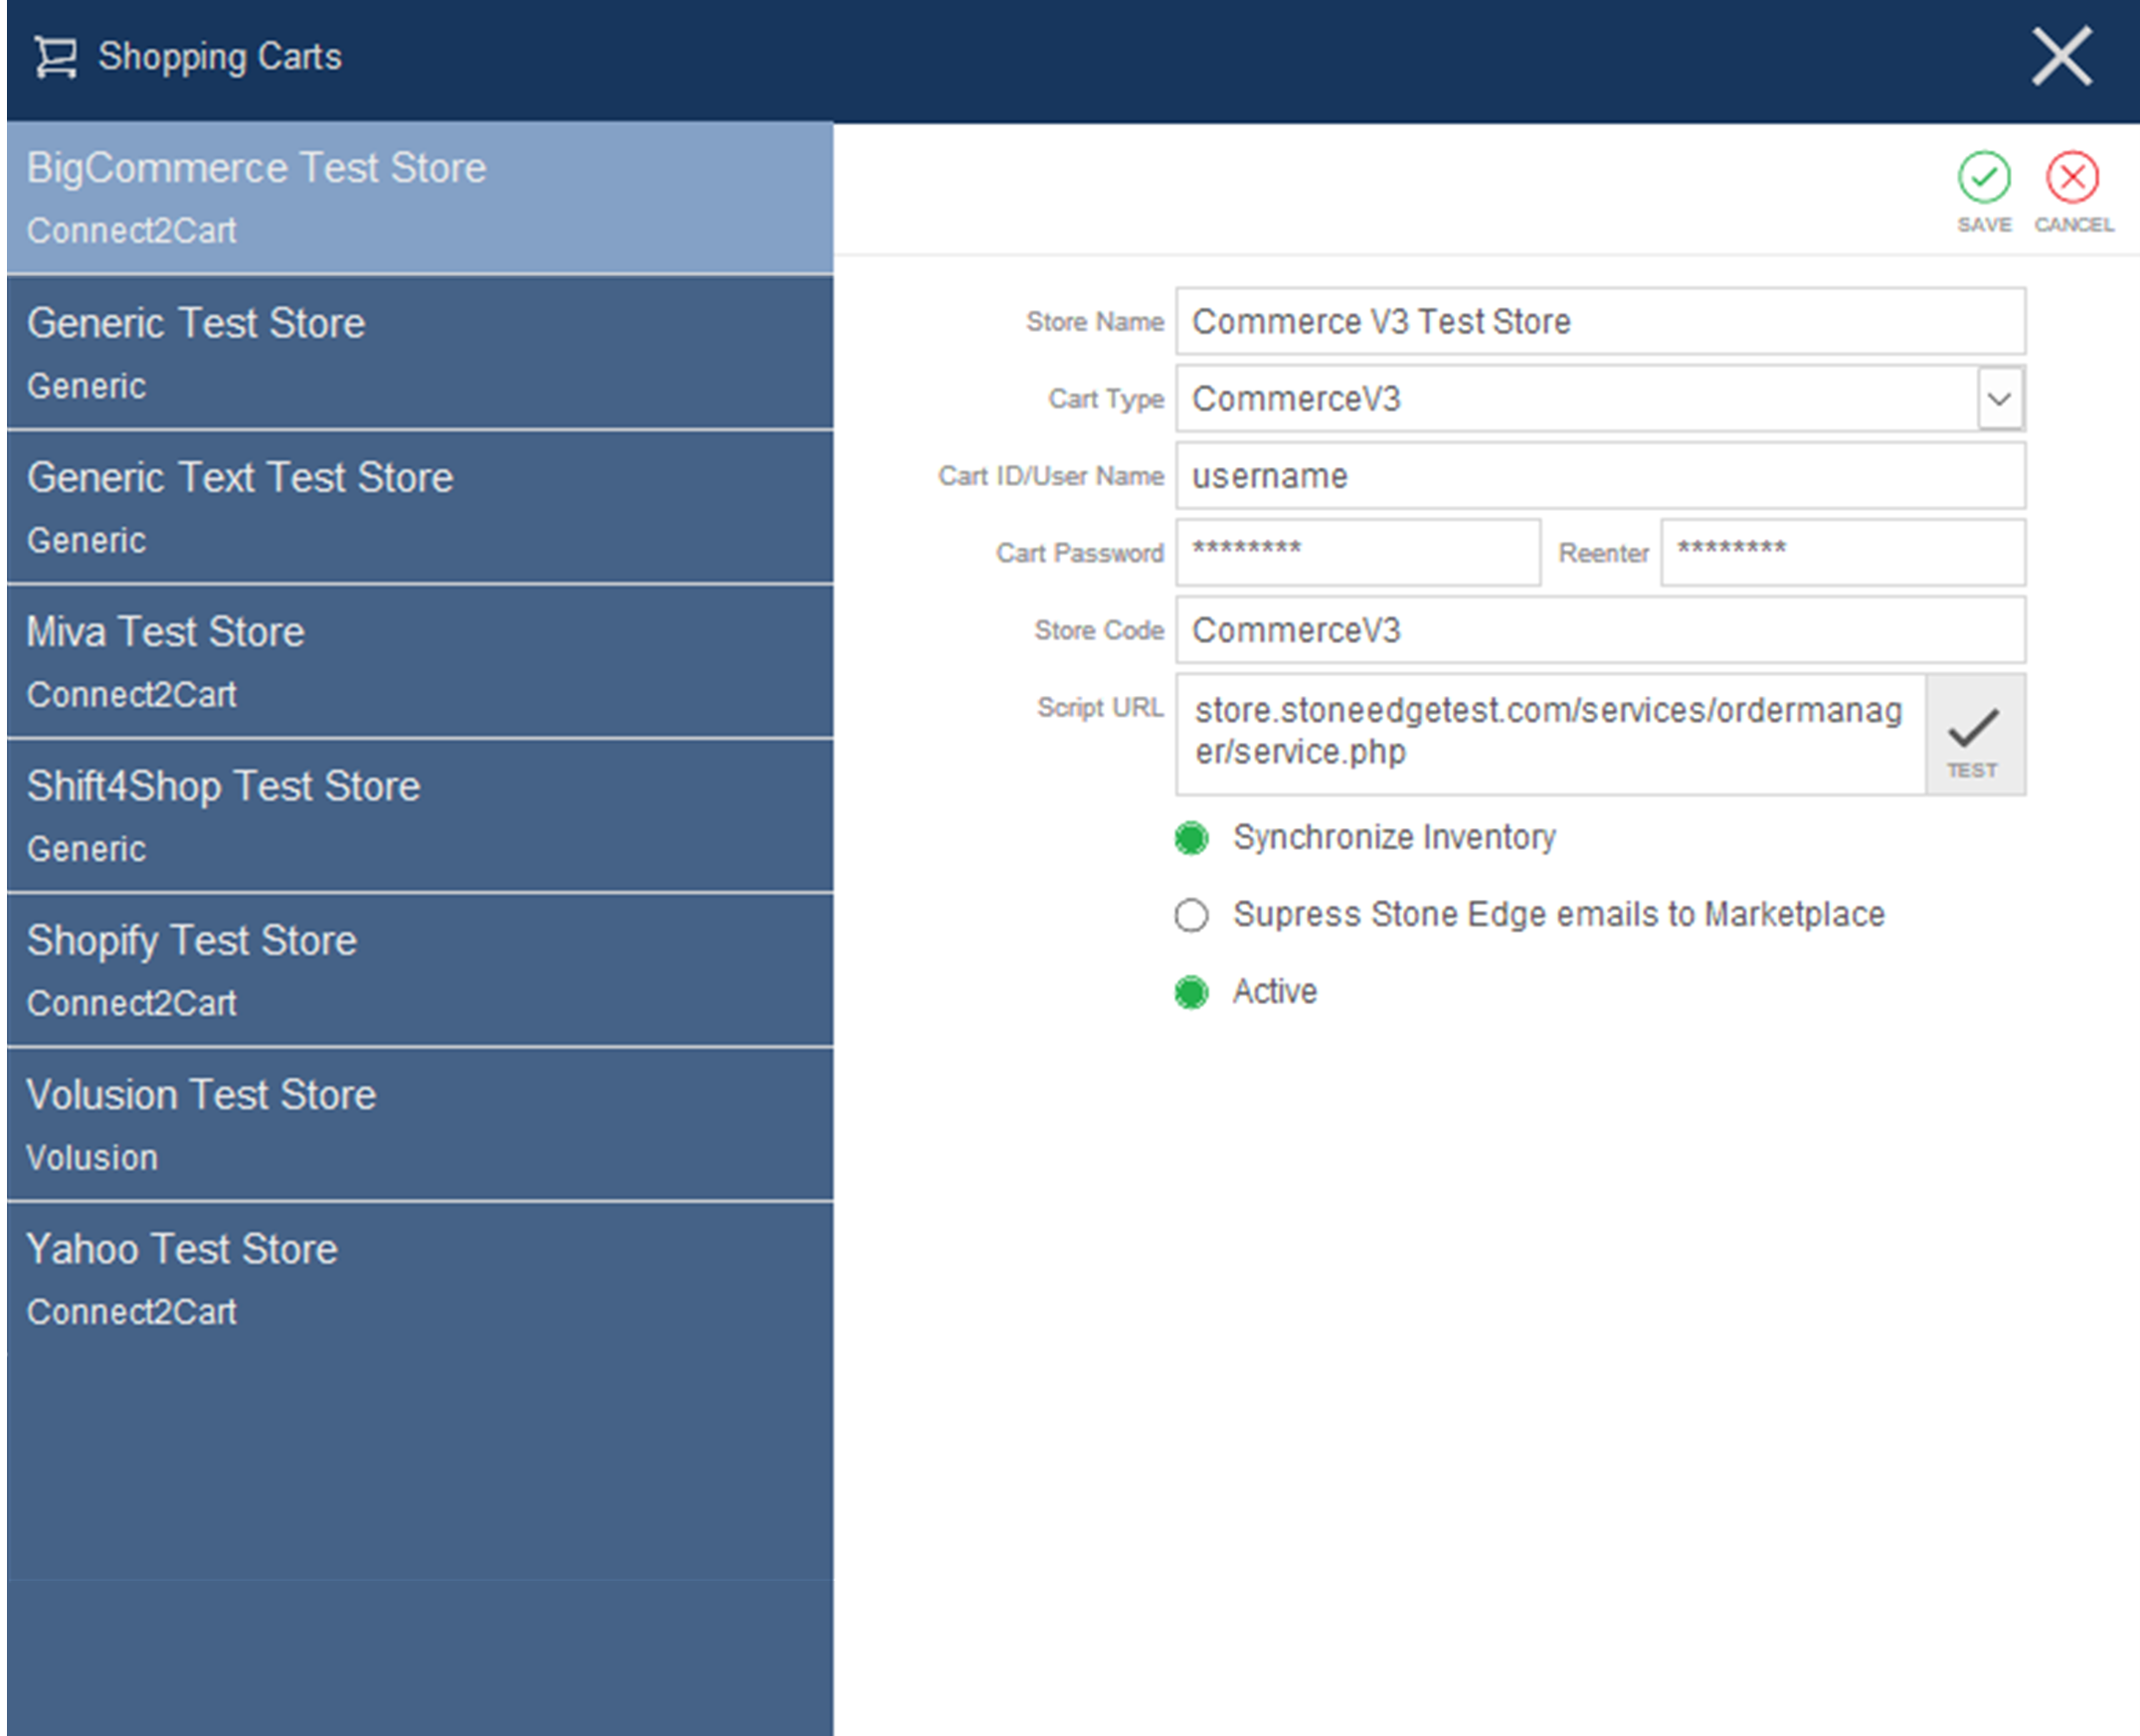
- Click “Save” in the upper right-hand corner.
- The store will now be listed! (numeric-alpha order).
Other Features
Order Status Updates Setup
Note: Click “Save” after any parameters have been changed.
- Main Menu -> Gear Icon (Settings).
- System Functions -> Set System Parameters.
- Parameter Group = Program
- Parameter = UseStatusUpdates -> True if using Status Updates.
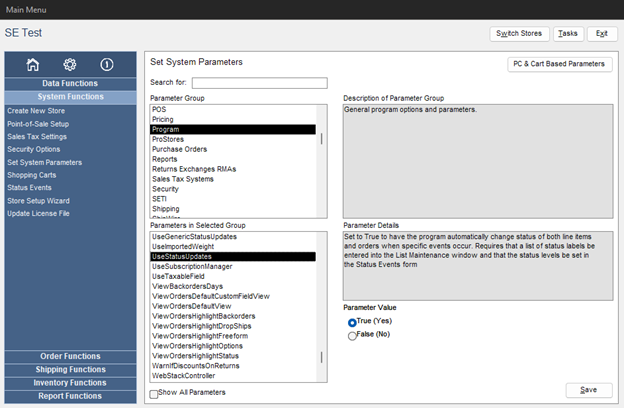
- Parameter = UseStatusUpdates -> True if using Status Updates.
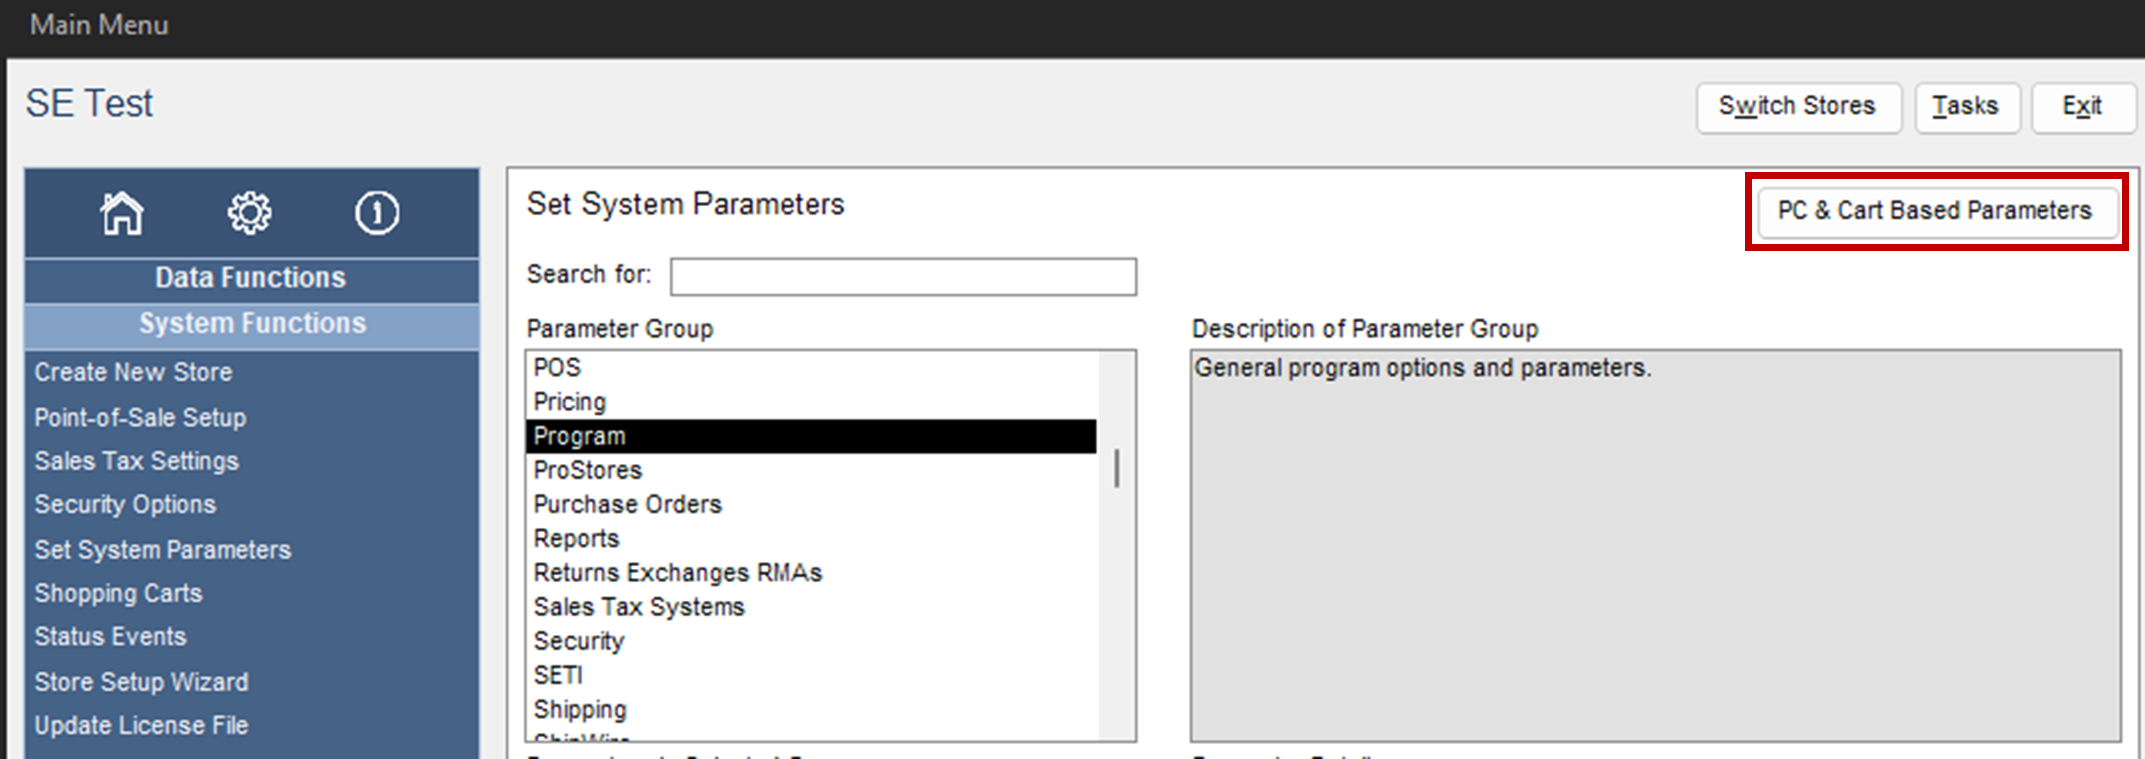
- Click “PC & Cart Based Parameters” in the upper right-hand corner.
- Click “Shopping Cart” at the top.
- Click the shopping cart name for the CV3 cart.
- Parameter Group = Program.
- Parameter = UseGenericStatusUpdates -> True if using Status Updates.
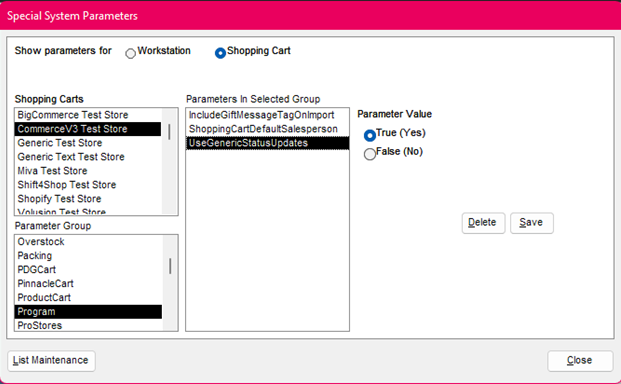
- Parameter = UseGenericStatusUpdates -> True if using Status Updates.
- Click “Close”
- System Functions -> Status Events
- Click “Notify Cart” next to Status Events to be used
NOTE: Do not change the defaults for the Item Status and Order Status columns!

Inventory Synchronization
Note: Click “Save” after any parameters have been changed.
- Main Menu -> Gear Icon (Settings)
- System Functions -> Set System Parameters.
- Parameter Group = Program
- Parameter = SynchQOH -> True if using real-time inventory synch.
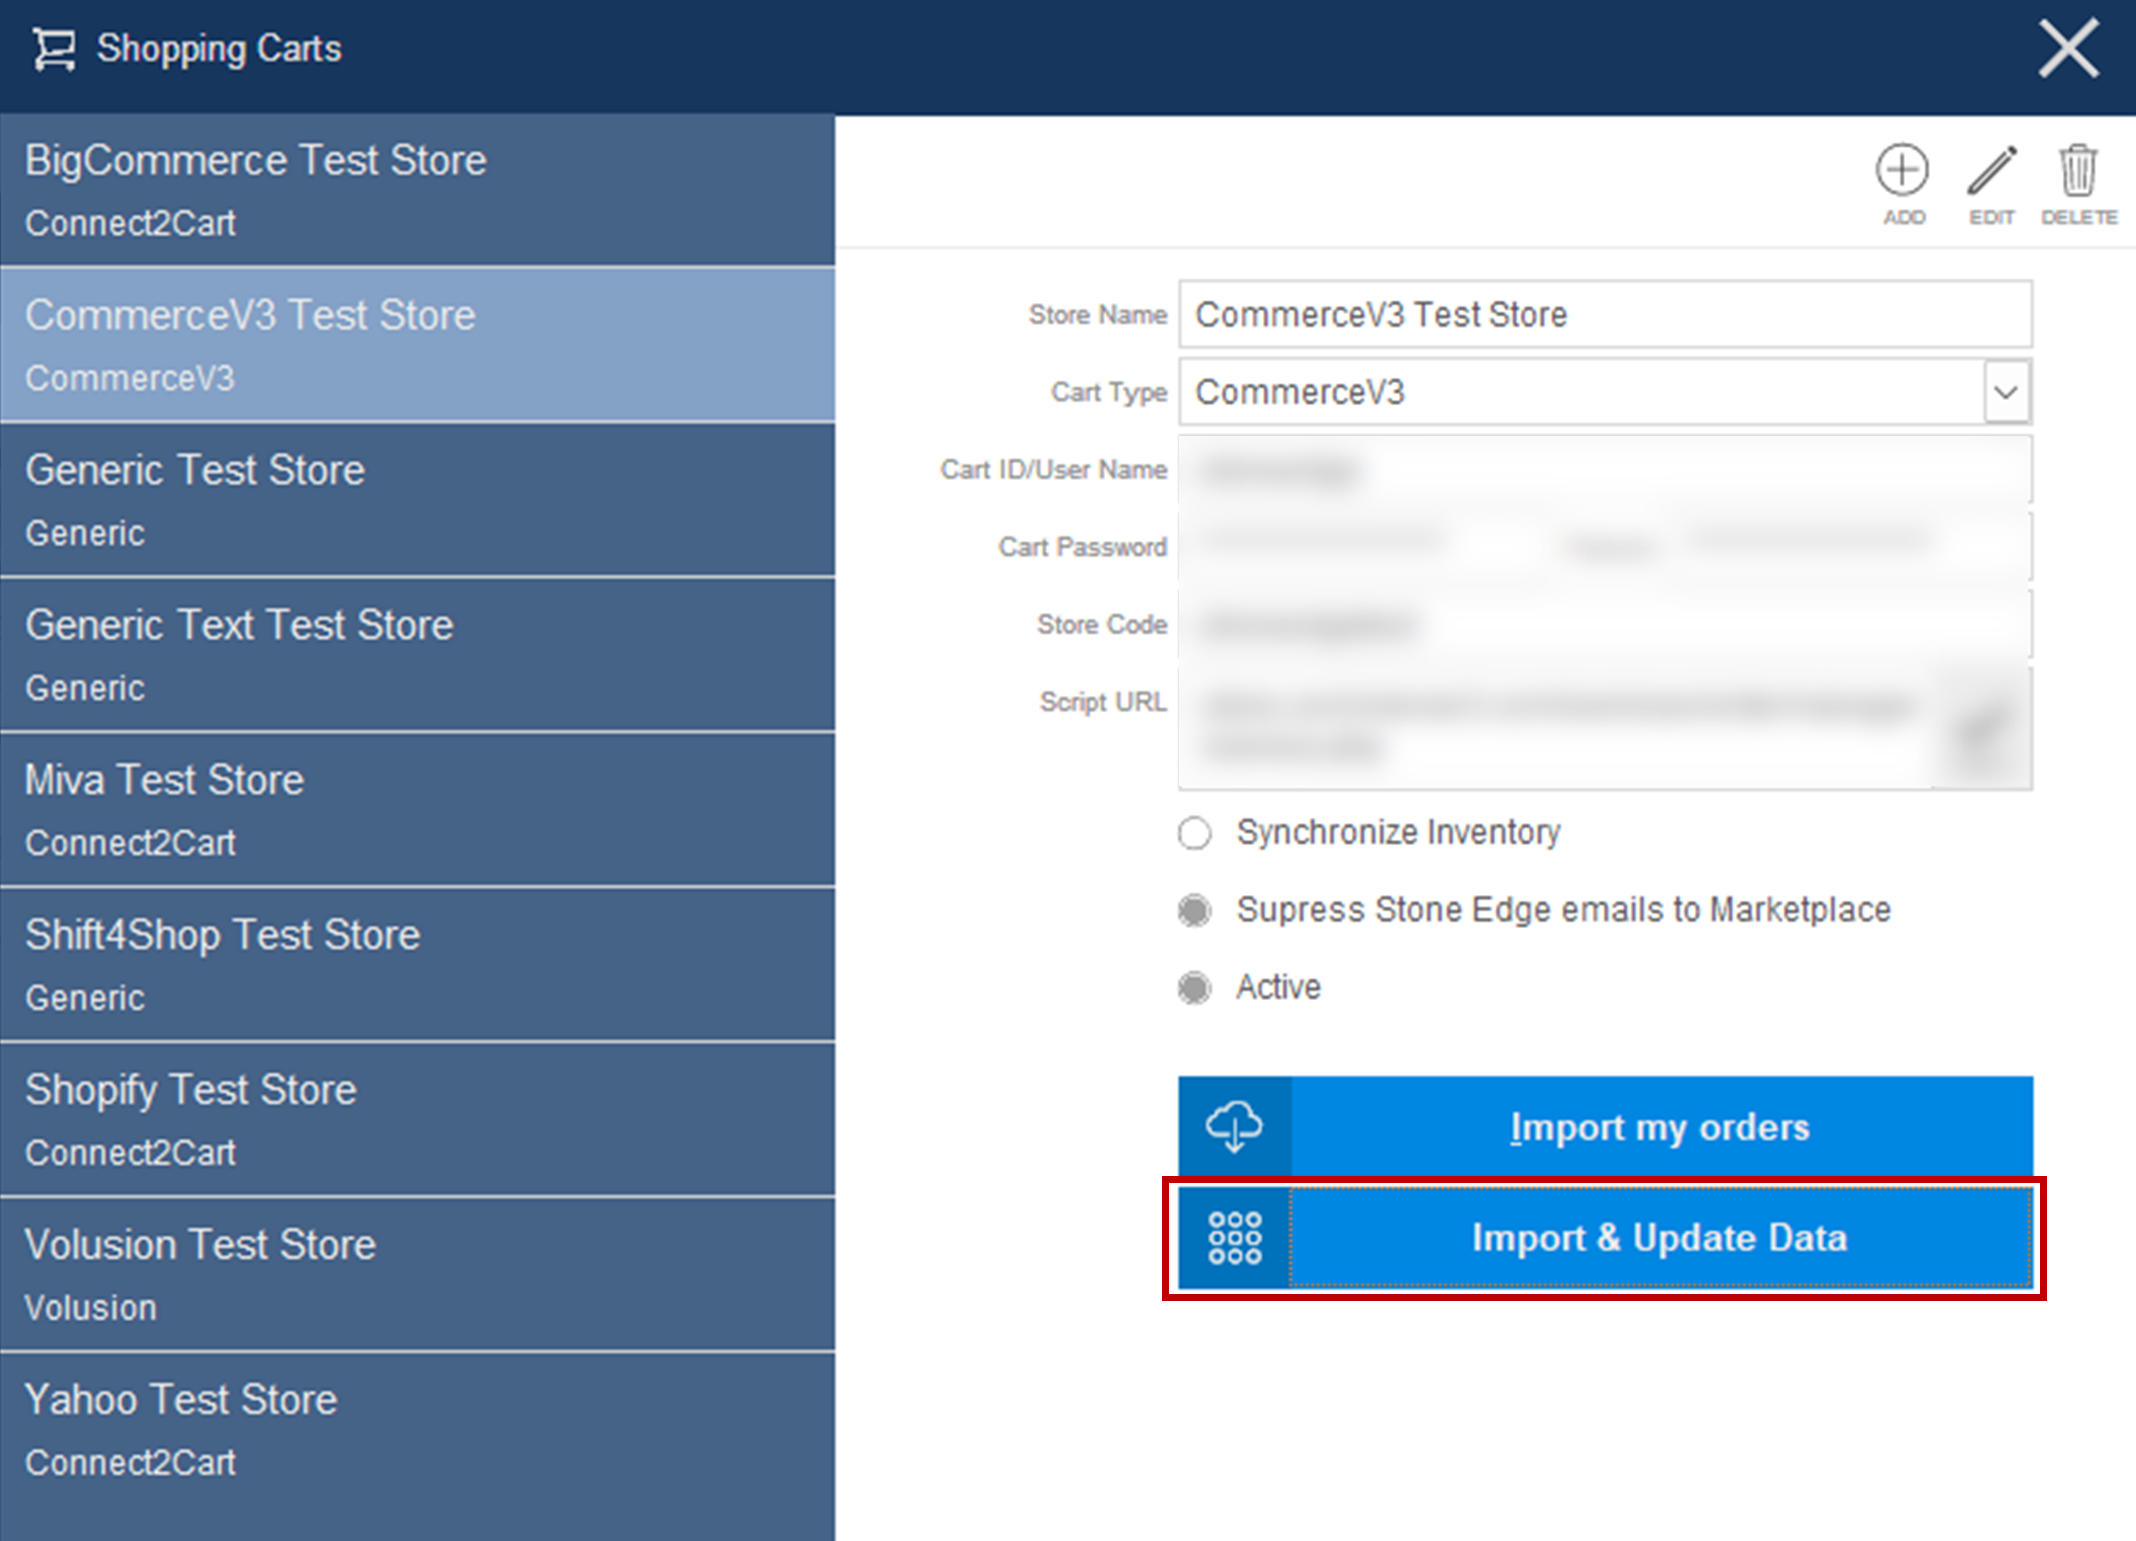
- System Functions -> Shopping Carts.
- Click the shopping cart name for the CV3 cart.
- Click the “Import & Updater Data” button.
- Click “Get QOH for New Products”
- This can take time, so do it outside business hours.
- Click “Send QOH to Website” if Stone Edge is more accurate than the website.
- The “Include QOH for…” and “Create Records for…” options are selected.
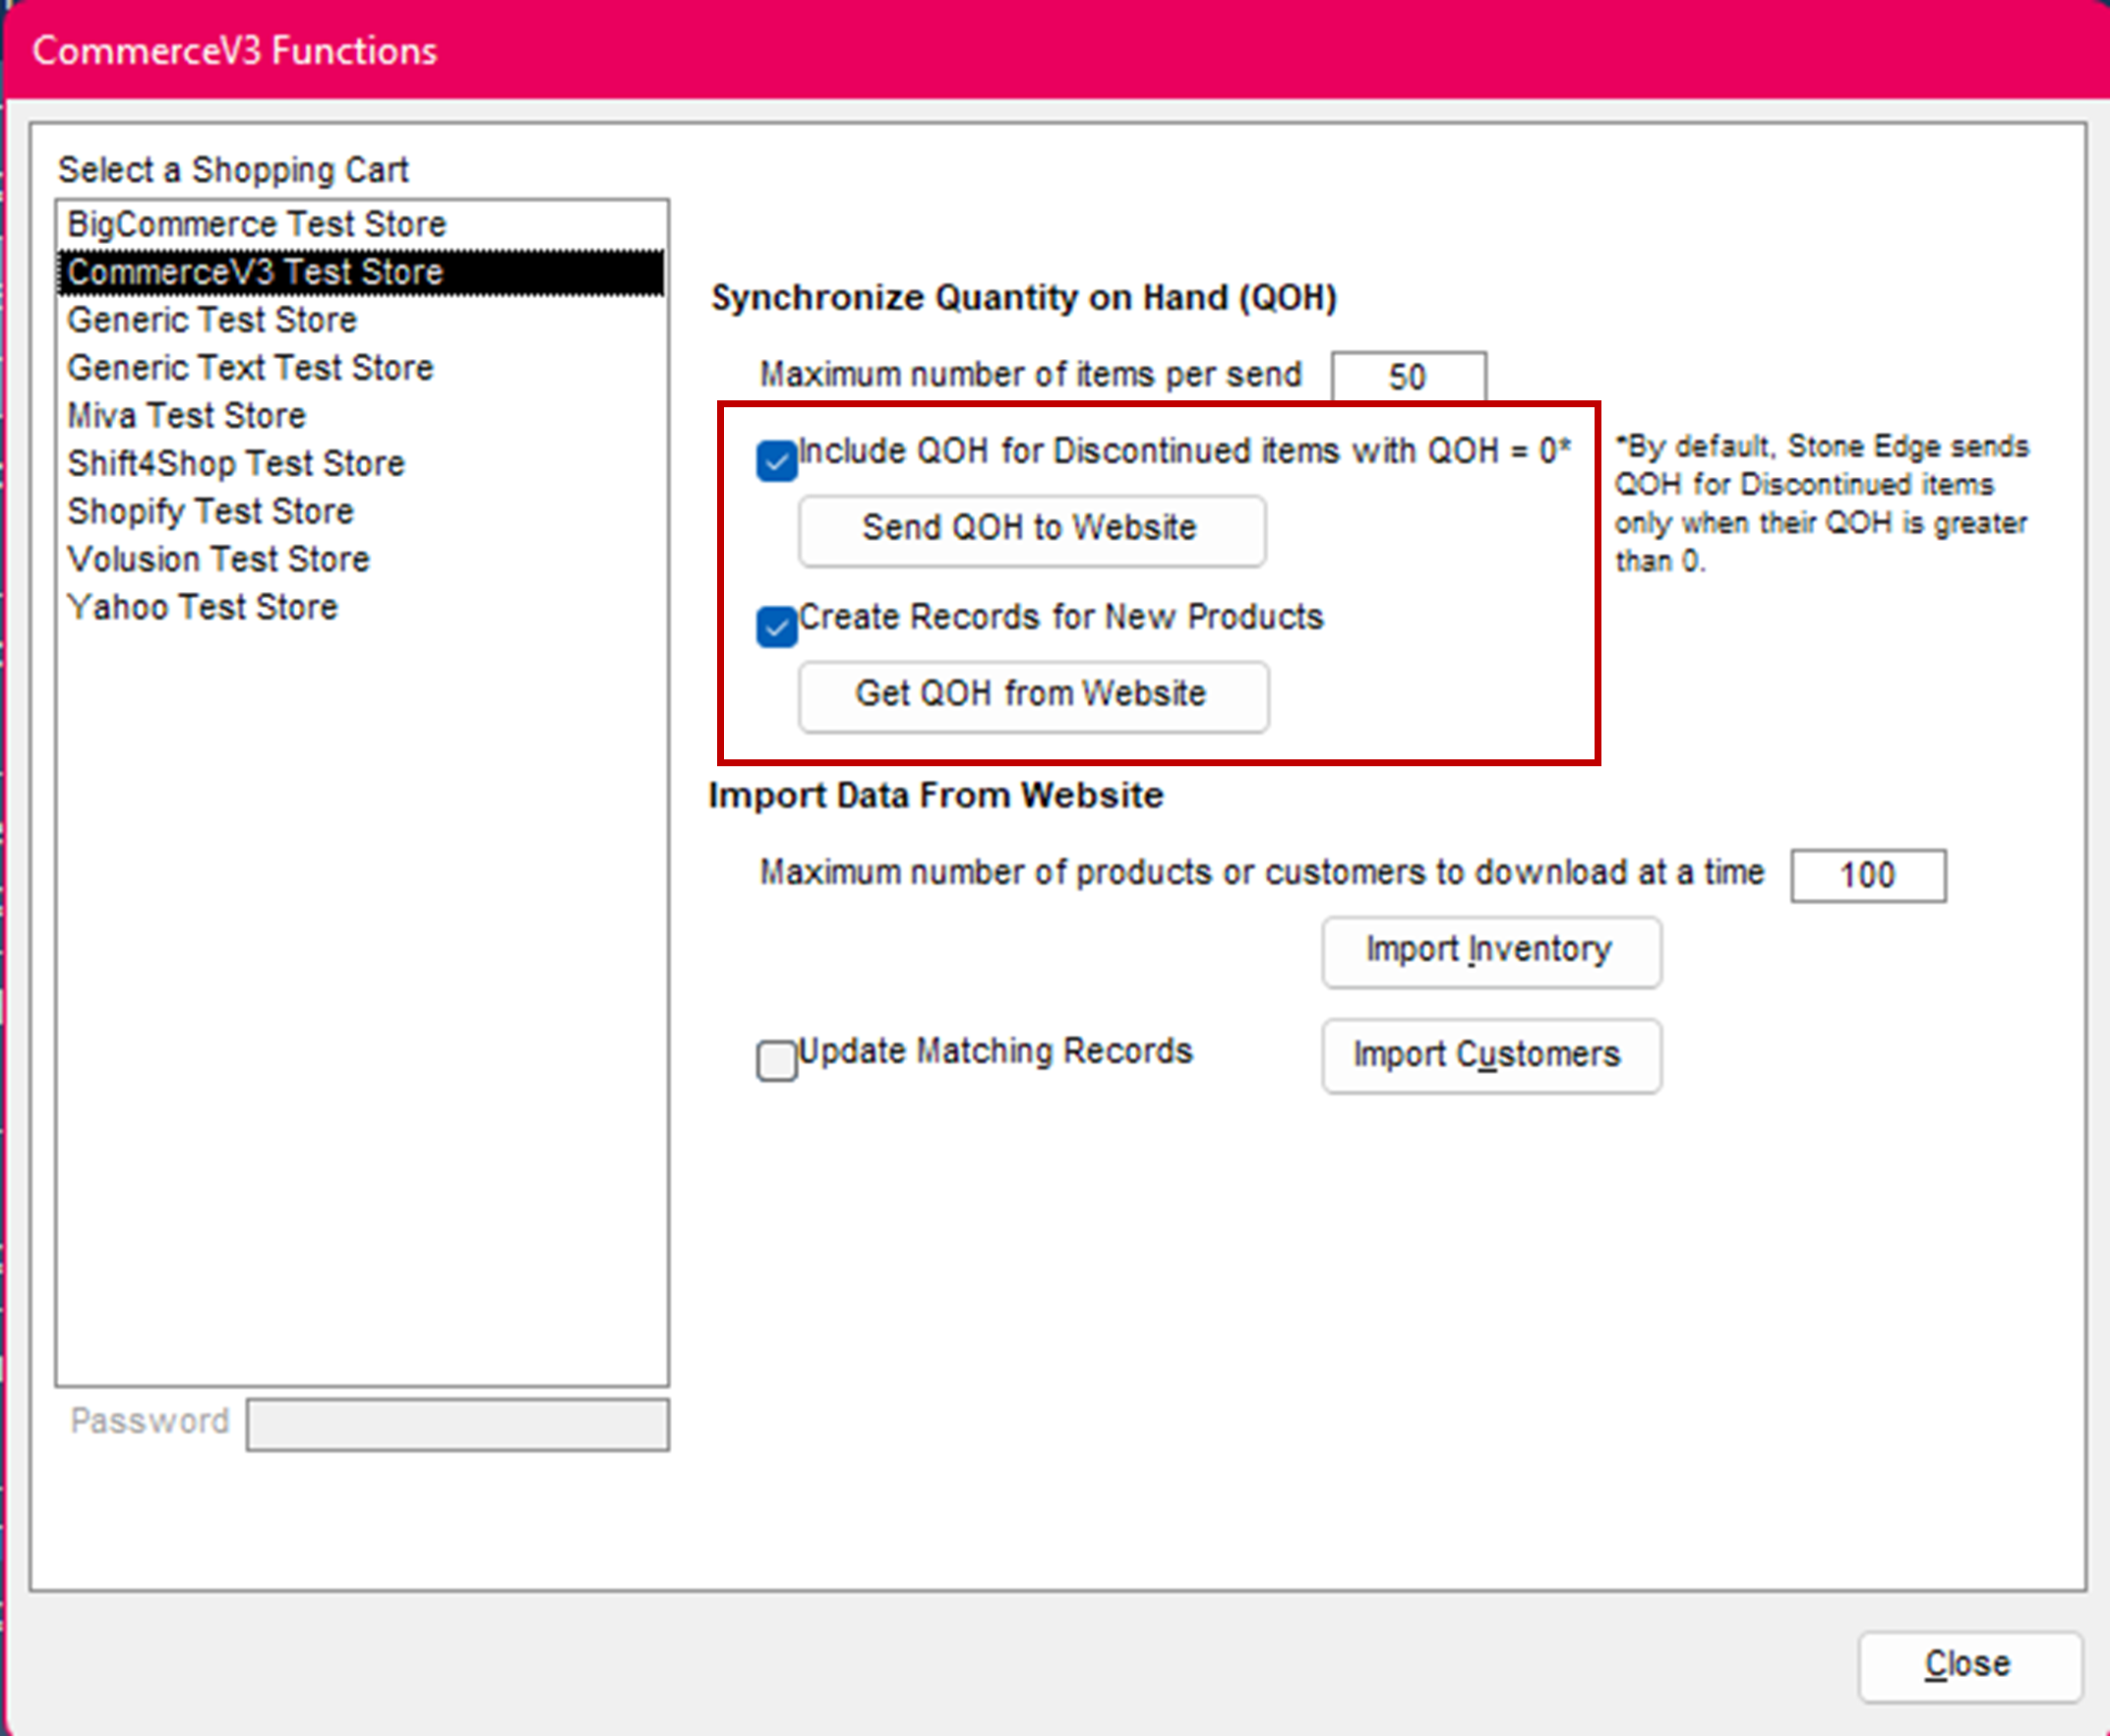
- Click “Close”
- Click Ð in the top-right corner
Refer to this Knowledge Base document on How To Import.