
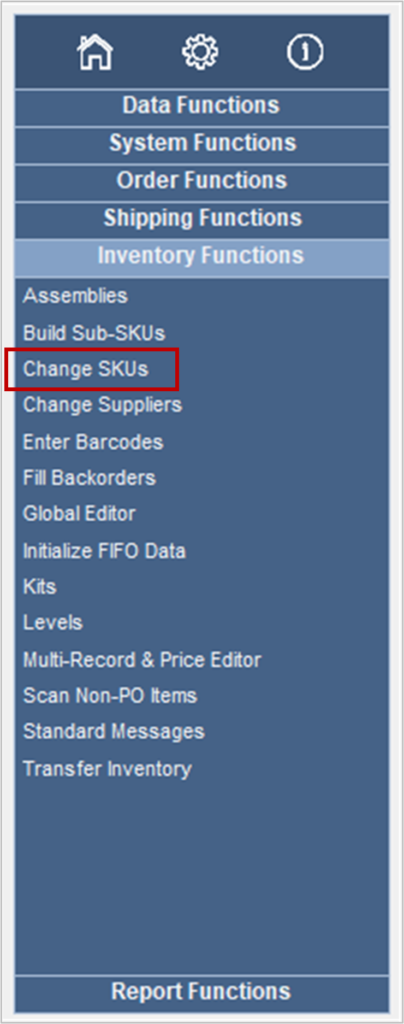
Navigation
- Main Menu -> Gear Icon (Settings)
- Inventory Functions -> Change SKUs
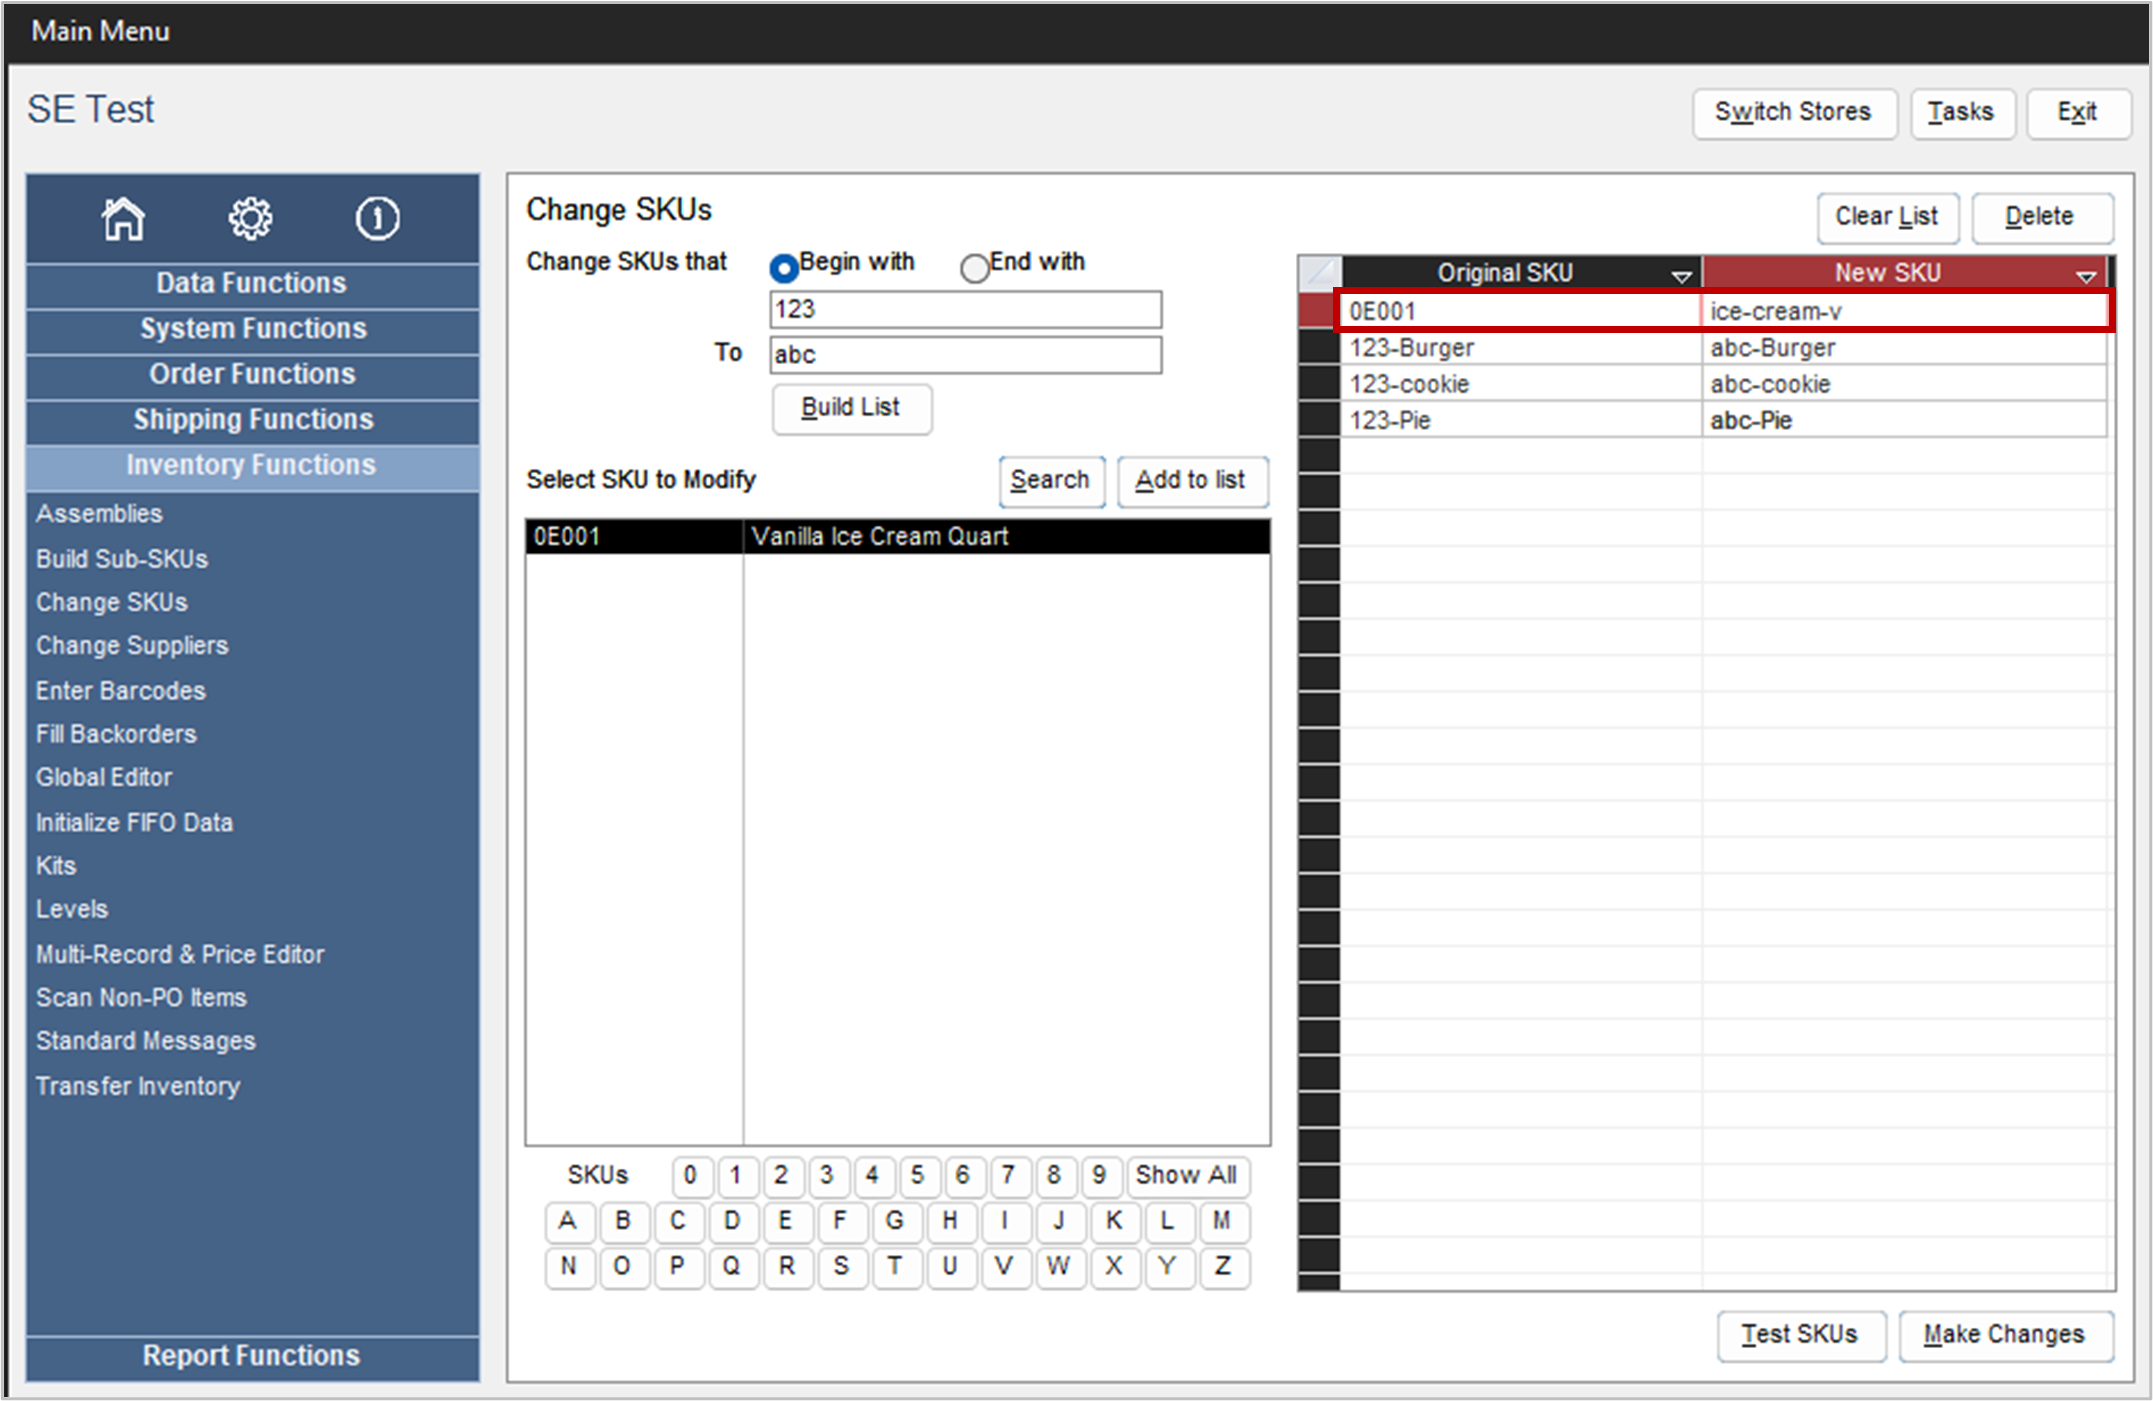
Select a Group of SKUs to Change
For this example we will change a group of SKUs that Begin with “123” to “abc”:
- Click the radio button labeled Begin with.
- Enter “123” in the unlabeled text field immediately below the “Change SKUs that” radio buttons.
- Enter “abc” in the To text field.
- Click the [Build List] button.
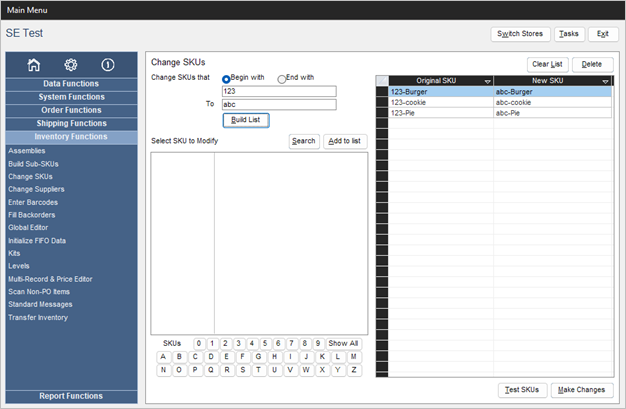
- Review the proposed changes in the New SKU column of the right-hand pane.
- Click the [Test SKUs] button to check for possible errors.
- If the changes were tested successfully, click the [Make Changes] button to make the changes permanent. The program will prompt the user for confirmation once again before making the requested changes.
- Click [OK] to proceed with the changes, or [Cancel] to abort the change request.
Select a Single SKU and Add it to the List of SKUs to Change
Method 1 – Using the Search Button
For this example, we will add another single SKU that does not meet the pattern in the previous example to the list of SKUs to be changed.
- Click the [Search] button, which opens the Search Inventory screen.
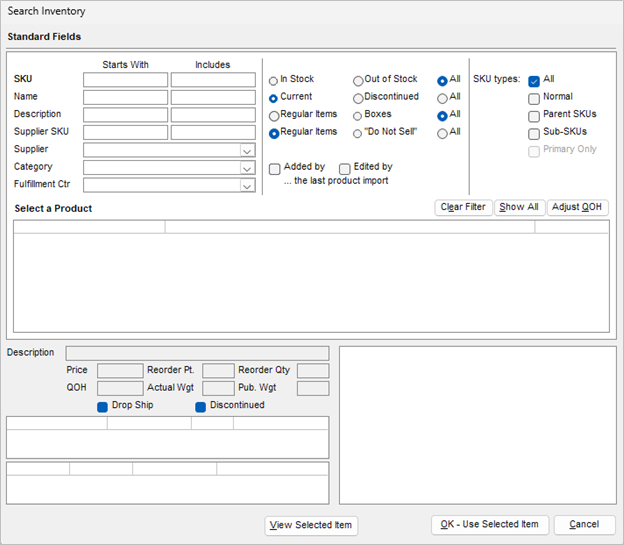
- Use any of the fields on this screen as criteria to locate the SKU in question. In this example, we are looking for a SKU that starts with “0E0” as part of the SKU. The result is seen in the Select a Product section of the screen.
- Click on the SKU in the Select a Product section.
- Click the [OK – Use Selected Item] button.
- The Change SKU screen appears with the SKU we selected in the Select SKU to Modify pane.
- Click the [Add to list] button to move it to the list in the right-hand pane.
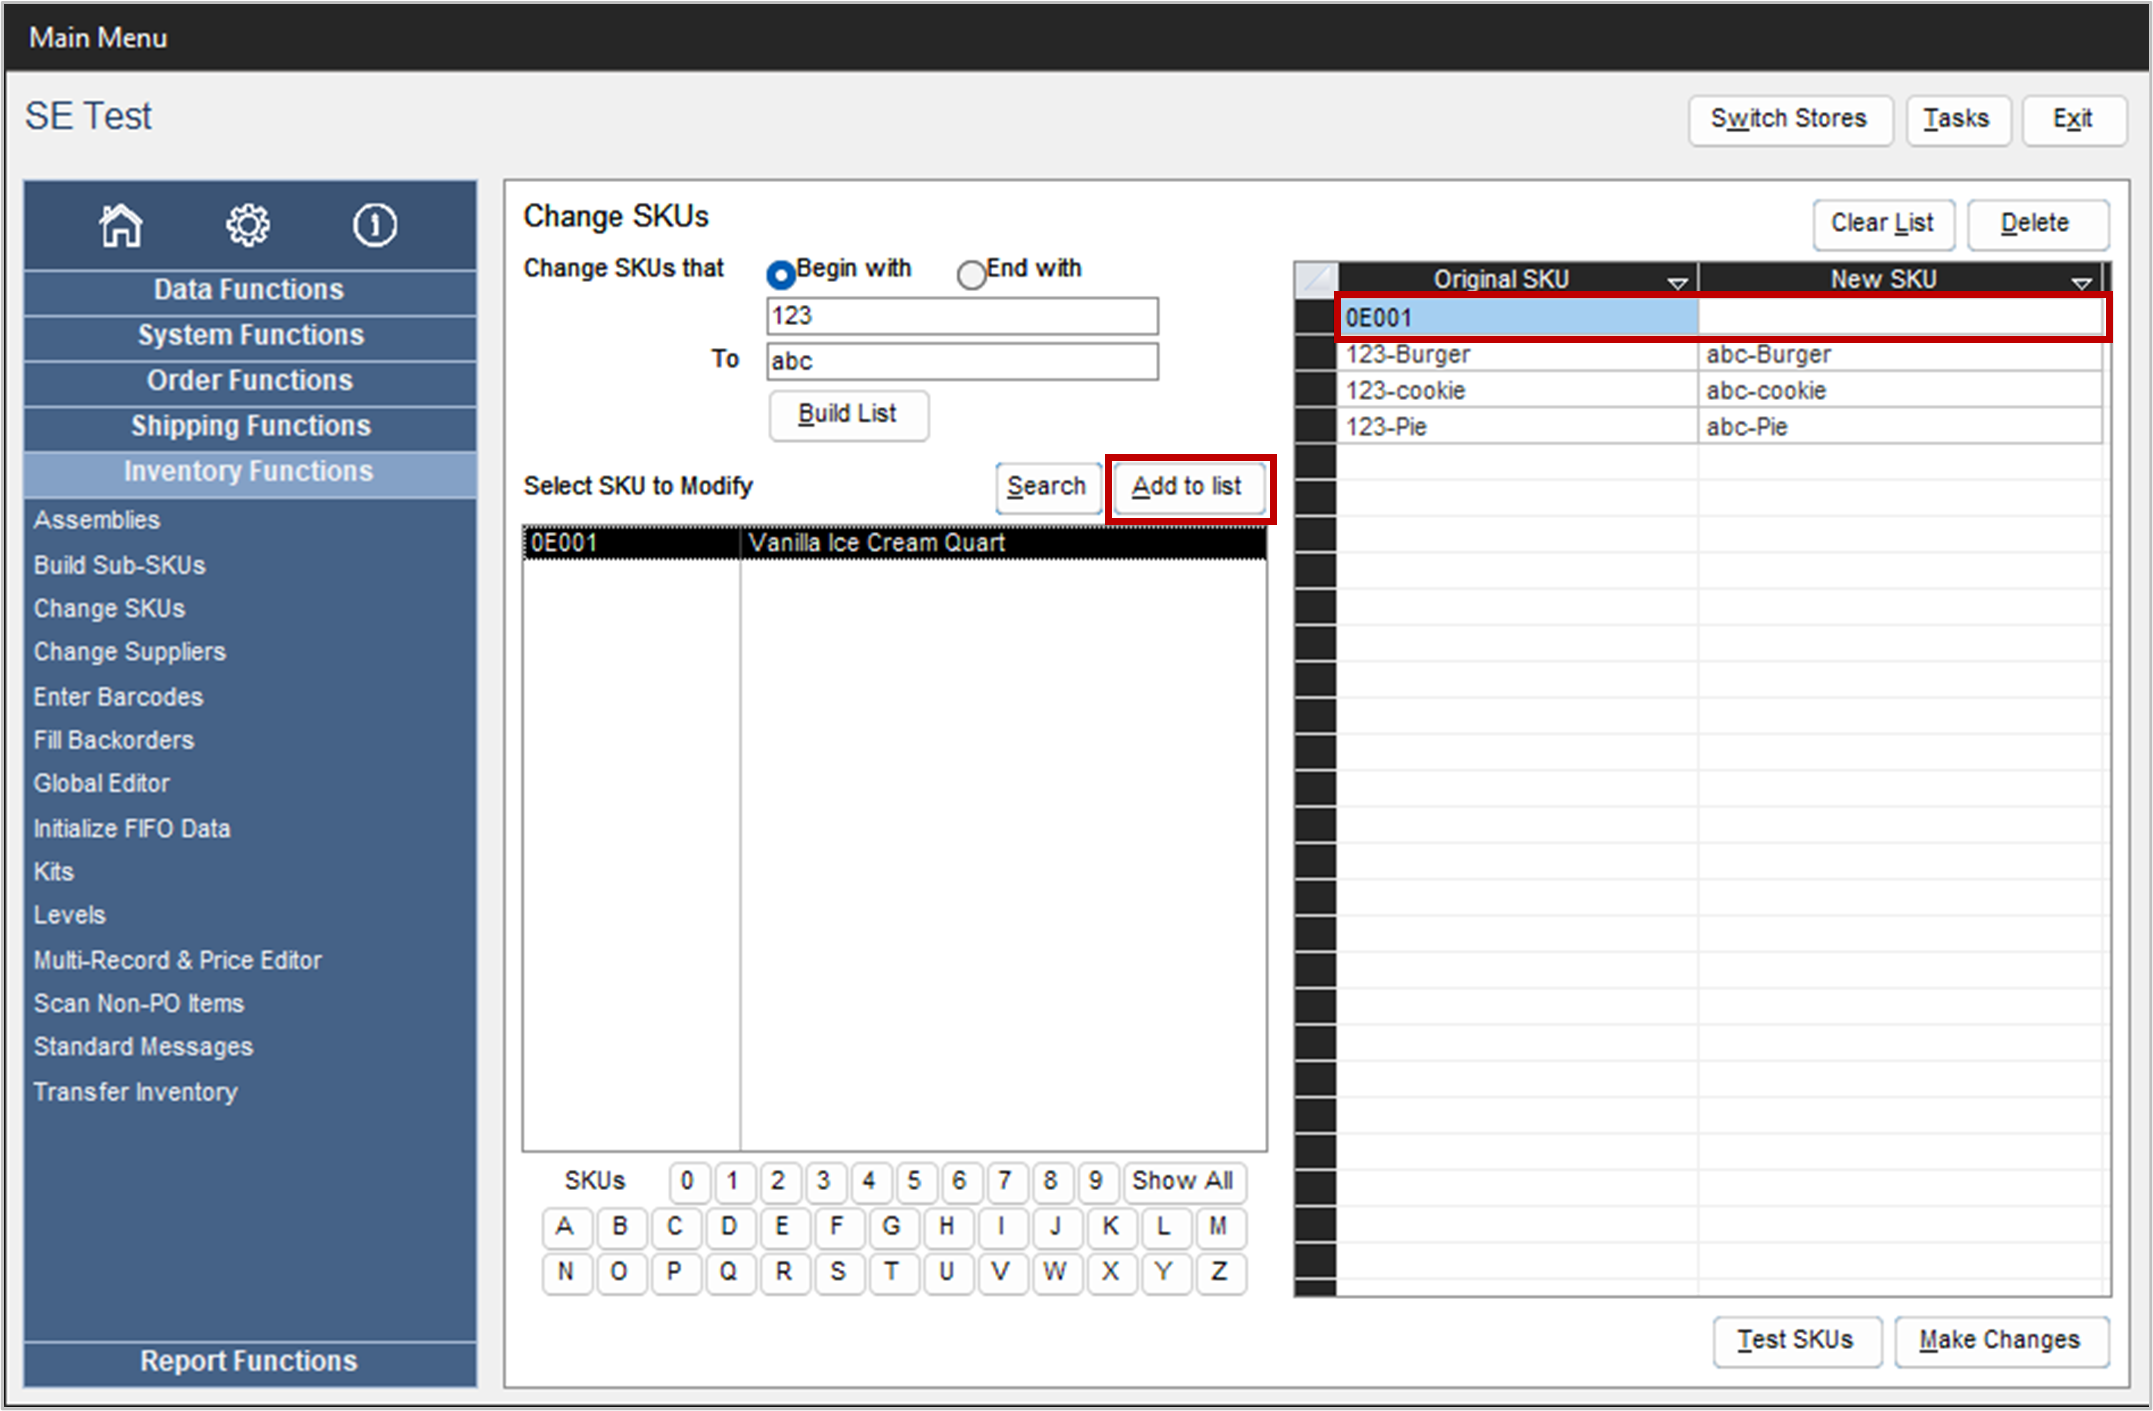
- Click the cell in the same row as the selected SKU under the New SKU column.
- Enter the replacement SKU.
- Click the [Test SKUs] button to check for possible errors.
-
If that is all of your changes, you would then click the [Make Changes] button; however, we are going to continue with another example of how to select a single SKU.
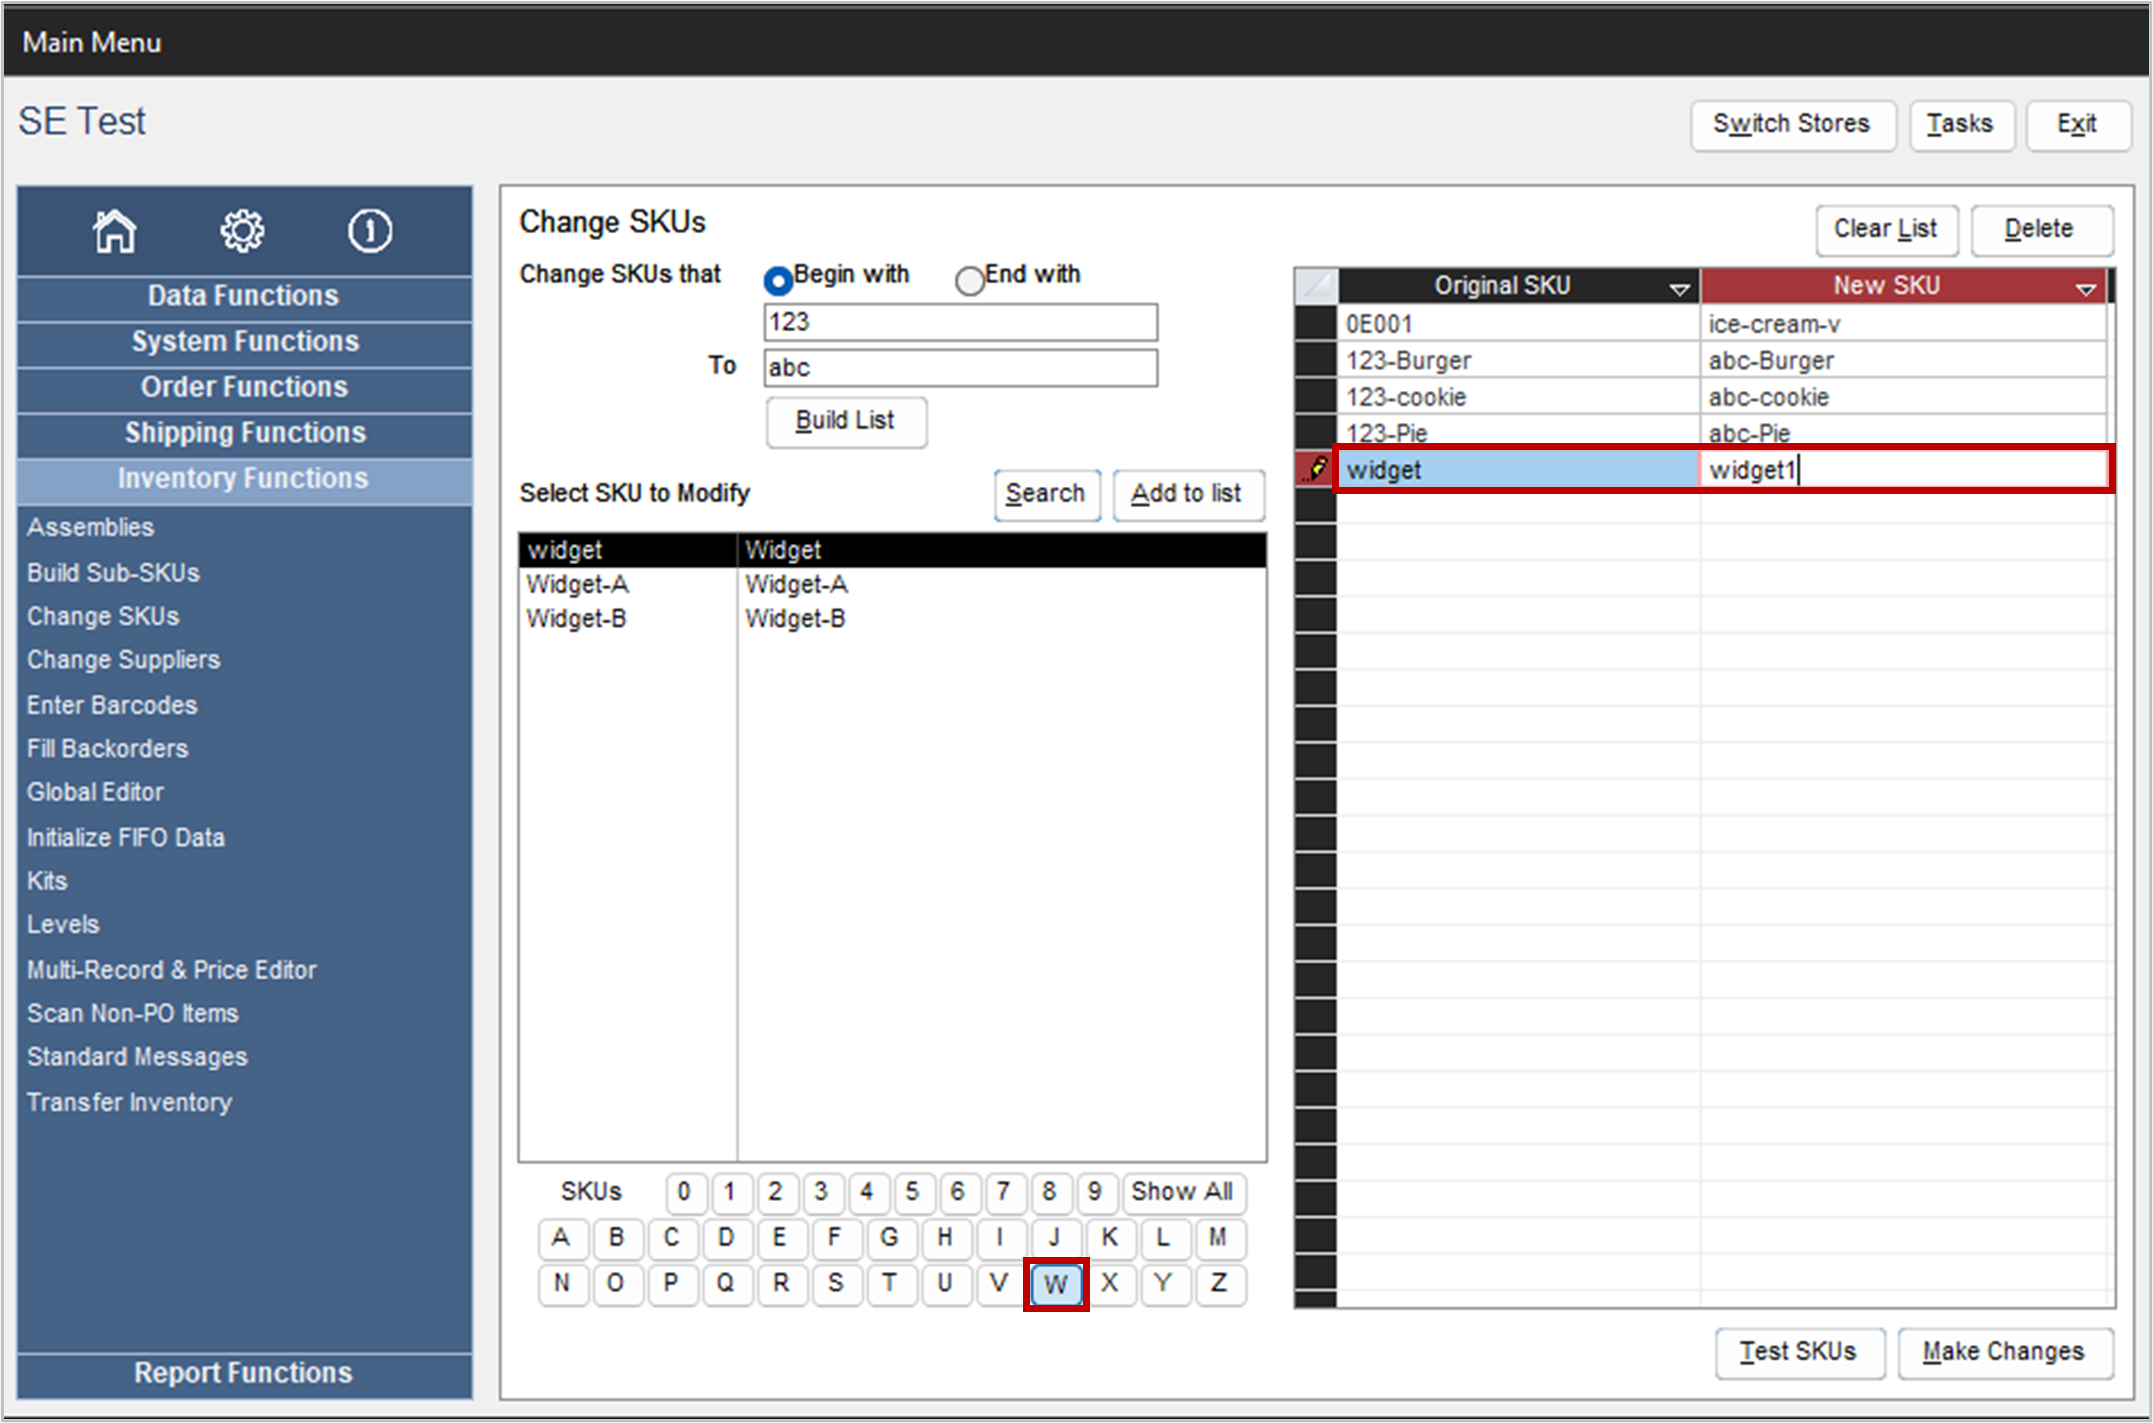
Method 2 – Using the “SKUs ” Buttons
Let’s assume that we also want to change the SKU of an inventory item that starts with the letter “W”.
- Click the button labeled “W” in the SKUs section.
- The Select SKU to Modify pane now contains a list of all SKUs that start with the letter “W”.
- Select a SKU from the list and click the [Add to List] button move the right-hand pane.
- Enter the replacement SKU in the cell to the right of the Original SKU.
- Click the [Test SKUs] button.
- If there are no errors, click the [Make Changes] button to execute the changes to all of the records in the right-hand pane.
- The program will prompt for confirmation before making the changes.
- Click [OK] to proceed with the changes or [Cancel] to abandon the changes.
- Click [OK] again to acknowledge the completion of the process.