

Contents of this Topic: Show
This shopping cart's capabilities:
Orders can cannot be directly imported from the web site
Product records can be directly imported from the web site
Customer records can be directly imported from the web site
Custom (order) Fields can cannot be imported from the web site
Manual Inventory Synchronization is supported from the web site
Real-time Inventory Synchronization is not supported
Order Status Updates are not supported
This shopping cart does not need an integration script from the Stone Edge download gateway.
Shopping carts can be defined during the Setup Guide when the program is first installed, or you can enter them at a later date by following these instructions.
Stone Edge only supports the "Pro", "Advanced", and "Enterprise" versions of ProStores.
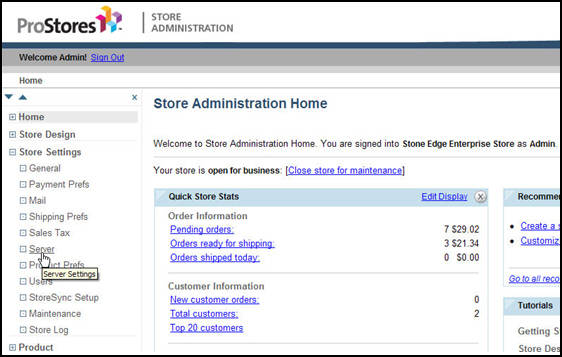
Log into your ProStores Store Administration Home page.
Expand Store Settings on the left navigation bar, and then select Server.
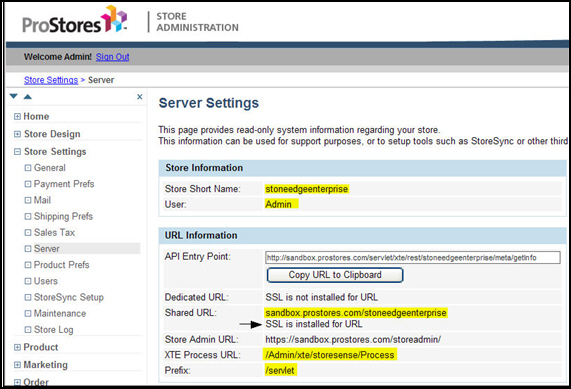
Leave your browser open to the Server Settings page as you will need to copy information from it into Stone Edge. (The information you need is highlighted in the screenshot below.)
Go to Main Menu>Settings>System Functions>Shopping Carts.
If you have not yet setup a cart, the program asks if you want to do so now? Respond Yes.

Select Add New. The fields displayed on this screen vary based on the cart type.
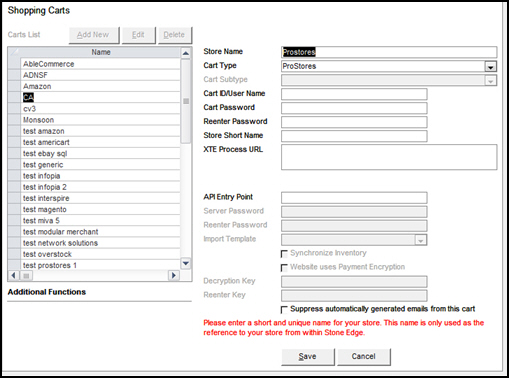
Enter a value in Store Name.
Select ProStores from Cart Type. If you are only licensed for one type of shopping cart, there is no drop-down list, only the name of the cart for which you are licensed.
Enter your CartID/User Name and Cart Password. This is the user name and password that you use to log into your ProStores Store Administrations page.
Enter your password again in Reenter Password.
Refer to the ProStores Store Administrations page and copy your Store Short Name. Paste it into the field of the same name in the Stone Edge shopping cart definition.

Next, determine your XTE Process URL
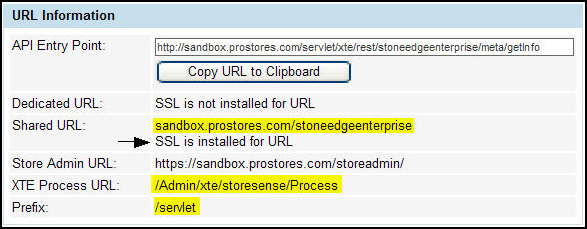
To get your XTE Process URL, go to the URL Information box in the middle of your ProStores Store Administrations page.
To create your XTE Process URL, you must combine the Shared URL or Dedicated URL + Prefix +XTE Process URL (see the highlighted fields in the screenshot below). To determine whether to choose Shared URL or Dedicated URL, check to see if "SSL is installed for URL". You must choose the URL with SSL installed. If neither URL has SSL installed, contact ProStores to obtain it. If both URLs have SSL installed, chose the Dedicated URL.
Based on the screen shot example below, the XTE Process URL would be the following:
sandbox.prostores.com/stoneedgeenterprise/servlet/Admin/xte/storesense/Process
Enter the ProStores URL in Script URL.
Use Copy URL to Clipboard on the ProStores URL Information screen and paste it into API Entry Point of the Stone Edge shopping cart definition.
Decide whether to Suppress automatically generated emails from this cart. Selecting this box prevents Stone Edge from sending automated email messages to customers, such as tracking links or order confirmations.
Select Save and the definition is added to the Carts List.
Select Test Script URL to validate the path. This button is not visible until the shopping cart definition is initially saved.
You should see a message similar to the following image. Select OK to acknowledge the script URL is accessible and finish the authentication process.

A browser window opens to the ProStores login page.
Login to your ProStores site. Select Continue.
The Stone Edge Order Manager Authorization screen appears. Select Agree and Continue to authorize.
ProStores authorization is complete. Close the browser window.
The shopping cart definition is complete! If you have not yet entered or imported supplier information, do that before you import products or all of your products are assigned to the Default Supplier record.
Go to Main Menu>Settings>System Functions>Shopping Carts.
Select the appropriate shopping cart definition from the list.
Select Import & Update Data in the Additional Functions section of the screen to open the Shopping Cart Functions screen. The caption of the screen changes to display the cart type.
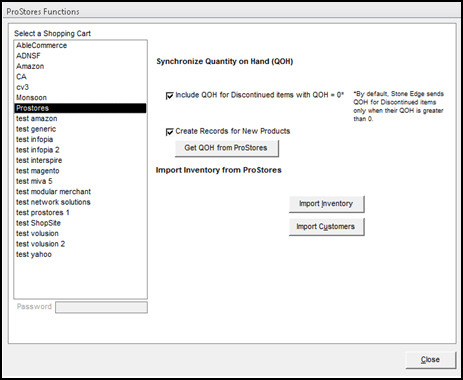
Select Import Inventory.
The program asks for confirmation that you want to import all products from the shopping cart.

Select OK.
The subsequent screen allows you to refine the product record import process. The choices available depend on the shopping cart system.
Choose whether to Start by deleting all existing Inventory? or to retain existing product data.
If existing product data is not deleted, choose whether to replace all existing data with data from the shopping cart, just selected fields, or do not change any existing data. The last choice basically means that only data for product records which do not presently exist in the store data file are imported.
Select OK.
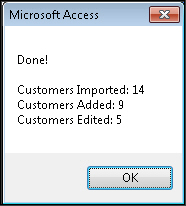
When the product import is complete, the program displays a summary of the results.
Select OK.
Select Close to exit the Shopping Cart Functions screen.
Some shopping carts let you collect additional information from the customer at checkout and include them in the order XML files so you can import them into Stone Edge custom order fields.
This feature is not supported by this shopping cart type.
Go to Main Menu>Import My Orders>Import My New Orders.
Choose the appropriate shopping cart definition from Select a Shopping Cart.
Select Import via Internet. Refer to Knowledge Base topic Import Orders, for full instructions.
If you did not test your XTE Process URL during the shopping cart setup process, you will be redirected to your ProStores Store Administration page to authorize Stone Edge to access your ProStores site. See the previous section Configuring Stone Edge for details on testing the Script URL.
If this is the first time you are importing orders from this cart, you are asked if any of the orders have already been shipped. If so, specify the cut-off date. Refer to Knowledge Base topic, First Import, for full instructions.
This is a static, single point-in-time transfer of QOH data between Stone Edge and a shopping cart, depending on the capbilities of the shopping cart system.
Take a physical inventory and update the QOH of all products at the web store.
Go to Main Menu>Settings>System Functions>Shopping Carts.
Select the appropriate shopping cart definition from Select a Shopping Cart.
Select Import & Update Data under Additional Functions.
Optionally, select Create Records for New Products.
Choose whether to Include discontinued items with QOH = 0.
Select Get QOH from Website.
You are asked to confirm you want to import all QOH figures from the shopping cart.
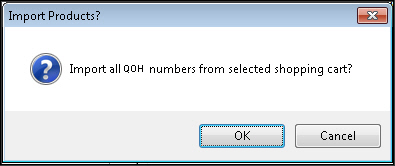
Select OK.
A summary of the import is displayed.
Select OK.
This feature is not supported.
Matching New Records to Existing Customers
Status Updates Feature: Basic Requirements
Created: 1/23/15
Revised:
Published: