Version 7.0

Version 7.0
Contents of this Topic: Show
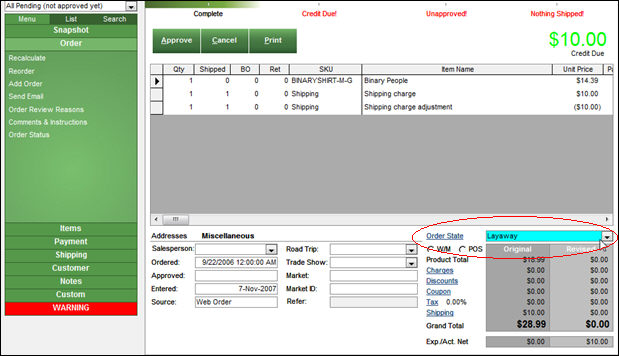
Note: Do not confuse "order state" with "order status". The order state is used in-house to track the progress of an order and to control what functions can be performed at each step along the way. The order status is similar, but is used to inform your customers of what is happening with their orders.

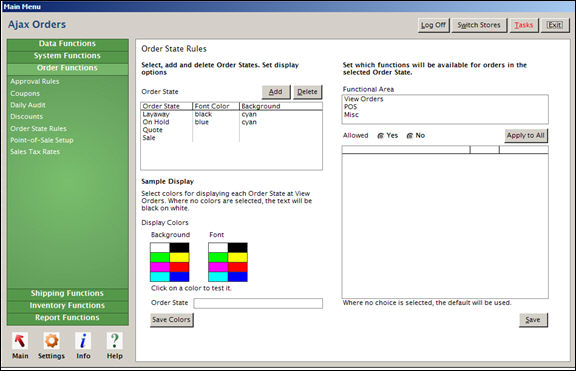
Order State Rules screen
Open the Order State Rules screen by going to Main Menu > Settings > Order Functions > Order State Rules.
To create a new order state, click the Add button.
Enter a name for the state.
Click OK. The new order state name appears in the Order State list and in the Order State field in the Sample Display section.
To set up rules for this order state, go on to the next section, Setting Order State Rules.
Select an Order State from the list. (The selected Order State also appears in the Sample Display box.)
Choose a Functional Area to display the list of Operations in that area.
Each Operation has a default setting shown in the Default column: Yes if it's allowed or No if it's not allowed. (This column will not change, providing a reference when you want to revert back to default settings.)
Select each Operation that you want to change from its default setting. The Allowed radio button automatically switches from the default setting to the optional setting.
Click Save after each selection. Your change appears in the Allowed To column.
Repeat these steps for each Functional Area you want to change.
Alternately, to change all the Operations to the same setting at once, select an Operation, check the desired Allowed status (Yes or No) and click Apply to All.
Click Save.
Select an Order State from the list.
Click on the background and font colors that you wish to use. Make as many changes as you like to test the colors.
When you have them set the way you want them, click Save Colors.

Created: 7/13/12
Revised:
Published: 04/13/16