Version 7.0

Version 7.0
Contents of this Topic: Show
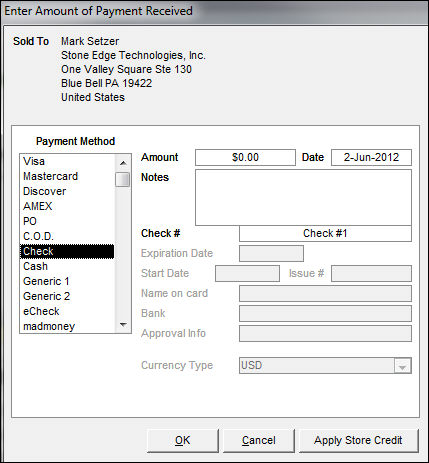
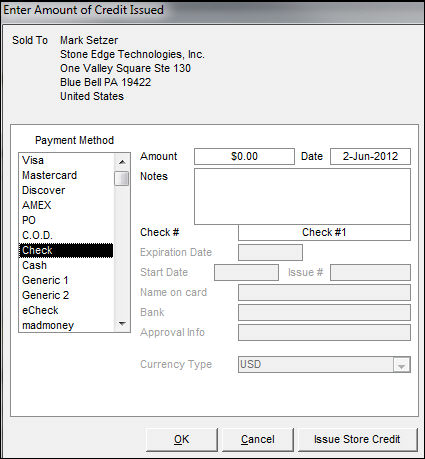
The Enter Amount of Payment Received/Credit Issued screen is opened when the Log Payment or Log Credit links on the Process Orders > Payment tab are clicked. It is also opened by the Log $ button of the Multi-Order Processor screen.
The Enter Amount of Payment Received/Credit Issued screen is opened when the Log Transaction button of the Manual Orders and Process Orders Payment tabs are clicked. The Log Payment/Credit links on the Process Orders > Payment tab accordion also open these screens, as does the Log $ button of the Multi-Order Processor screen.
This screen allows the user to manually record a payment made outside of SEOM, or issue store credit to a specific customer. For example, use this screen when the customer pays for an order with a paper check or COD. Or, use this screen to issue Store Credit to a customer rather than refunding money when items are returned. Just fill in the Amount of store credit and click the Issue Store Credit button. Likewise, if a customer has accumulated store credit, it can be applied against the balance due on a subsequent order by clicking the Apply Store Credit button.
Although the screen shows credit card payment methods, it is not possible to perform credit card transactions at this screen. Issuing credit to a credit card account must be done through the Payment tab of the Manual Orders or Process Orders screens, assuming the payment gateway supports that function.
The visible fields on this screen change according to the selected payment method, although they may not be applicable to all processes performed at this screen.

Enter Amount of Payment Received screen

Enter Amount of Credit Issued screen
Main Menu> Process My Orders > View and Process My Orders > Payment tab
Main Menu> Create a New Order > For a New or Existing Customer > Payment tab
Main Menu > Process My Orders > Multi-Order Processor
Enter the check number in the Check # field.
Click OK.
Main Menu > Process My Orders > View and Process My Orders > Payment tab
Enter the check number in the Check # field.
Click OK.
Created: 6/2/12
Revised: 11/6/12
Published: 04/13/16