
Version 8 FM
Version 8 FM
Contents of this Topic: Show
The Rates button on the Pack & Ship screen displays real-time UPS or USPS rates for all shipping methods those carriers offer.
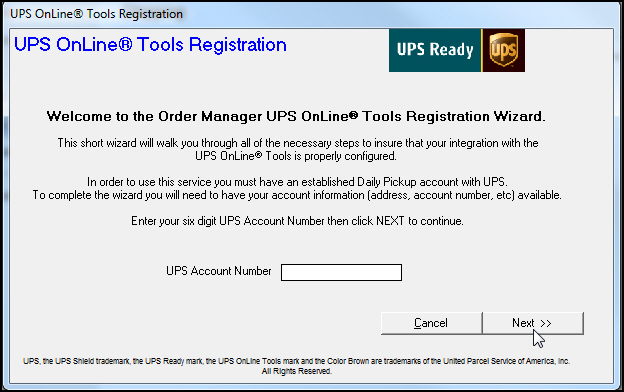
To shop for UPS real-time rates, you must configure UPS OnLine® Tools through the Shipping tab of the Setup Guide. Select Setup UPS Account for Rate Shopping.
Set system parameter USPSFromZip in order to shop for USPS real-time rates.
It is not possible to view real-time FedEx shipping rates at this screen, however, you can obtain that information through the Additional Functions link on the ShipRush interface. ShipRush for FedEx is required for printing shipping labels internally through Monsoon OMS. Customers with a current support contract are provided an annual license code for ShipRush.
For UPS shipments, the Use Selected Rate function returns the shipping method and cost to Monsoon Fulfillment Manager, which updates its order with that information. This function does not work for USPS shipments as the USPS interface is not able to return shipping rate information to Monsoon OMS. You have to manually select the most desirable shipping method in Monsoon Fulfillment Manager.
If the shipping method the Monsoon Order Manager assigned to the order is changed once it is received at the Monsoon Fulfillment Manager, the change in method is communicated to the Monsoon Order Manager, although the change in actual shipping charge is not. The actual method is displayed in the Fulfillment Summary of the Process Orders>Shipping tab in the Monsoon Order Manager. Actual shipping charges are not automatically updated in the Monsoon Order Manager since the order must still reflect the shipping charges paid by the customer when the order was placed. The actual shipping charges are recorded in the order which exists in the Monsoon Fulfillment Manager.
 Keep
in mind that the default settings for UPS OnLine®
Tools should match those specified in your shipping profile for UPS WorldShip
or ShipRush for UPS in order for the estimated shipping rates to match
as closely as possible. Any number of variables can cause the quoted shipping
rates to vary from the actual rate obtained when the shipping label
is printed.
Keep
in mind that the default settings for UPS OnLine®
Tools should match those specified in your shipping profile for UPS WorldShip
or ShipRush for UPS in order for the estimated shipping rates to match
as closely as possible. Any number of variables can cause the quoted shipping
rates to vary from the actual rate obtained when the shipping label
is printed.
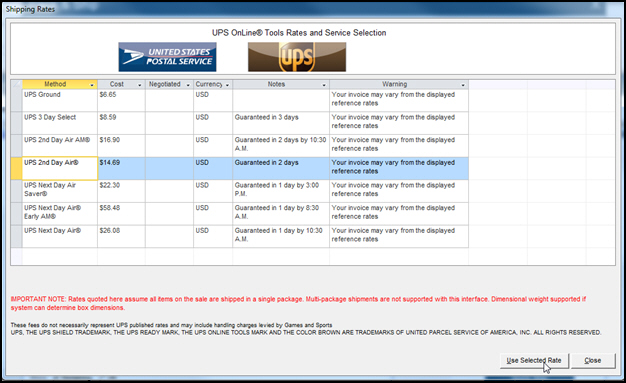
Select a logo at the top of the page to see shipping rates for shipping methods from that carrier.
The grid shows a list of shipping Methods, their estimated Cost or Negotiated rate, and Currency type of the cost quote.
The Notes field contains the description of the shipping method and the Warning field indicates the rates displayed here should be used as a best estimate. Depending on the settings of the application which actually prints the shipping label, the charges may vary slightly from those displayed here.
For UPS shipping methods you can automatically update the order in SEFM with the currently selected shipping method and clicking Use Selected Rates.
Go to File>Settings>Setup>Shipping.
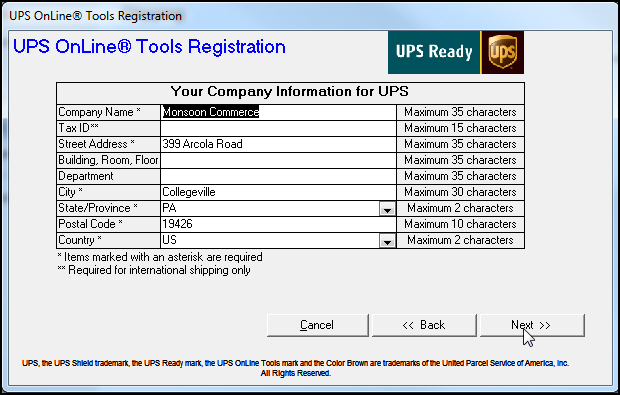
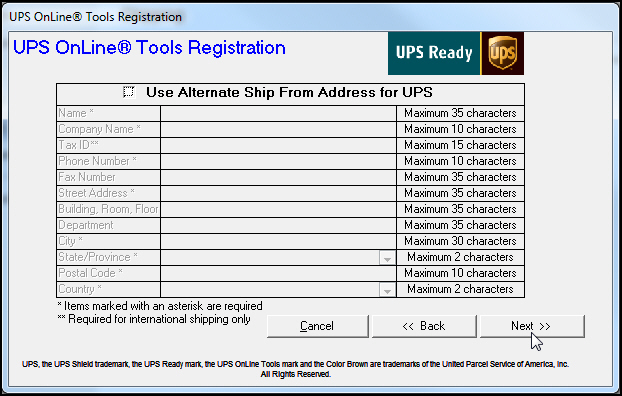
Enter your Company Information.
Select Next.

UPS Account Type -- Select one of the following options:
Daily Pickup
Occasional Pickup
Suggested Retail Rate (UPS Store)
Default Delivery Confirmation Type -- Select from one of the following options, some of which may incur additional fees:
None
No Confirmation -- No delivery confirmation requested on the shipment
Confirmation with No Signature -- Delivery Confirmation request sent with shipment specifying no signature required
Signature Required - Delivery Confirmation request sent with shipment specifying that a signature is required
Adult Signature Required - Delivery Confirmation request sent with shipment specifying that an adult signature is required
Amount for Signature Required --
If you have chosen the No Confirmation or Confirmation with No Signature option from the Default Delivery Confirmation Type drop-down list, you can have the program change the confirmation type to Signature Required when the Insured Value of the order meets or exceeds the dollar amount entered in this field.
If you have chosen the No Confirmation, Confirmation with No Signature, or Signature Required option from the Default Delivery Confirmation Type drop-down list, you can have the program change the confirmation type to Adult Signature Required when the Insured Value of the order meets or exceeds the dollar amount entered in this field.
Default Return Service -- Allows you to define the default return service (if any) to apply to a shipment. Select from one of the following options:
None -- No return shipment is processed
Print Return Label -- Return Label printed with the shipping label
Print and Mail -- Return Label is printed at UPS and mailed to the customer
Electronic Return Label -- Return Label is emailed to the customer by UPS
Return Service 1 Attempt -- Return Label printed by UPS, given to driver who attempts to pick up package. If the attempt fails, the driver leaves the label for the customer
Return Service 3 Attempts -- Return Label printed by UPS and given to the driver who will attempt to pick up package three times. Label is not left with customer if attempts fail.
Default to Residential -- This option controls the Residential flag on the shipment. Select from one of the following options:
NO -- Residential flag is set to FALSE (selected)
YES -- Residential flag is set to TRUE (selected)
YesIfNoCompanyName -- Sets the Residential flag to True if the shipping party does not have a company name present in their information. Leaves the Residential flag set to false otherwise.
Default COD Type -- If the order shows a balance due at the time the shipment is being processed, the program can set the COD flag to the default option selected here. Choose from one of the following:
Check -- Cashier’s Check -- Money Order -- The three stated forms of payment are accepted
Cashier’s Check -- Money Order -- The two stated forms of payment are accepted
Cash (EU Origins Only) -- Cash accepted -- this only pertains to shipments originating within the European Union
Check -- Money Order -- No Cash (EU Origins Only) -- Only check and money order allowed. No cash accepted -- this option only pertains to shipments originating within the European Union.
Default Package Type -- This option sets the default package type for the shipment. Select from one of the following options:
Your Packaging
UPS Express Envelope
UPS Express Tube
UPS Express Pak
UPS Express Box - Small
UPS Express Box - Medium
UPS Express Box - Large
UPS 25 Kg Box
UPS 10Kg Box
Package Length, Package Width, Package Height -- If you selected the Customer Packaging option from the Default Packaging Type drop-down list, you can enter the default package dimensions into these three fields. Package Length must contain the largest of the three values. Values are to be entered in inches/centimeters and are used to calculate Dimensional Weight of the package. These fields do accept decimal values.
Paperless Commercial Invoice for International Shipments -- You must contact UPS to set up your account to use Paperless Commercial Invoices with the internal UPS system. By selecting this option, Monsoon OMS will assume the merchant is set up to use the paperless commercial invoice feature with UPS and will flag any shipments that may require additional documents (NAFTA, SED, etc.).
Verify Addresses in Shipping Request -- Check this option if you want UPS to perform address validation on the shipping address prior to processing the shipment.
Default Insure Shipment -- This option sets the default value of the Insure check box. If checked, the shipment will include an insurance request.
Minimum Value before applying insurance -- Enter the minimum shipment value required to apply insurance. If shipment value is below this threshold, value is set to 0 so insurance is not applied to shipment. This setting is ignored if the parameter UPSDefaultUseInsurance is FALSE.
Insured Value Source -- If the Default Insure Shipment check box is selected, this option becomes available. This allows you to define how the Declared Value is reported for shipping insurance. Select from one of the following options:
Product Total -- Value is set to the total retail value of shippable items on the order
Product Cost -- Value is set to the Cost of shippable goods on the order
Product Total to Max Amount- Value is set to the retail value of shippable items on the order up to the maximum amount entered into the Amount field.
Product Cost to Max Amount- Value is set to the cost of goods of shippable items on the order up to the maximum amount entered into the Amount field.
Flat Amount -- Value is set to the dollar amount entered into the Amount field
Maximum Amount of Insurance to Apply -- If you selected one of the options for Insured Value Source that contain the word "amount", this field is be enabled to accept a dollar amount that acts as the declared value (Flat Amount) or "ceiling" (Max Amount) for declared value for shipping insurance.


Enter USPSFromZip in Parameters in Selected Group and select Go.
Select the parameter in the list box to see the Parameter Details and Parameter Text fields.
Enter the Zip or Postal Code for this warehouse location.
Select Save and OK.
How to Shop for Shipping Rates
Created: 11/25/14
Revised: 6/22/15
Published: 08/19/15