1/31/11: The problems with the Real-Time Inventory Synchronization feature for ShopSite has been resolved by that vendor, which requires action on the part of the user to install a patch. Refer to the ShopSite Knowledge Base topic found at: http://support.shopsite.com/KBase/questions/2532/ for detailed instructions.
The below instructions are only confirmed working on version 5.900-7.100 of Stone Edge and up to version 10 of Shopsite, no later versions have been tested. requires an annual subscription fee, as the inventory information will be hosted on the Stone Edge servers. Contact the Stone Edge Technologies, Inc. sales department for more information.
The merchant must provide Stone Edge Technologies, Inc. with the serial number of their store. According to ShopSite's Help article, the serial number should be found in the Product Information section of the Preferences>Hosting Service screen ("back office").
Set system parameter RealTimeInvURL to https://www.stoneedge.net/ShopSite/RTI.ashx
Change system parameter SynchQOH to True, which will enable the Synchronize Inventory field of the Shopping Cart definition screen. For more information on setting system parameters see the Knowledge Base article, Set System Parameters.
Go to Maintenance Menu>Cart Functions>Create/Edit Shopping Carts and select the appropriate shopping cart definition from the list. The shopping cart definition screen may also be accessed from the Quick Clicks on the Main Menu if the default settings have not been altered by the user.
Click the Edit button at the top of the screen.
Enter the RTI UserName and RTI Password in the fields of the same name on the Shopping Cart definition screen. The values that should be entered in these fields can be obtained from the confirmation email sent by Stone Edge Technologies when the subscription was purchased (User Admin account information). The password for the User Admin account can be changed by the user via the My Account link at web interface, which is located at http://www.stoneedge.net/Shopsite/

Check the Synchronize Inventory box.
Click the Save button to retain the changes to the shopping cart definition.
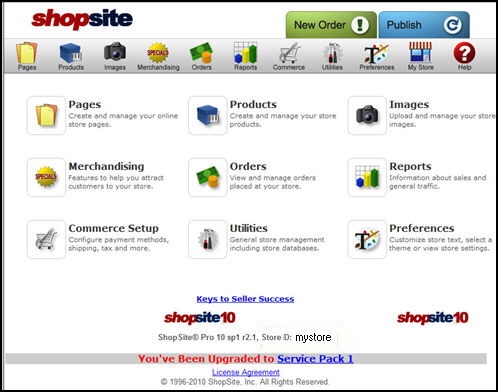
Login to the Admin (back office) section of the ShopSite shopping cart.
Locate the Preferences section and click on the Inventory Tracking button.
In the Store-wide inventory tracking section, click the radio button next to Custom Inventory Tracking and then click the Configure button.

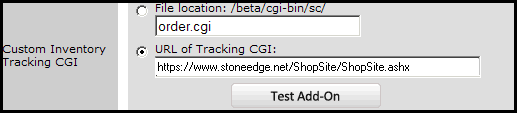

If the test is not successful, double-check the URL that was entered in step 4.
Click the Save button at the bottom of the form.
Return to the Order Manager and navigate to the Maintenance Menu>Cart Functions>Shopping Cart Functions>Go.
Select the appropriate shopping cart definition from the list and click the Send QOH to Inventory Link button, which will push QOH information from the Order Manager to the Stone Edge servers.
The ShopSite web site will now rely on the inventory numbers that are stored on the Stone Edge servers. As products are sold, QOH changes will not be apparent by looking at the inventory count in the back-end of the shopping cart. To monitor the QOH of inventory products, compare the values in the Order Manager against those that are displayed at the Stone Edge Servers.
If the values differ, enter the correct QOH information in the Order Manager and then repeat step 2 to synchronize the QOH information on the Stone Edge servers.
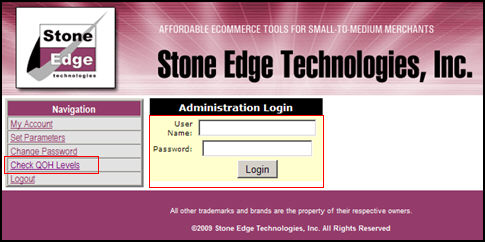
To see the QOH values that are currently being used by the web site, login to the User Admin account on the Stone Edge servers and click the Check QOH Levels link.
Modified: 1/14/15