Overview
SEOM allows the user to designate individual computers as Task Specific Workstations.
For example, you could configure one or more of your computers as “Point of Sale Only” systems. If you run SEOM on those computers, the program will go directly to the POS (Point of Sale) screen when you open it. When you leave the POS screen, SEOM will close. No other SEOM screens or functions will be available on those computers.
Or, if your warehouse staff handles all of your shipping, they could have a PC that can only access the Pack Orders screen in the Order Manager.
Workstations can be designated for the following screens/tasks:
- Main Menu (has access to all normal SEOM functions)
- Point of Sale
- Manual Orders
- Pack Orders
- View Inventory
- View Customers
- Custom Menu (goes to the user-written menu defined in the system parameter CustomMainMenu, in the Custom parameter group)
All of the choices in the list above, except Main Menu and Custom Menu, restrict users at that workstation to a specific screen.
Setup
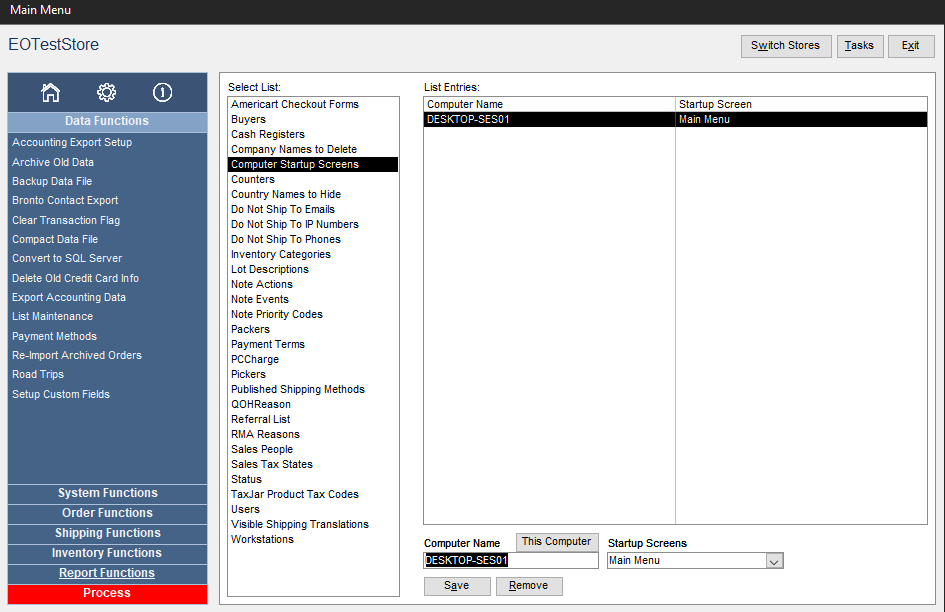
- Go to Main Menu>Settings>Data Functions>List Maintenance
- In the Select List box, select Computer Startup Screens.
- In the Computer Name field, enter the Windows computer name for the workstation to restrict to a startup screen. If you are at that workstation, click the This button to have the program automatically enter the computer name of the workstation.
- Select the appropriate startup screen name for that computer from the Startup Screens drop-down list. If any screen other than the Main Menu or Custom Menu is selected, that will be the only screen that will be available to all users on that workstation. When the startup screen is closed, the program will close as well. The use of Custom Menus is rare.
- Click the Add/Edit button, and the workstation’s name appears in the List Entries: section of the screen.
- To remove the restrictions from a workstation, select it in the List Entries: section and click the Remove button and it is removed from the list.

