Overview
- This topic outlines the steps to create a Windows system task to periodically run the Auto Order Import function of the current version of SEOM.
- Select a workstation not generally used for Stone Edge activities and follow the instructions below after Stone Edge is installed and connected to the production store data file.
- The Auto Importer will Need a seat license to operate. If you exceed the number of licenses you have, this will cause the auto imported to stop working. It will also need to be reset to resume operation.
Procedure
NOTE: Screenshots and Instructions using Windows 11
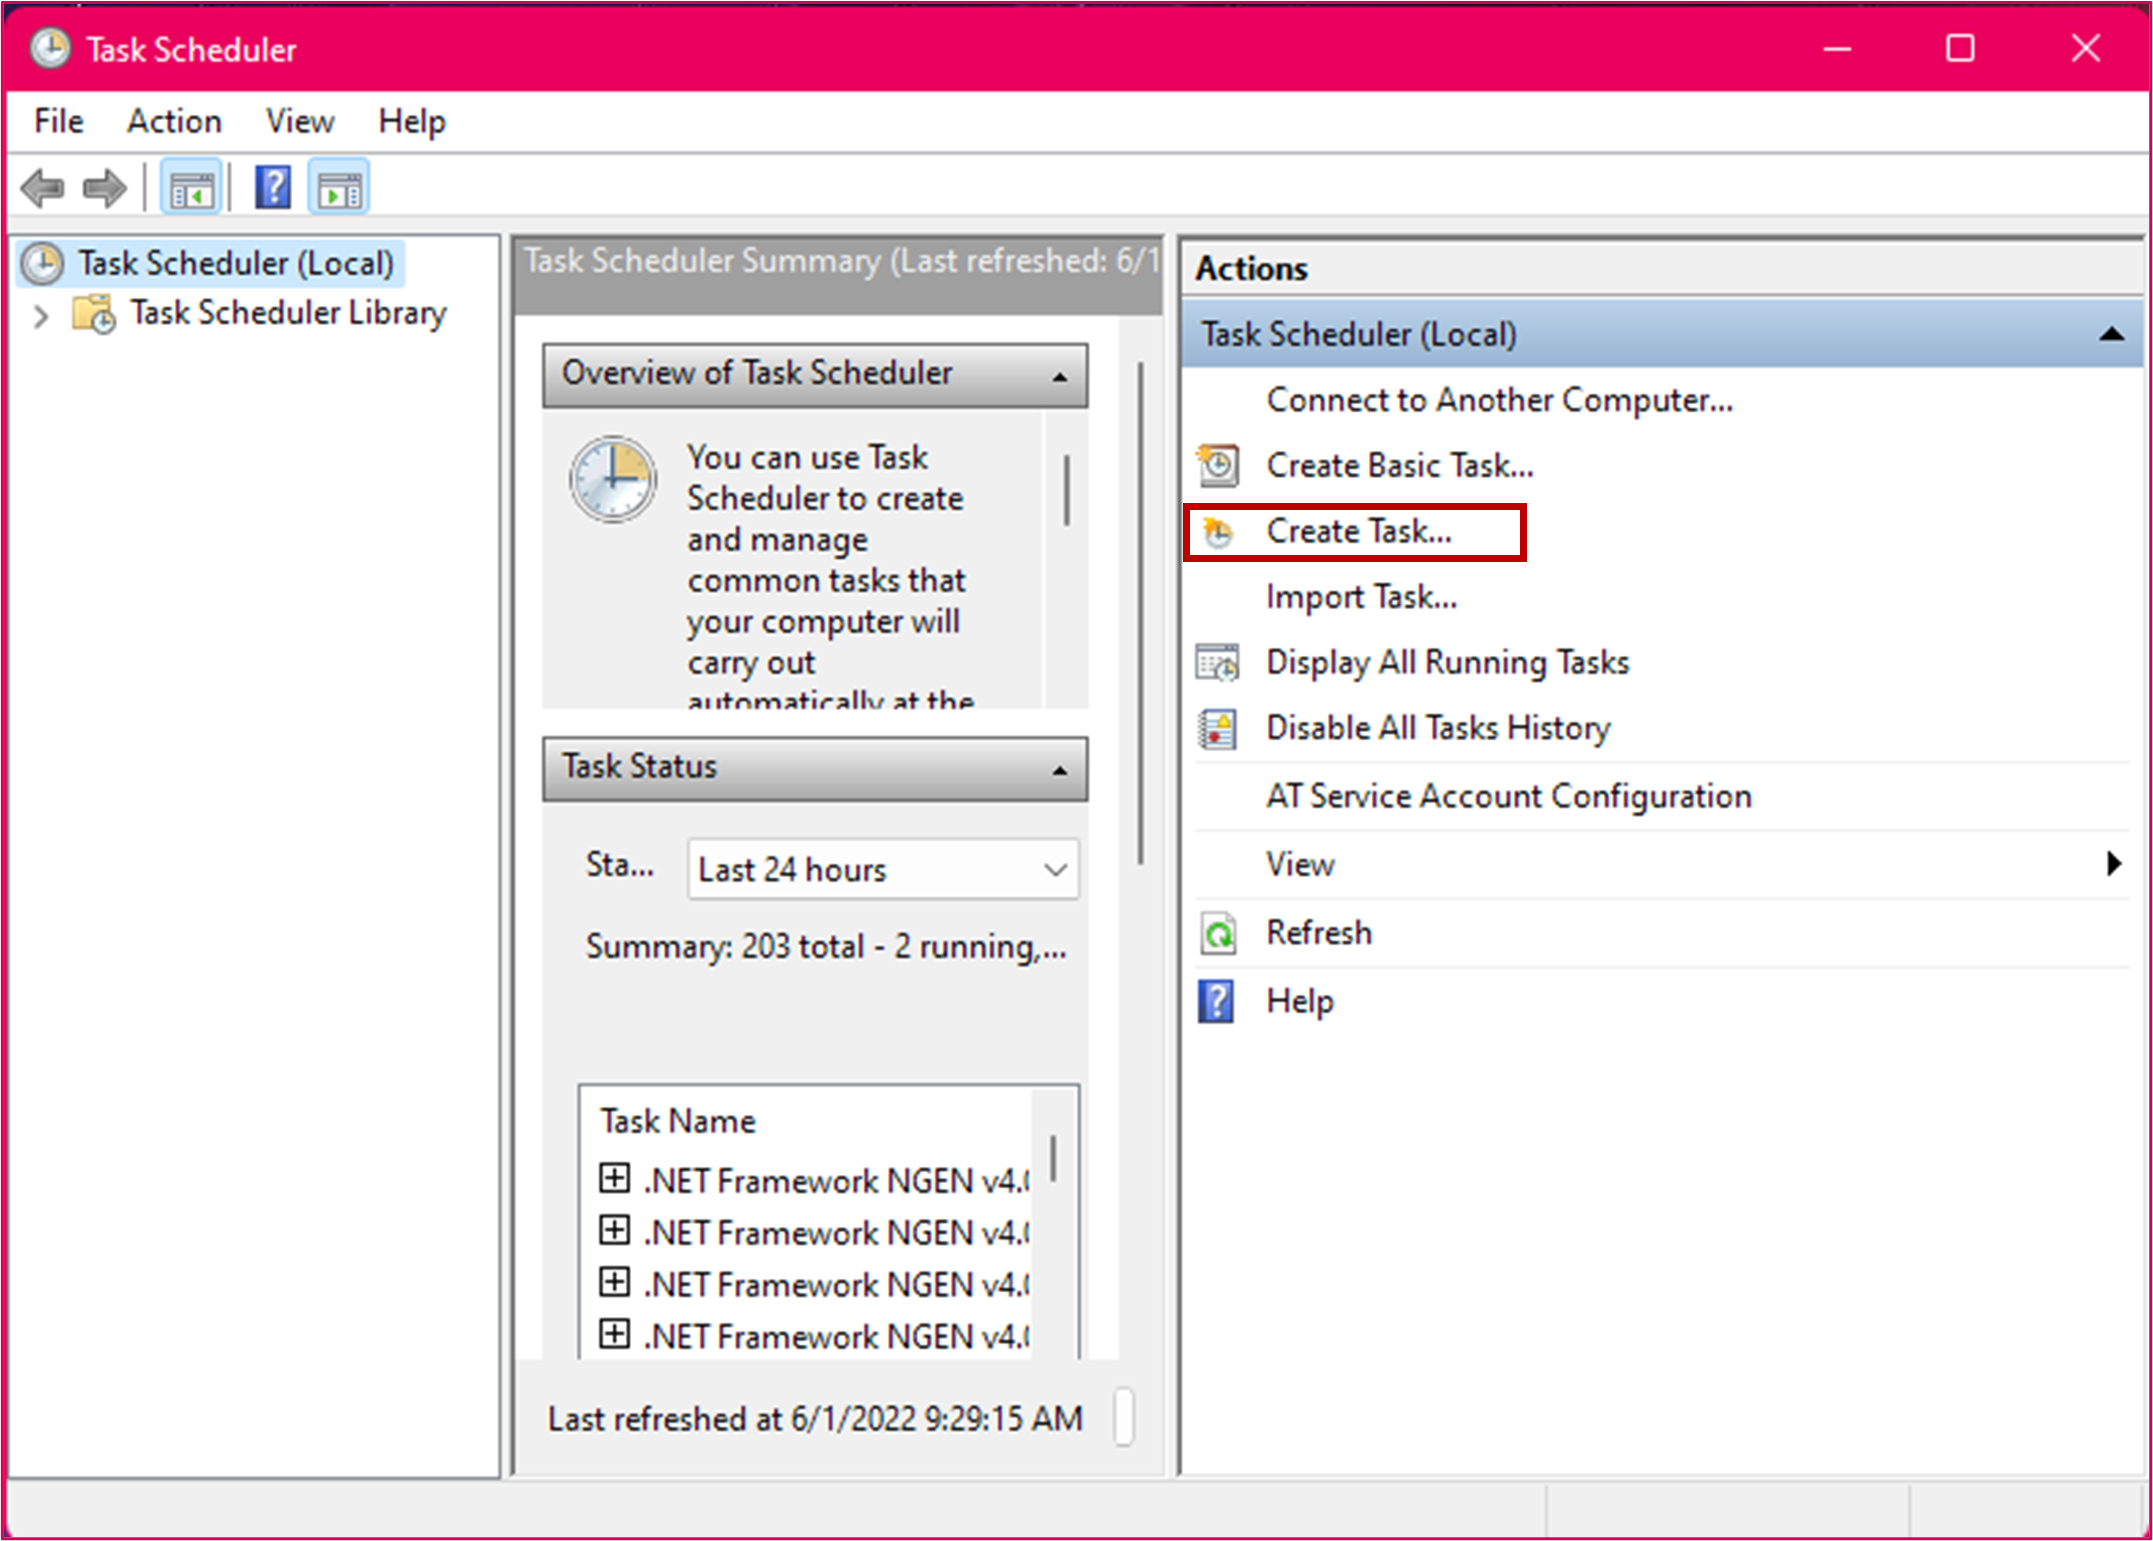
- Windows Search Bar -> Task Scheduler
- Click “Create Task” from the list on the right side.
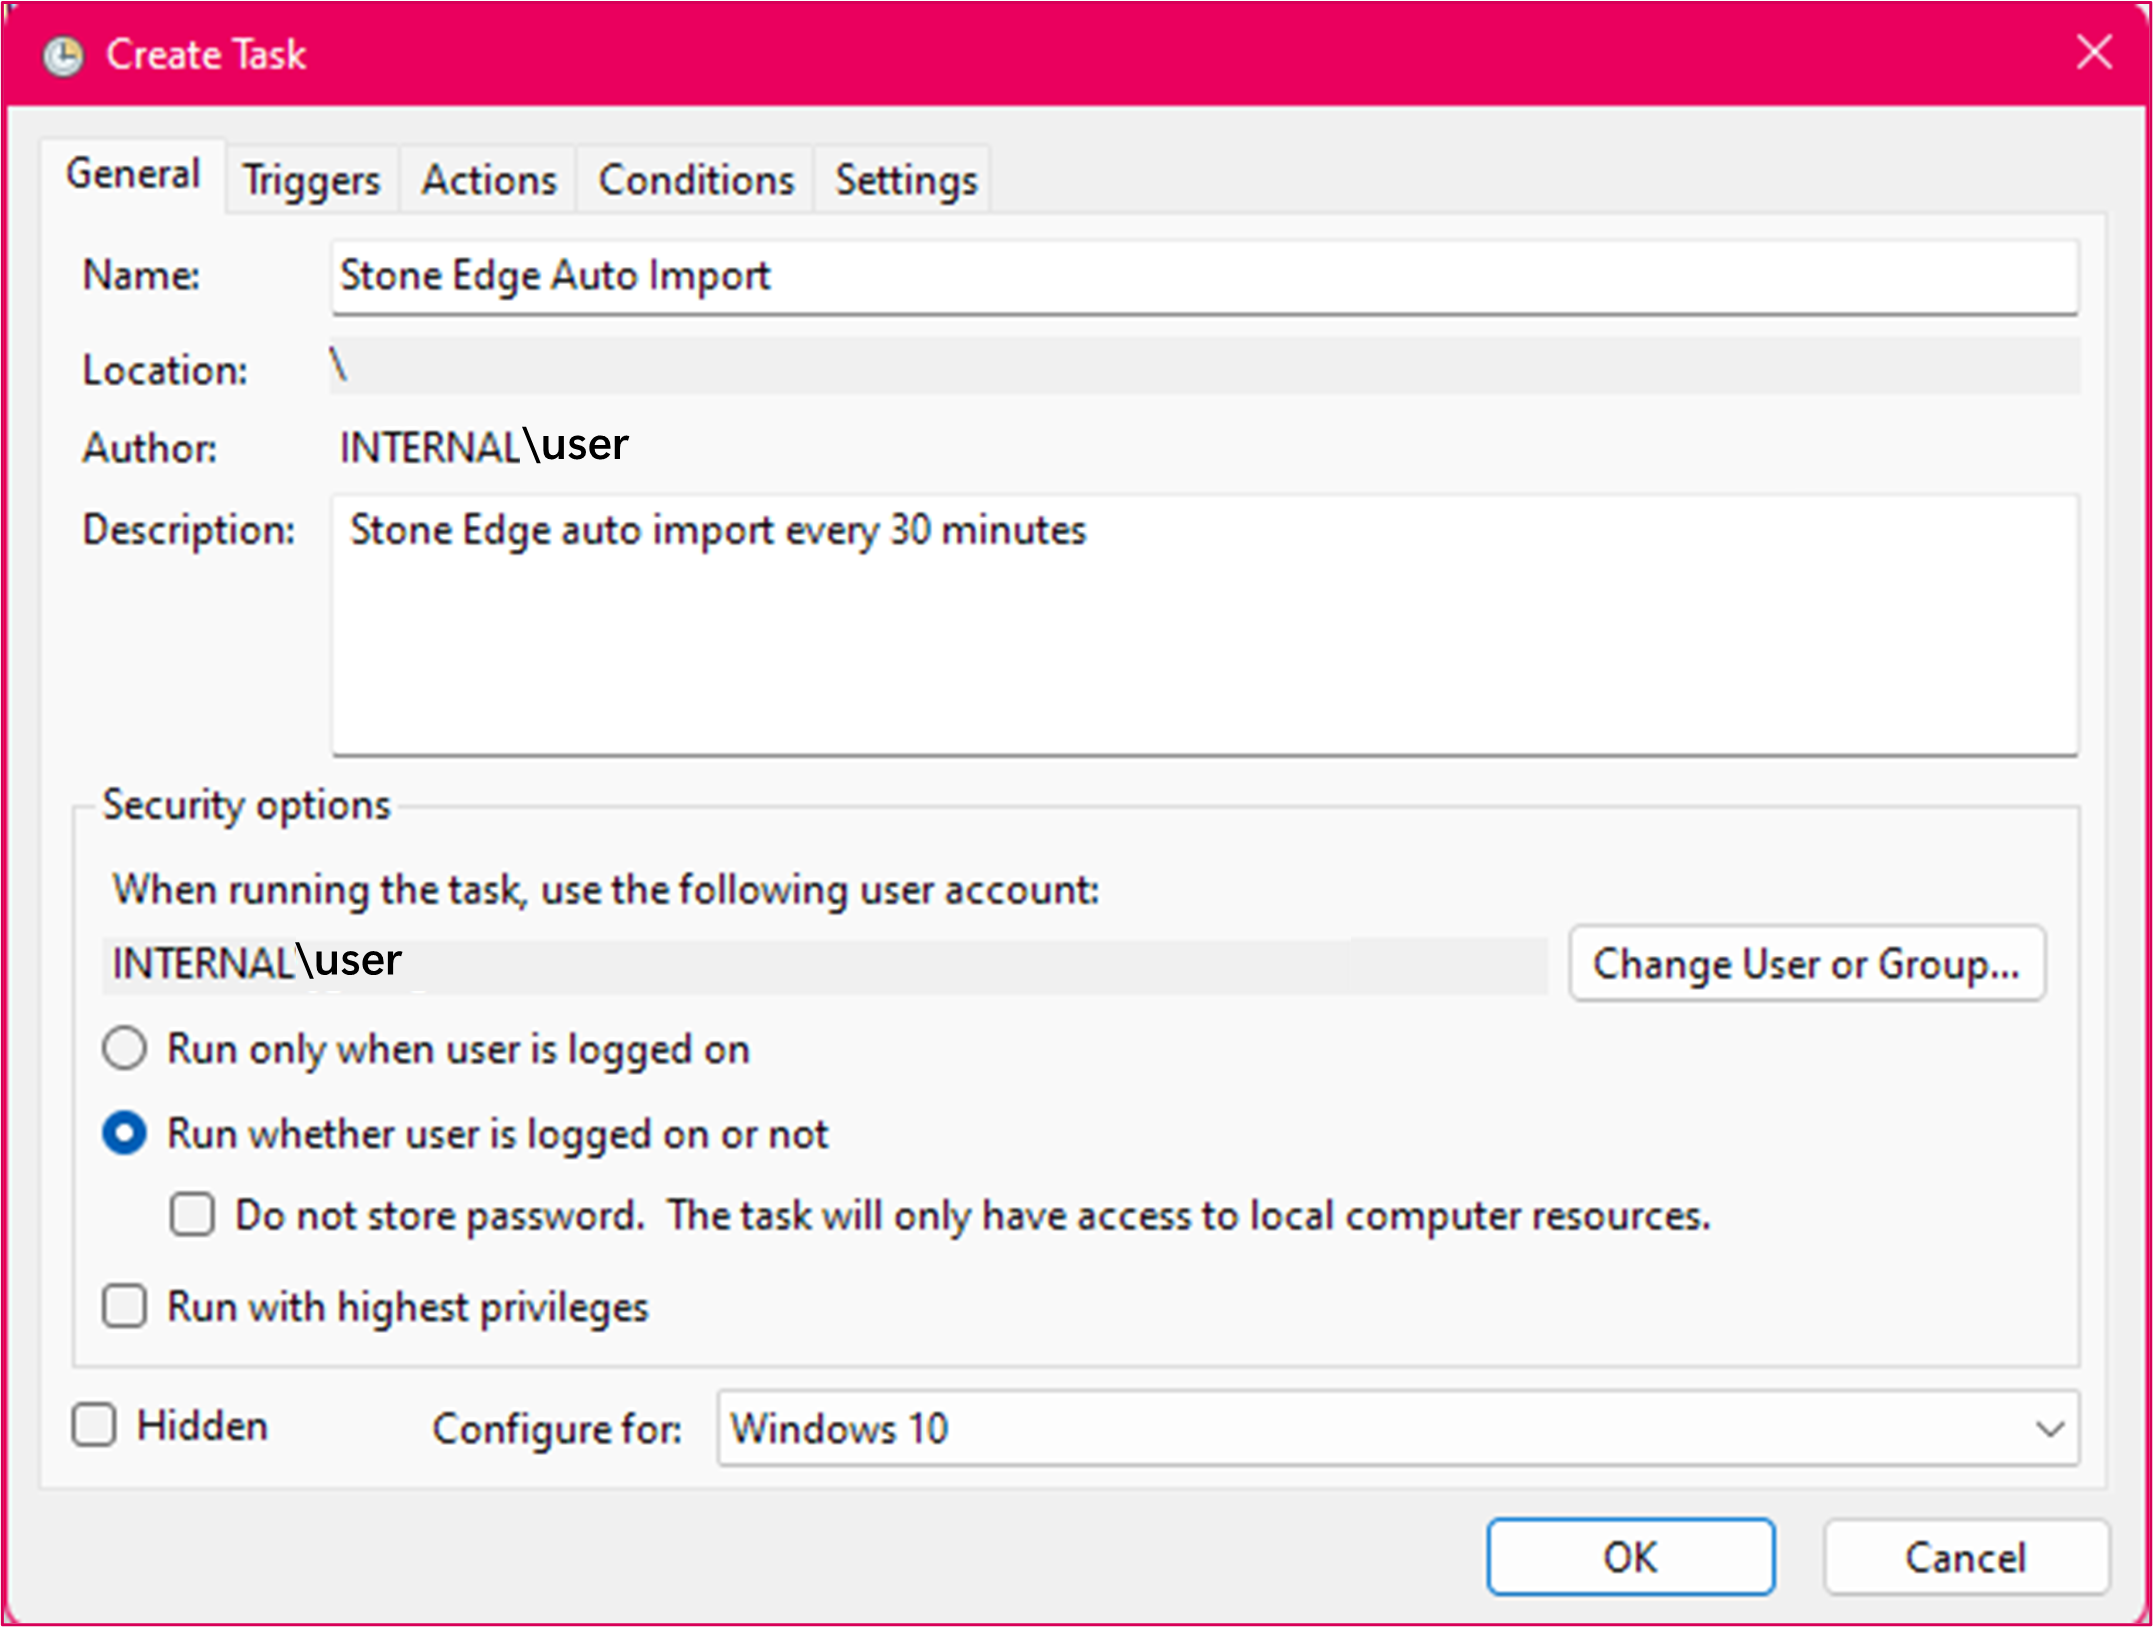
- A pop-up “Create Task” appears
- On “General” tab, fill required fields
- Name -> Of the task (The example below uses Stone Edge Auto Import)
- Description -> For personal use to remember what task does
- User/Group -> Run task using specific user/group (Optional; The example below uses INTERNAL\user)
- Choose “Run whether user is logged on or not” option
- Configure for -> Choose OS that the task will be running on
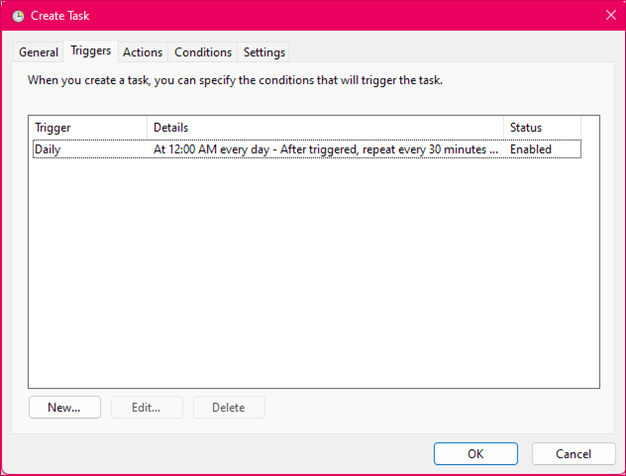
- Select the “Triggers” tab from the top menu bar
- Click “New” on the bottom right-hand corner
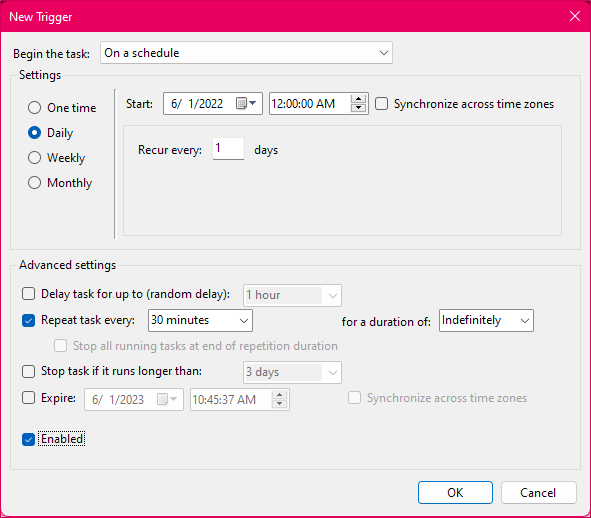
- A pop-up called “New Trigger” appears
- Give trigger parameters
- Begin the task -> On a schedule (should be the default)
- Settings
- How often do you want the task to run -> Daily (most likely option if you’re going to import orders regularly)
- Start -> When you want the task to start working (Date and Time)
- Recur every _ Day -> 1 (If you’re going to use this task daily)
- Advanced Settings
- Repeat the task every -> 30 Minutes (for this example, you can choose any time)
- For the duration of -> indefinitely (task can be manually stopped if not wanted in the future)
- Enabled -> Checkbox
- Click “OK” to save.
- The trigger will now be in the list on the triggers page!
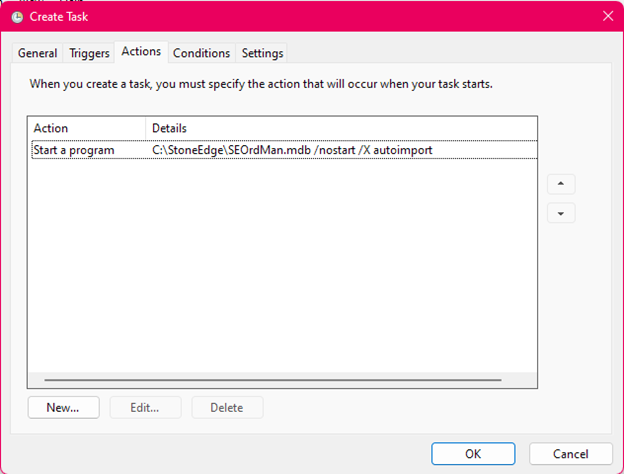
- Click the “Actions” tab from the top menu bar
- Click “New” on the bottom right-hand corner

- “New Action” pop-up appears
- Fill the following
- Action -> Start a program (will be the default)
- Program/script -> Find your SEOrdMan.mdb file (in this example, the file is in C:\StoneEdge\SEOrdMan.mdb)
- Add Arguments -> 2 arguments required
- /nostart
- /autoimport
- Start in -> leave blank
- Click “OK” to save when done
- The action will now be in the list on the actions page
- Click “OK” to save the Task
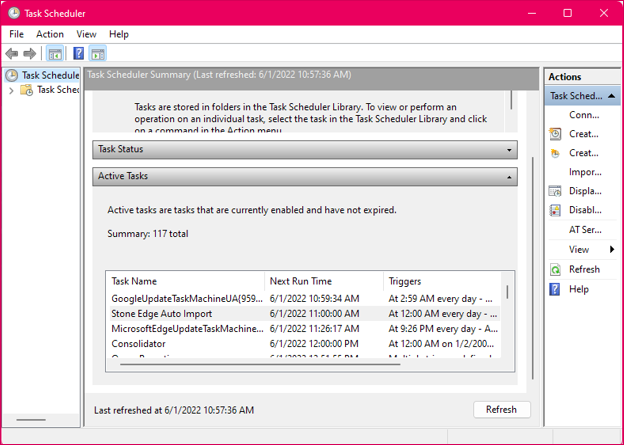
- On the “Task Scheduler,” click “Refresh” at the bottom of the middle column.
- Scroll the middle column to the “Active Tasks,” and you should be able to see your task.