
Order Manager
Version 8
Order Manager
Version 8
Contents of this Topic: Show
Monsoon Order Manager supports the use of 10 price levels which can defined for each inventory item. Each price level is given a name, for example, "wholesale" or "cost". Price levels can be assigned to customer records.
When an order is placed for an existing customer, at Manual Orders the system uses the price level indicated in the customer's record. If the customer record does not specify a price level, the system uses the default price level, determined by the current setting of system parameters DefaultManualOrderPriceLevel and DefaultManualOrderPriceLevel.
Price levels do not affect imported orders, as the pricing information that comes from the shopping cart system is honored by Monsoon Order Manager, however, it is possible to make a change to the price of a product on an imported order at the Process Orders screen by manually revising the line item .
![]() Be aware that turning multi-level pricing on and off (UseMultiLevelPricing=TRUE/FALSE) requires you to re-enter price information for products at each price level.
Be aware that turning multi-level pricing on and off (UseMultiLevelPricing=TRUE/FALSE) requires you to re-enter price information for products at each price level.
Open the Set System Parameter screen by one of the following methods:
Main Menu>Settings>System Functions>Set System Parameters
Main Menu>Quick Clicks>System Parameters (provided that the user has not removed System Parameters from the Quick Clicks menu)
Select the Pricing group from the Parameter Group list box in the upper left-hand corner of the screen. (Use the scroll bar on the right side of the list to navigate to the Pricing group entry).
The Parameters in Selected Group list is populated with the names of the parameters that are part of the Pricing group.
Scroll down to the parameter, UseMultiLevelPricing, set it to TRUE, and select Save.
Then enter the names of the pricing levels to be used for PricingLevel1, PricingLevel2, etc. Select Save after entering a value in each parameter.
Select Close to exit the Set System Parameters screen.
Open the Inventory screen by one of the following methods:
Main Menu>Manage My Inventory>View & Manage My Inventory
Main Menu>Quick Clicks>Inventory (provided that the user has not removed Inventory from the Quick Clicks menu)
Additional price fields are now visible in each inventory record, reflecting the names of the Price Levels established in the system parameters (previous section)
Select Edit in the upper right-hand corner of the screen to open the record for editing.
Enter the regular and sale prices for the product at each price level.
To indicate that the product is on sale at a particular price level, select the check box labeled "On Sale" for the given price level.
Select Save to retain the changes and lock the record to prevent it from being edited.
Select Close to exit the Inventory screen.
![]() If a large number of records are to be edited, use the Multi-Record and Price Editor to enter the price level information instead.
If a large number of records are to be edited, use the Multi-Record and Price Editor to enter the price level information instead.
Open the Customers screen by going to one of the following :
Main Menu>Manage My Customers>View & Manage My Customers
Main Menu>What would you like to do?>Manage My Customers
Navigate to, or Search for, the record of the customer for whom a price level will be assigned.
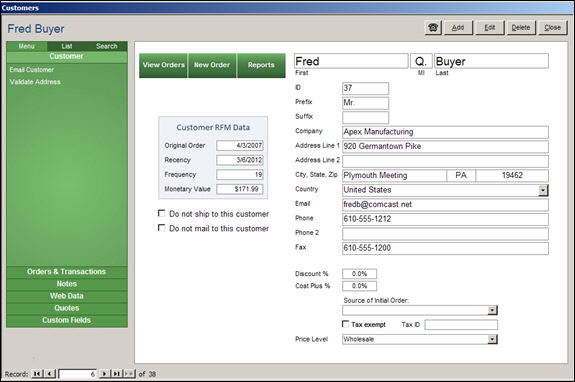
Customers Screen: Customer view
Select Edit to open the customer record for editing.
Select the Price Level drop-down arrow and select a price level from the list.
Select Save (not pictured) to retain the changes that were made.
The price level that was assigned to the customer will now be reflected in the customer's record.
Select Close in the upper right-hand corner to exit the Customers screen.
Open the Inventory screen, navigate to the desired product record, and select the Pricing tab.
Select Edit in the upper right-hand corner of the screen.
Over-type the values in the Reg. Price and Sale Price fields for any or all of the defined Price Levels. Zero is an acceptable value in either of these fields.
When finished making changes, select Save in the upper right-hand corner of the screen.
Created: 3/12/12
Revised: 9/18/14
Published: 08/19/15