Import My Customers
Contents of this Topic: ShowHide
Overview
Customer information can be imported from
a file or from a web store, if the shopping cart supports that feature.
Refer to the Shopping
Cart Matrix and Shopping Cart
Functions screen for more information about the latter.
This topic discusses importing customer information
from a text file, which can be either a tab-delimited or comma-delimited
text file.
When importing data from a text file and
the data contains commas, the file should be saved as a tab-delimited
file, not as a .csv file.
Quotes should not be present in text files,
regardless of whether it is a csv or tab-delimited file, or you will encounter
errors.
To import customer information from a text
file, go to Main
Menu>Manage My Customers>Import My Customers - File
Best Practice
Before importing data into the store file, make a backup copy in case
you need to back out the changes.
Description of the Screens
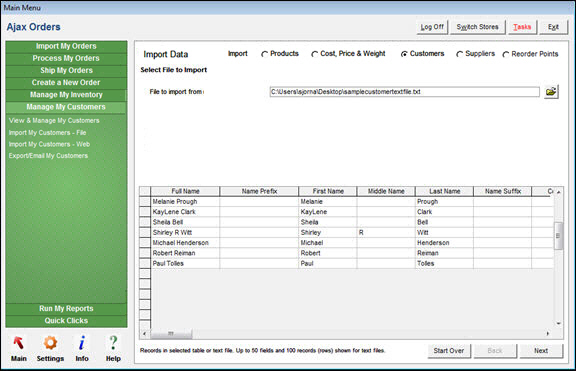
Select File to Import tab
Import
- the Customers
radio button is selected by default
File to import from
- enter the path to the file containing the
product information
- the program displays up to 50 fields in the
file and the first 100 records at the bottom of the screen
Folder
- select this to navigate to the location of
the file containing the product information
Start Over
- returns to the Select
File to Import tab
Next
- select this button when ready to proceed to
the Import Options tab
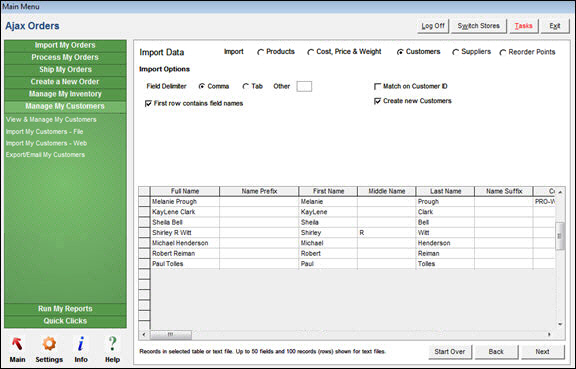
Import Options tab
Field Delimiter
Comma
- select this if the fields in the input file
are separated by commas
Tab
- select this if the fields in the input file
are separated by a tab
Other
- enter the character used to separate the fields
in the input file
First Row Contains Field Names
- select this if the first row in the input
file contains a header record with field names
Match on Customer ID
- select or clear this to determine if the program
should use the Customer Matching feature during the import process
Create New Customers
- select or clear this to determine if new customer
records are created during the import process
Data in Text File
- the grid at the bottom of the screen displays
up to fifty fields and the first one hundred records of data in the
input file
Start Over
- returns to the Select
File to Import tab
Back
- returns to the previous tab
Next
- select this when ready to proceed to the Customer Fields tab
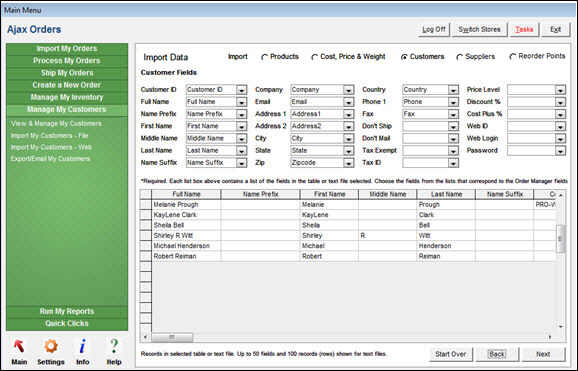
Customer Fields tab
- map the fields in the input file to their
counterparts in Monsoon
Order Manager
:
| Customer
ID |
Company |
Country |
Price
Level |
| Full Name |
Email |
Phone
1 |
Discount
% |
| Name Prefix |
Address
1 |
Fax |
Cost
Plus % |
| First Name |
Address
2 |
Don't
Ship |
Web ID |
| Middle Name |
City |
Don't
Mail |
Web Login |
| Last Name |
State |
Tax Exempt |
Password |
| Name Suffix |
Zipcode |
Tax
ID |
|
Data in Text File
- this section of the screen displays up to
fifty fields and the first one hundred records of data in the input
file
Start Over
- returns to the Select
File to Import tab
Back
- returns to the previous tab
Next
- select this button when ready to proceed to
the first page of the Custom Fields
tab, if custom customer fields are defined in the program
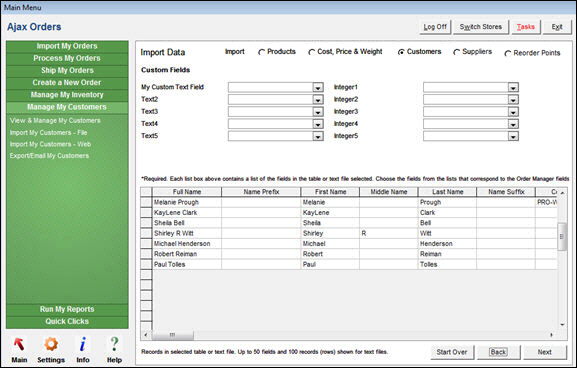
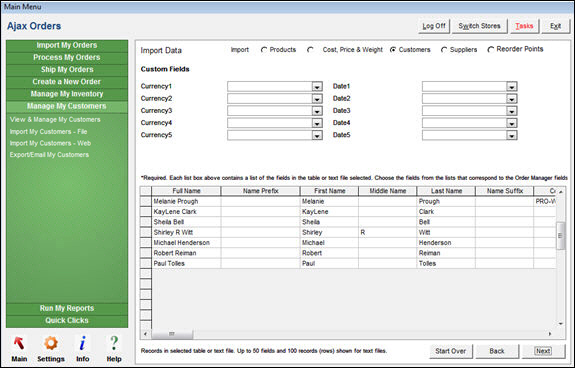
Custom Fields tab 1
- map fields in the input file to any custom
customer Text and Integer fields defined in Monsoon
Order Manager
- this tab is not visible if custom customer
fields are not defined
Data in Text File
- the grid at the bottom of the screen displays
up to fifty fields and the first one hundred records of data in the
input file
Start Over
- returns to the Select
File to Import tab
Back
- returns to the previous tab
Next
- select this when ready to proceed to the second
page of Custom Fields, if
custom customer fields are defined
Custom Fields tab 2
- map fields in the input file to any custom
customer Currency and Date fields defined in Monsoon
Order Manager
- this tab is not visible if custom customer
fields are not defined
Data in Text File
- the grid at the bottom of the screen displays
up to fifty fields and the first one hundred records of data in the
input file
Start Over
- returns to the Select
File to Import tab
Back
- returns to the previous tab
Next
- select this when ready to proceed to the Finish and Import tab
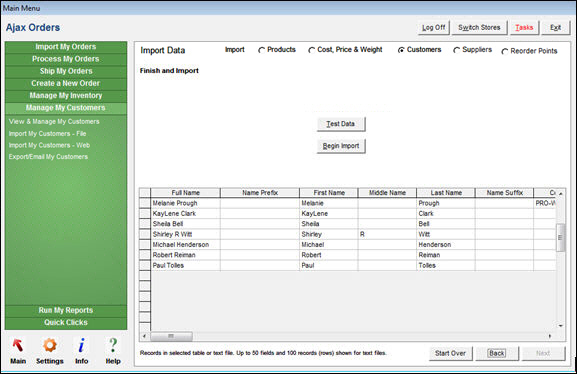
Finish and Import Tab
Test Data
- select this to have the program check for
common data errors before starting the import process
Begin Import
- select this to start the import process
Start Over
- returns to the Select
File to Import tab
Back
- returns to the previous tab
Additional information
Created:
6/15/12
Revised:
8/10/15
Published:
08/19/15


