
Order Manager
Version 8
Order Manager
Version 8
Contents of this Topic: Show
You may have certain problem customers to whom you do not want to ship product. Your first option is to select Do not ship to this customer on their customer record, which tells Monsoon Order Manager not to automatically approve orders from that customer. This method is limited by the program's ability to "match" an incoming order with the "flagged" customer record. Refer to Matching New Records to Existing Customers for more information.
Creating a Do Not Ship To List via the List Maintenance feature gives you more control over screening orders from problem customers because you can build lists of e-mail addresses, telephone numbers and/or IP addresses Monsoon Order Manager should look for as the order is imported. You can then use an Approval Rule to tell the program what to do when it detects an order from an entry in the list or lists.
Approval Rules are applied by the program as orders are imported, therefore they do not affect Manual Orders.
The program looks for the IP Address anywhere within the IP text received from your shopping cart because some shopping cart systems do not provide IP numbers only. For example, if you add the IP address 111.222.333.444 to the list and the IP text received from the shopping cart is "IP Address:111.222.333.444, Host Name:adsl-11-22-33-44-55.dsl.pacbell.net", the program flags that order because 111.222.333.444 is found within the IP text.
To avoid problems with telephone number formatting, the program strips leading 1's off of the numbers, then removes everything but numerals and letters.
Go Main Menu>Settings>Data Functions>List Maintenance.
The List Maintenance dialogue box opens.
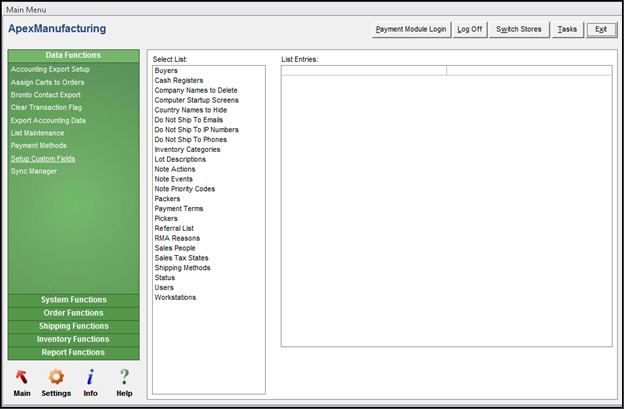
List Maintenance screen
Choose Do Not Ship To Emails, Do Not Ship to IP Numbers, or Do Not Ship to Phones, from Select List.
Enter the Email Address, the IP # or Phone Number in the text field at the bottom of the page. For example, 221.68.00.01, techwriter@stoneedge.com, or (484) 927- 4804.
Type in the value and select Save (or press Enter twice) to add your entry to the list. The cursor returns to the text field where you can continue adding entries.
Repeat steps 4 and 5 as often as necessary. Note: To delete an entry in the list, select it in List Entries and click Remove.
Go Main Menu>Settings>Order Functions>Approval Rules. The Order Approval Rules dialog box opens.
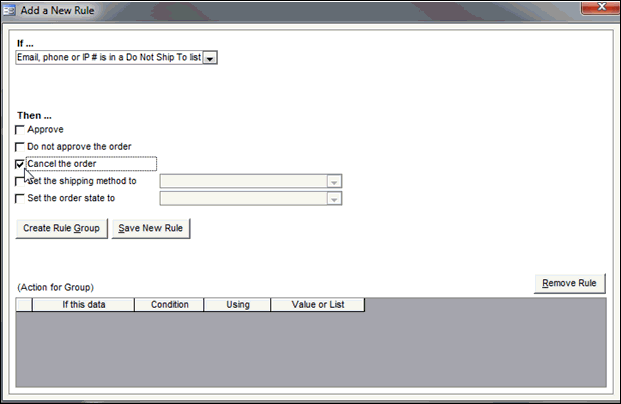
Select New. The Add a New Rule dialog box opens.
In the If .. section, select Email, phone or IP # is in a Do Not Ship To list.
In the Then... section, select the check box of the action you wish to occur, such as Cancel the order.
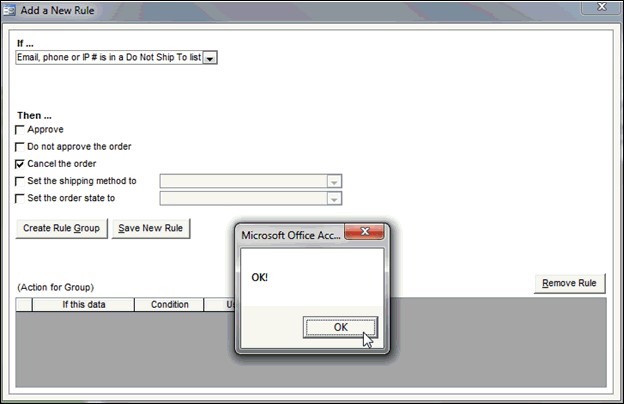
Select Save New Rule.
Select OK in the confirmation message box.
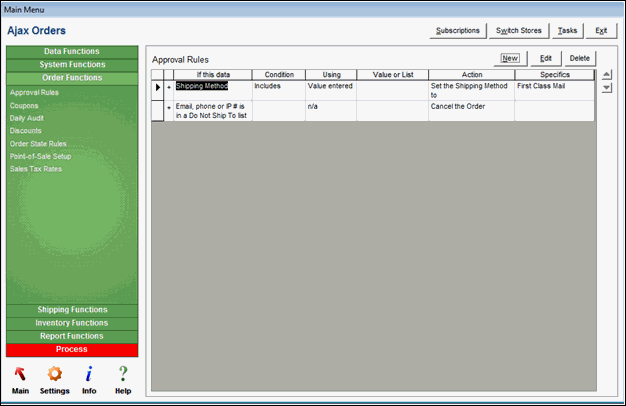
The new approval rule is added.
Created:
Revised: 7/9/15
Published: 08/19/15