

In this Topic: Show
Note: If you have just purchased the Order Manager (since June 15th 2011) or have just begun to use FedEx as a shipping carrier, be advised that it is now necessary to use ShipRush for FedEx in order to print shipping labels via the Order Manager. Contact the Stone Edge Technologies Sales Department (610-994-3699) to obtain a license for ShipRush.
Existing customers may still be able to utilize the Fed/Ex integration described in this topic until such time as their meter number changes (may occur as a result of running the Setup Wizard for ShipManager Direct), or until FedEx sunsets the API currently used by the Order Manager (projected for May, 2012).
Note: For Version 5.612 and lower, complete the Shipping tab on the Order Manager Setup Wizard, before going through the steps in this document. See the knowledge base article, Shipping Setup for more information. For Version 5.9 and above, see the Store Setup Wizard, Shipping section, instead.
To use the Order Manager's internal shipping system for FedEx, you must set the following System Parameters. Go to System Parameters> Parameter Group> Shipping.
FedExShippingSystem
this parameter replaces the obsolete parameter, "Shipping System"
the parameter detail can be set as follows:
None/External - this setting is used if the Order Manager's internal label printing capability will not be used, or if an external program, such as FedEx ShipManager, will be used to print shipping labels outside of Order Manager (uses an ODBC connection to relay shipping and tracking information)
Order Manager - as of Version 5.922, this option can no longer be selected; however, if upgrading from a previous release of Version 5 and this parameter was already set to "Order Manager", the program will retain that setting; when FedEx retires the old API or the user's meter number changes for any reason, previous users will no longer be able to print shipping labels without using ShipRush
ShipRush - this setting is used by new users, or users that are just starting to ship via FedEx and want to print FedEx shipping labels through the Order Manager; it requires the user to obtain a copy of the ShipRush software from the Stone Edge sales department
UnitOfMeasureDimensions - set this parameter to define the dimensional values you entered for your products
UnitOfMeasureWeight - set this parameter to define the weight values you entered for your products
The FedEx ShipManager Direct Setup Wizard walks the user through entering their FedEx account information and preferences.
Go to Maintenance Menu> Setup Functions> Store Setup Wizard> Shipping
Click the FedEx® Ship Manager Direct® Setup Wizard button.
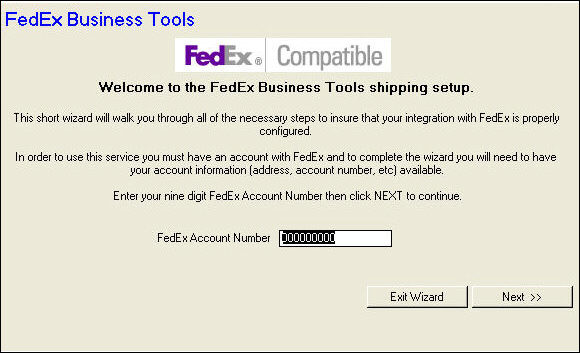
Enter your FedEx Account Number and click Next to go to Screen 2.
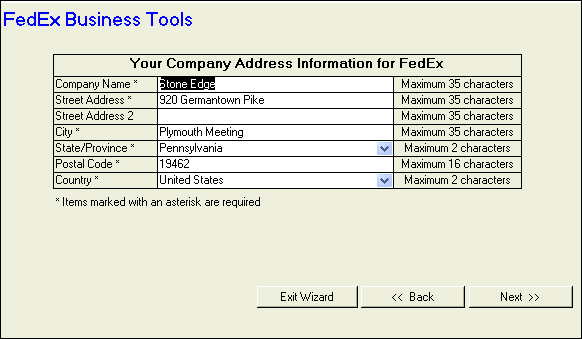
Complete all fields marked with an asterisk and click Next to go to Screen 3.
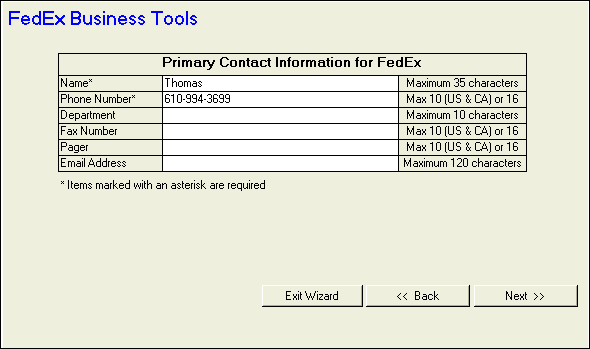
Complete all fields marked with an asterisk and click Next to go to Screen 4.
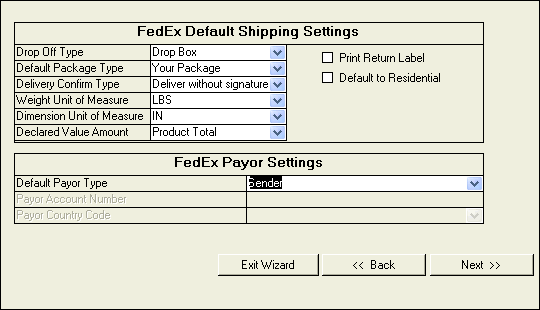
Make your selections from the drop-down lists and click Next to go to Screen 5.
Drop Off Type - Choose your default drop off method or pickup for shipments.
Default Package Type - Choose a default package type. (Choose Your Package if you use your own type of boxes, rather than FedEx-issued boxes.)
Delivery Confirm Type - Choose a delivery confirmation type: None (no confirmation), Deliver without signature (confirmation with no signature), Indirect (signature can come from individual not residing at destination address, e.g., neighbor, etc.), Direct (signature must come from individual at destination address), or Adult (18+ adult signature required).
Weight Unit of Measure - Choose pounds or kilograms. (Product weights in the Order Manager should be in pounds or kilograms. Conversion from ounces/grams to pounds/kilos is not supported for FedEx, as it is for USPS.)
Dimension Unit of Measure - Choose inches or centimeters.
Declared Value Amount - Set declared value to equal the cost of product(s) only or the cost of products plus shipping charges.
Default Payor Type - If the payor is someone other than the sender, then complete the Payor Account Number and Payor Country Code fields.
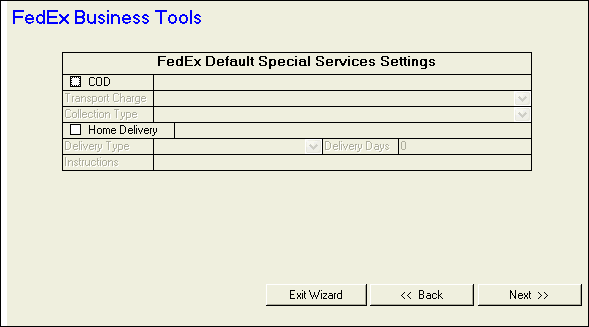
Choose optional special services. If you check COD, also select a Transport Charge and Collection Type. If you check Home Delivery, also select a Delivery Type, and indicate Delivery Days and any Instructions. Click Next to go to Screen 6.
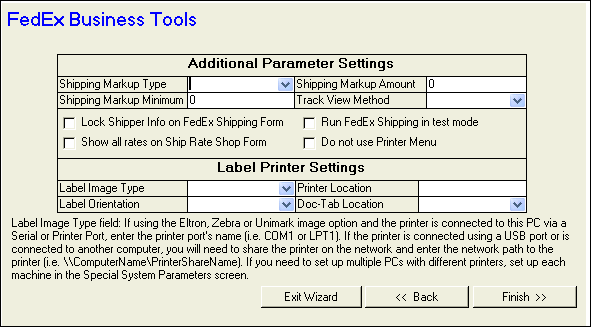
Choose Additional Parameter Settings and Label Printer Settings. When you've completed this screen, click Finish to go to the last screen.
Choose your Shipping Markup Type. If you wish to add additional surcharges (shipping markup) on the rates charged/quoted by FedEx, you can set this field to Flat Amount or Percent. If you select FlatAmount then enter the dollar amount to add in the Markup Amount field. If you select Percent, then enter the percentage to add in the Markup Amount field. You can also set a minimum dollar amount to charge in the Markup Minimum field. Should the calculated markup be less than the minimum, the minimum will be applied. If you do not wish to add surcharges then set this field to None.
Choose Track View Method. Select Order Manager, and when you click Track Package on the View Orders screen, the program will poll FedEx for tracking details then display the results in a screen within the Order Manager. Select Browser, and when you click the Track Package button in the View Orders screen, the program will open a web browser screen at the FedEx website and enter the tracking number automatically.
Lock Shipper Info on FedEx Shipping Form. Checking this option prevents users from changing the "shipper" and "ship from" fields on the FedEx Shipping Form when they are processing shipments.
Show all rates on Ship Rate Shop Form. If this option is true, the order Manager will display rates for all FedEx shipping methods available between the Origin and Destination addresses. If this option is False, the Order manager will only display rates for FedEx Shipping Methods available between the Origin and Destination Addresses that have been associated with your shipping methods in the Order Manager.
Run FedEx Shipping in Test Mode. Checking this option allows the user to print shipping labels without being charged. The labels are actually produced by a FedEx production server but voided after the label is received.
Do not use Printer Menu. If you have the system parameter UsePrinterMenu set to True and you do not want the FedEx Shipping System to use the Printer Menu prompt, check this option.
Choose Label Image Type. PNG produces an ”r;image” file type which can be printed on standard paper. PNG 4X6 is used for the Order Manager’s integrated Shipping Label/Packing Slip on 8.5 x 11 paper. Eltron, Zebra, and Unimark are specific to Thermal label printers of the same name.
Printer Location. If using the Eltron, Zebra or Unimark image option and the printer is connected to this PC via a Serial or Printer Port, enter the printer port's name (i.e. COM1 or LPT1). If the printer is connected using a USB port or is connected to another computer, you will need to share the printer on the network and enter the network path to the printer (i.e. \\ComputerName\PrinterShareName) in the Printer Location field. If you need to set up multiple PCs with different printers, use the workstation based printer parameter in the FedEx group. See Special System Parameters. If you have an Eltron or Zebra printer and are having problems setting it up to work with the Order Manager, try switching the setting from Eltron to Zebra or vice versa.
Choose Label Orientation. Orientation means the direction of the label. Is the top of the label first out of the printer (leading) or last (trailing)?
Choose Doc-Tab Location. DocTab is a small separate label strip containing details regarding the label produced for the shipment. This requires special paper and is only supported for Eltron, Zebra, and Unimark. DocTabs are typically used to attach to internal paperwork as a record of the shipment. (Not working as of 9/17/08.)
Ported: 2/7/12